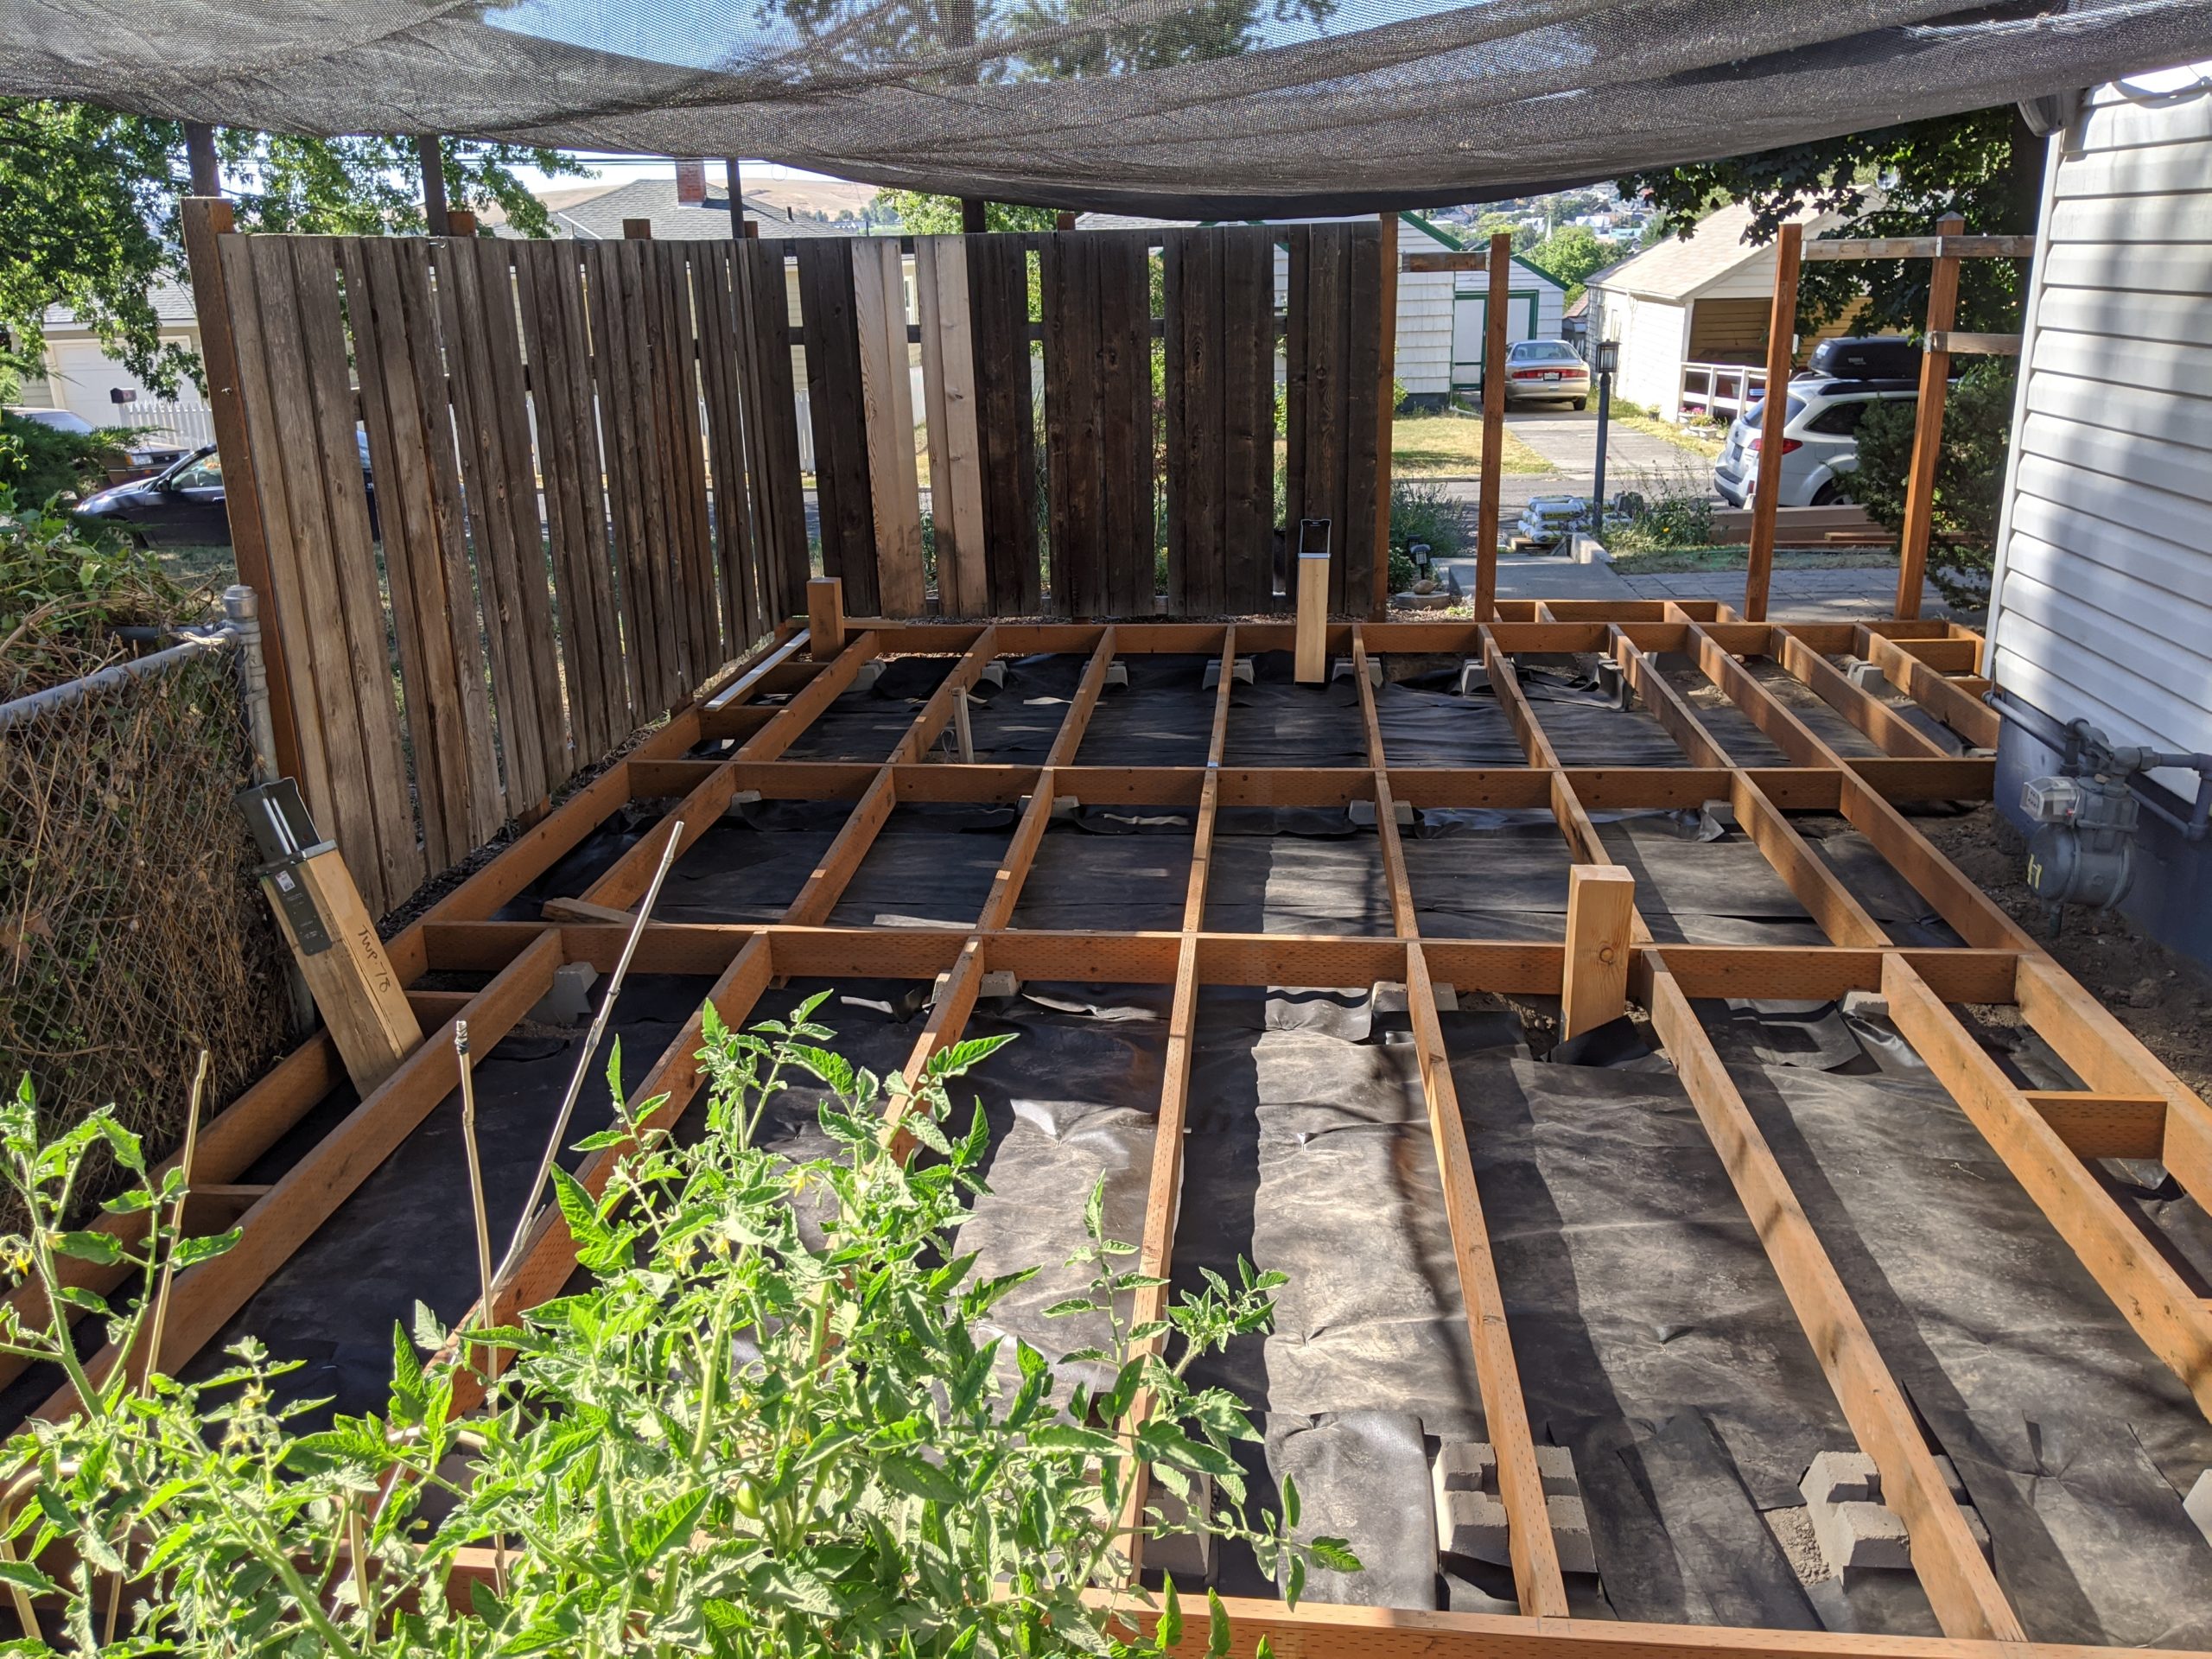
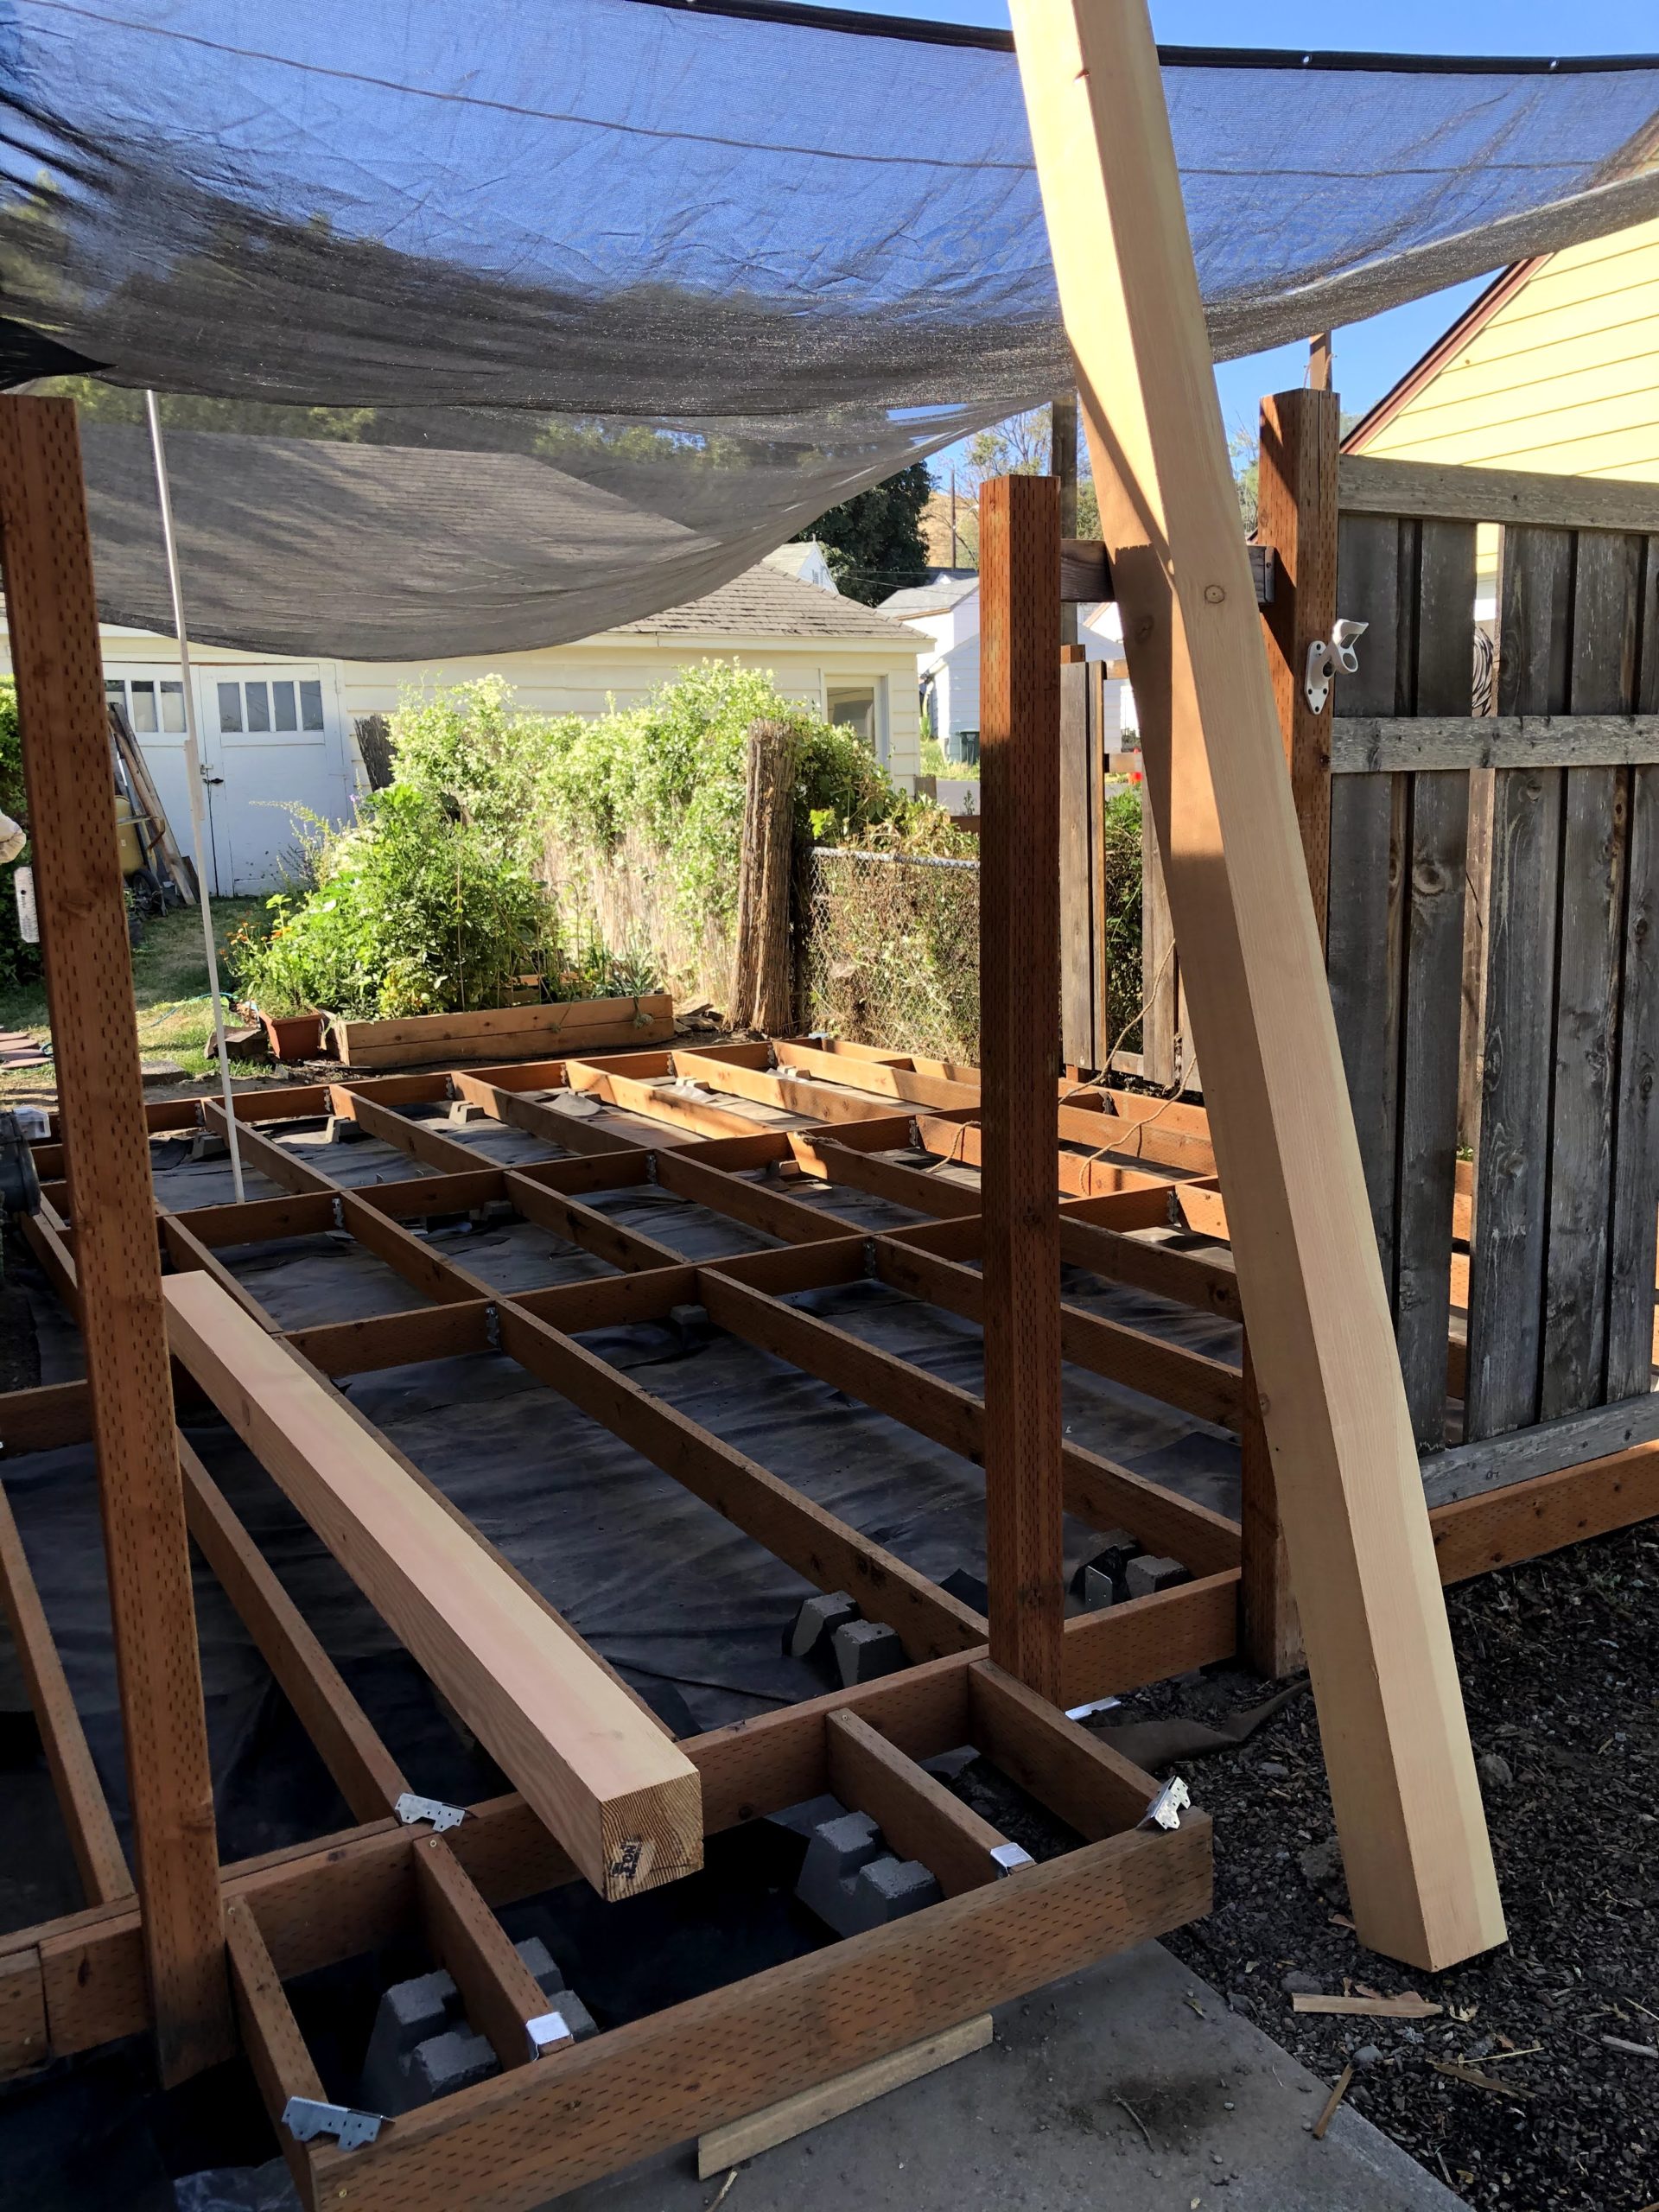
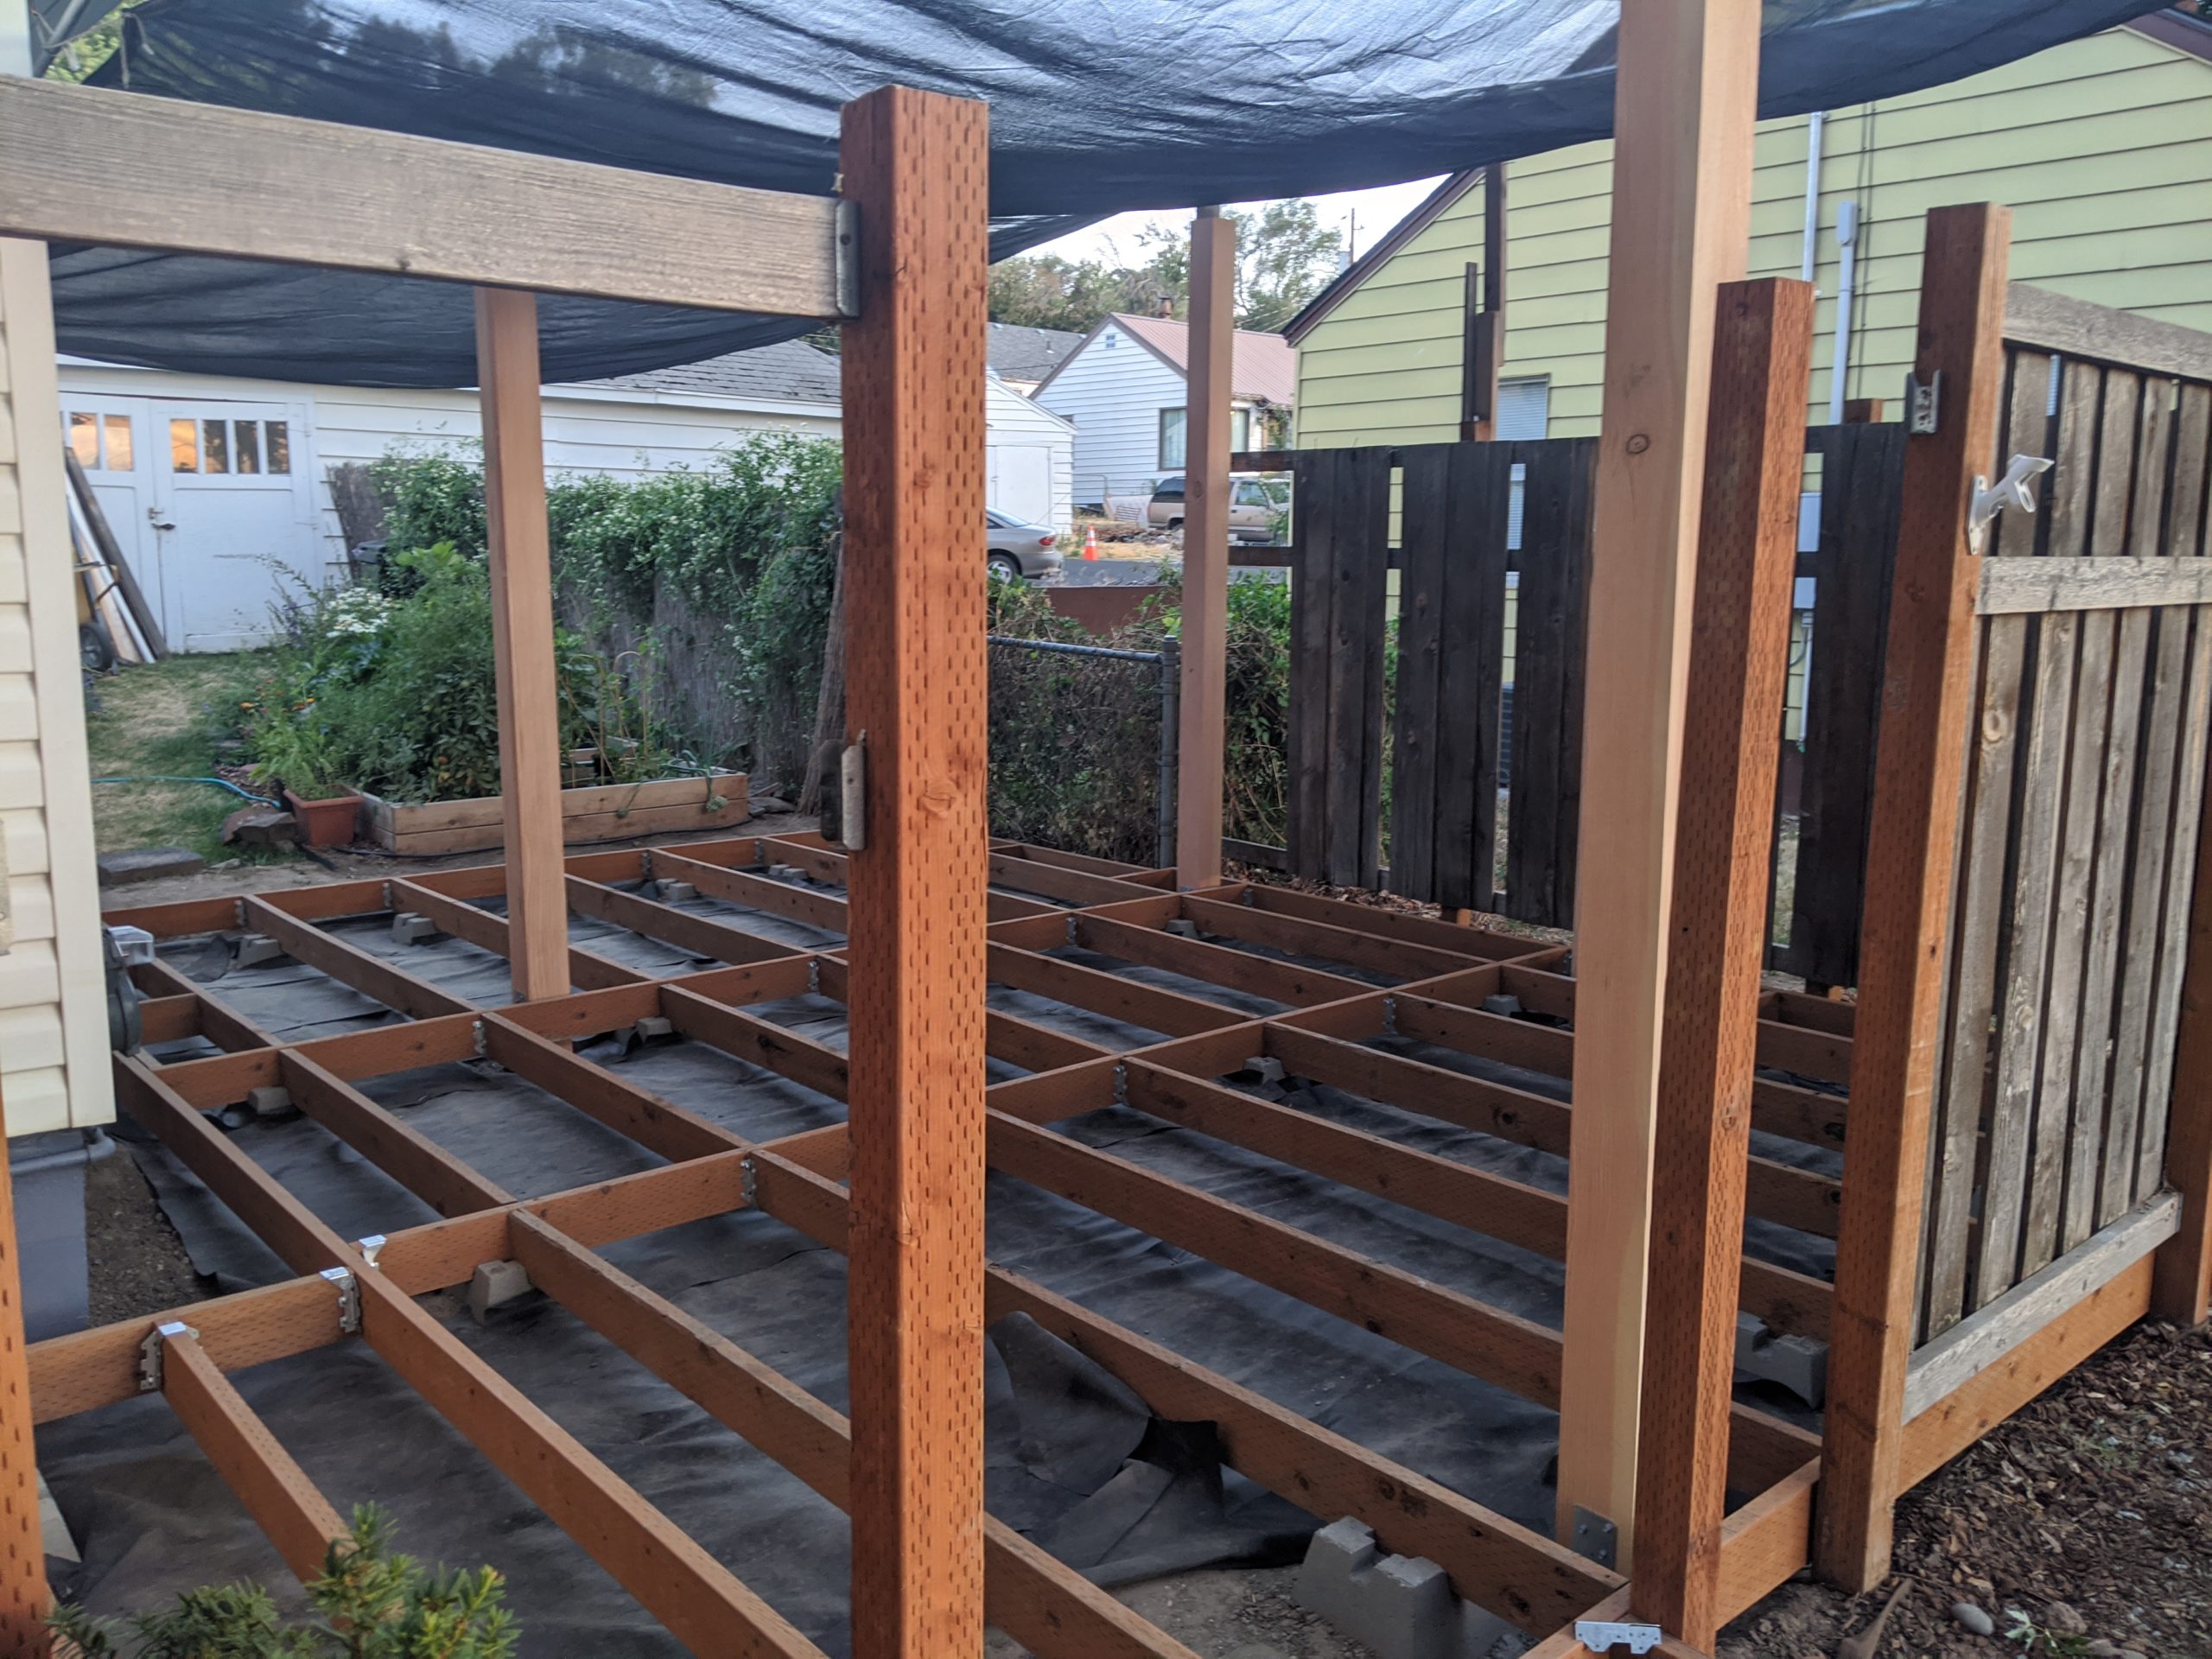
Now that the framing is square we are ready to set the posts for the pergola. We decided on 6×6 posts to make everything look and be more sturdy. The corners form a roughly 12’x14′ rectangle and the overall coverage will be around 14’x16′.
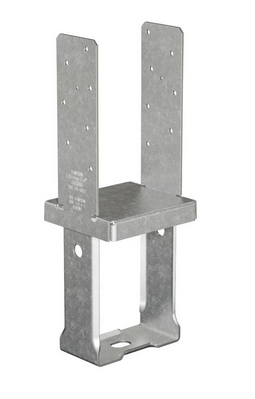
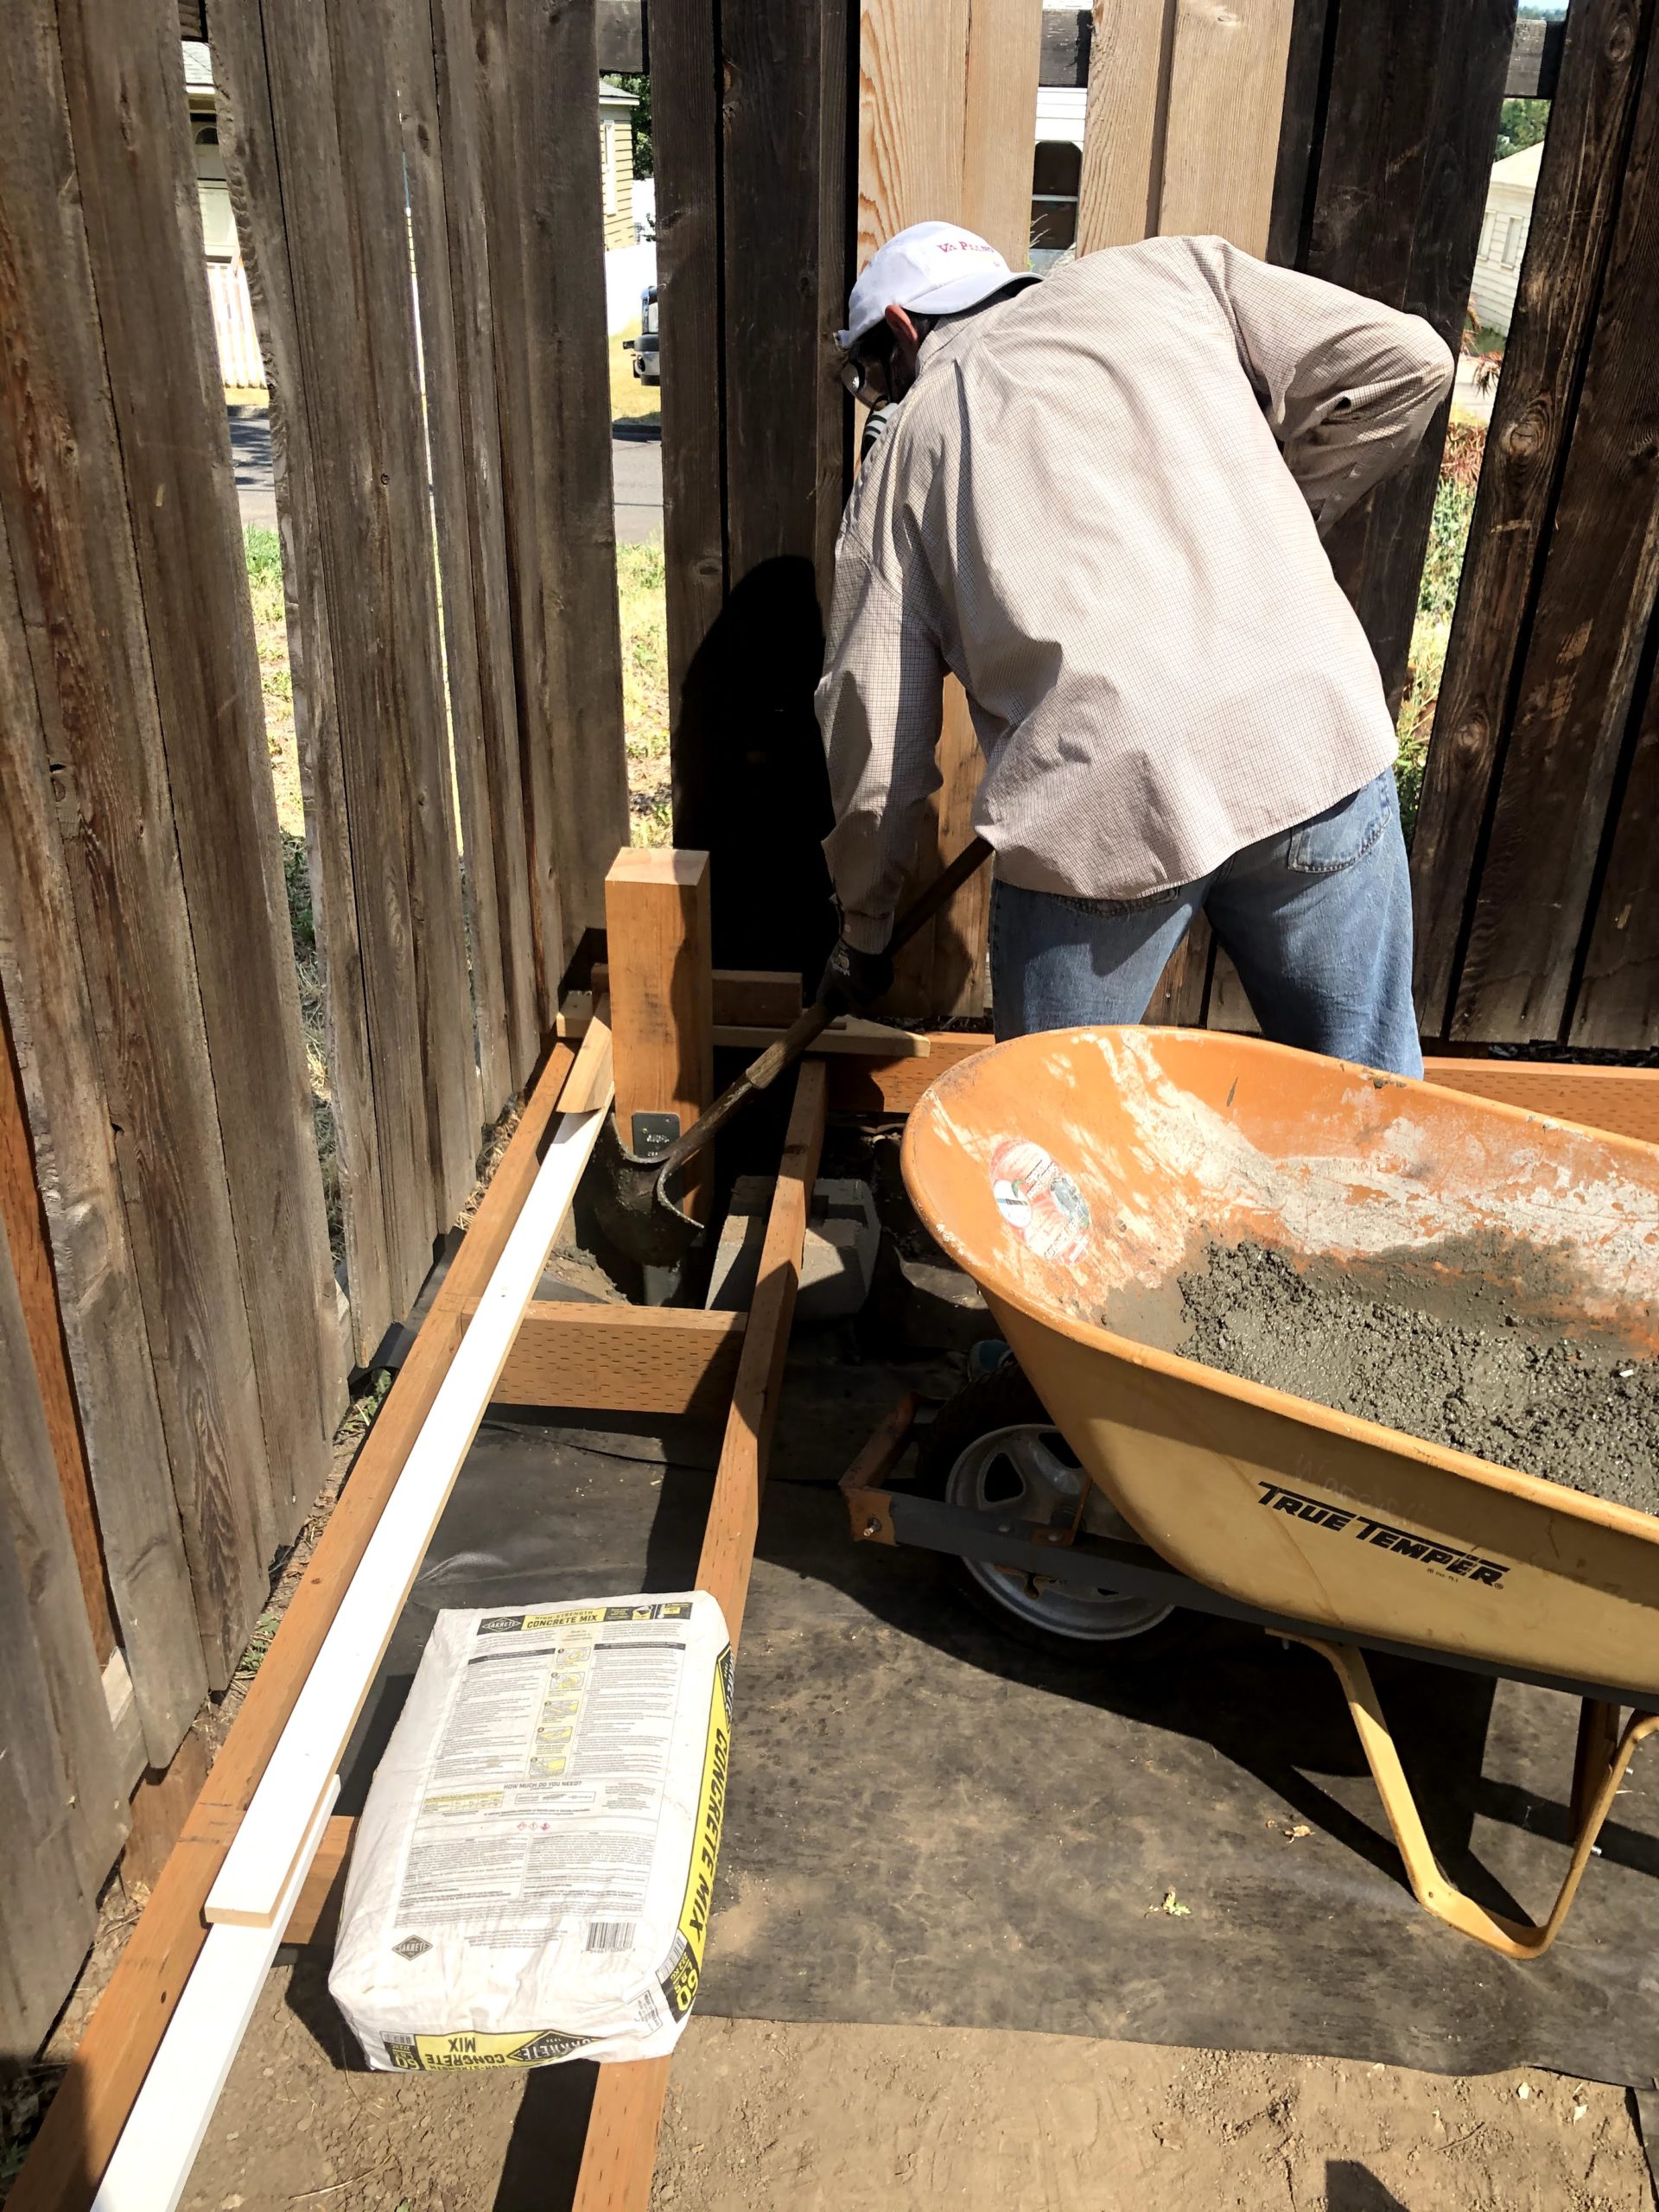
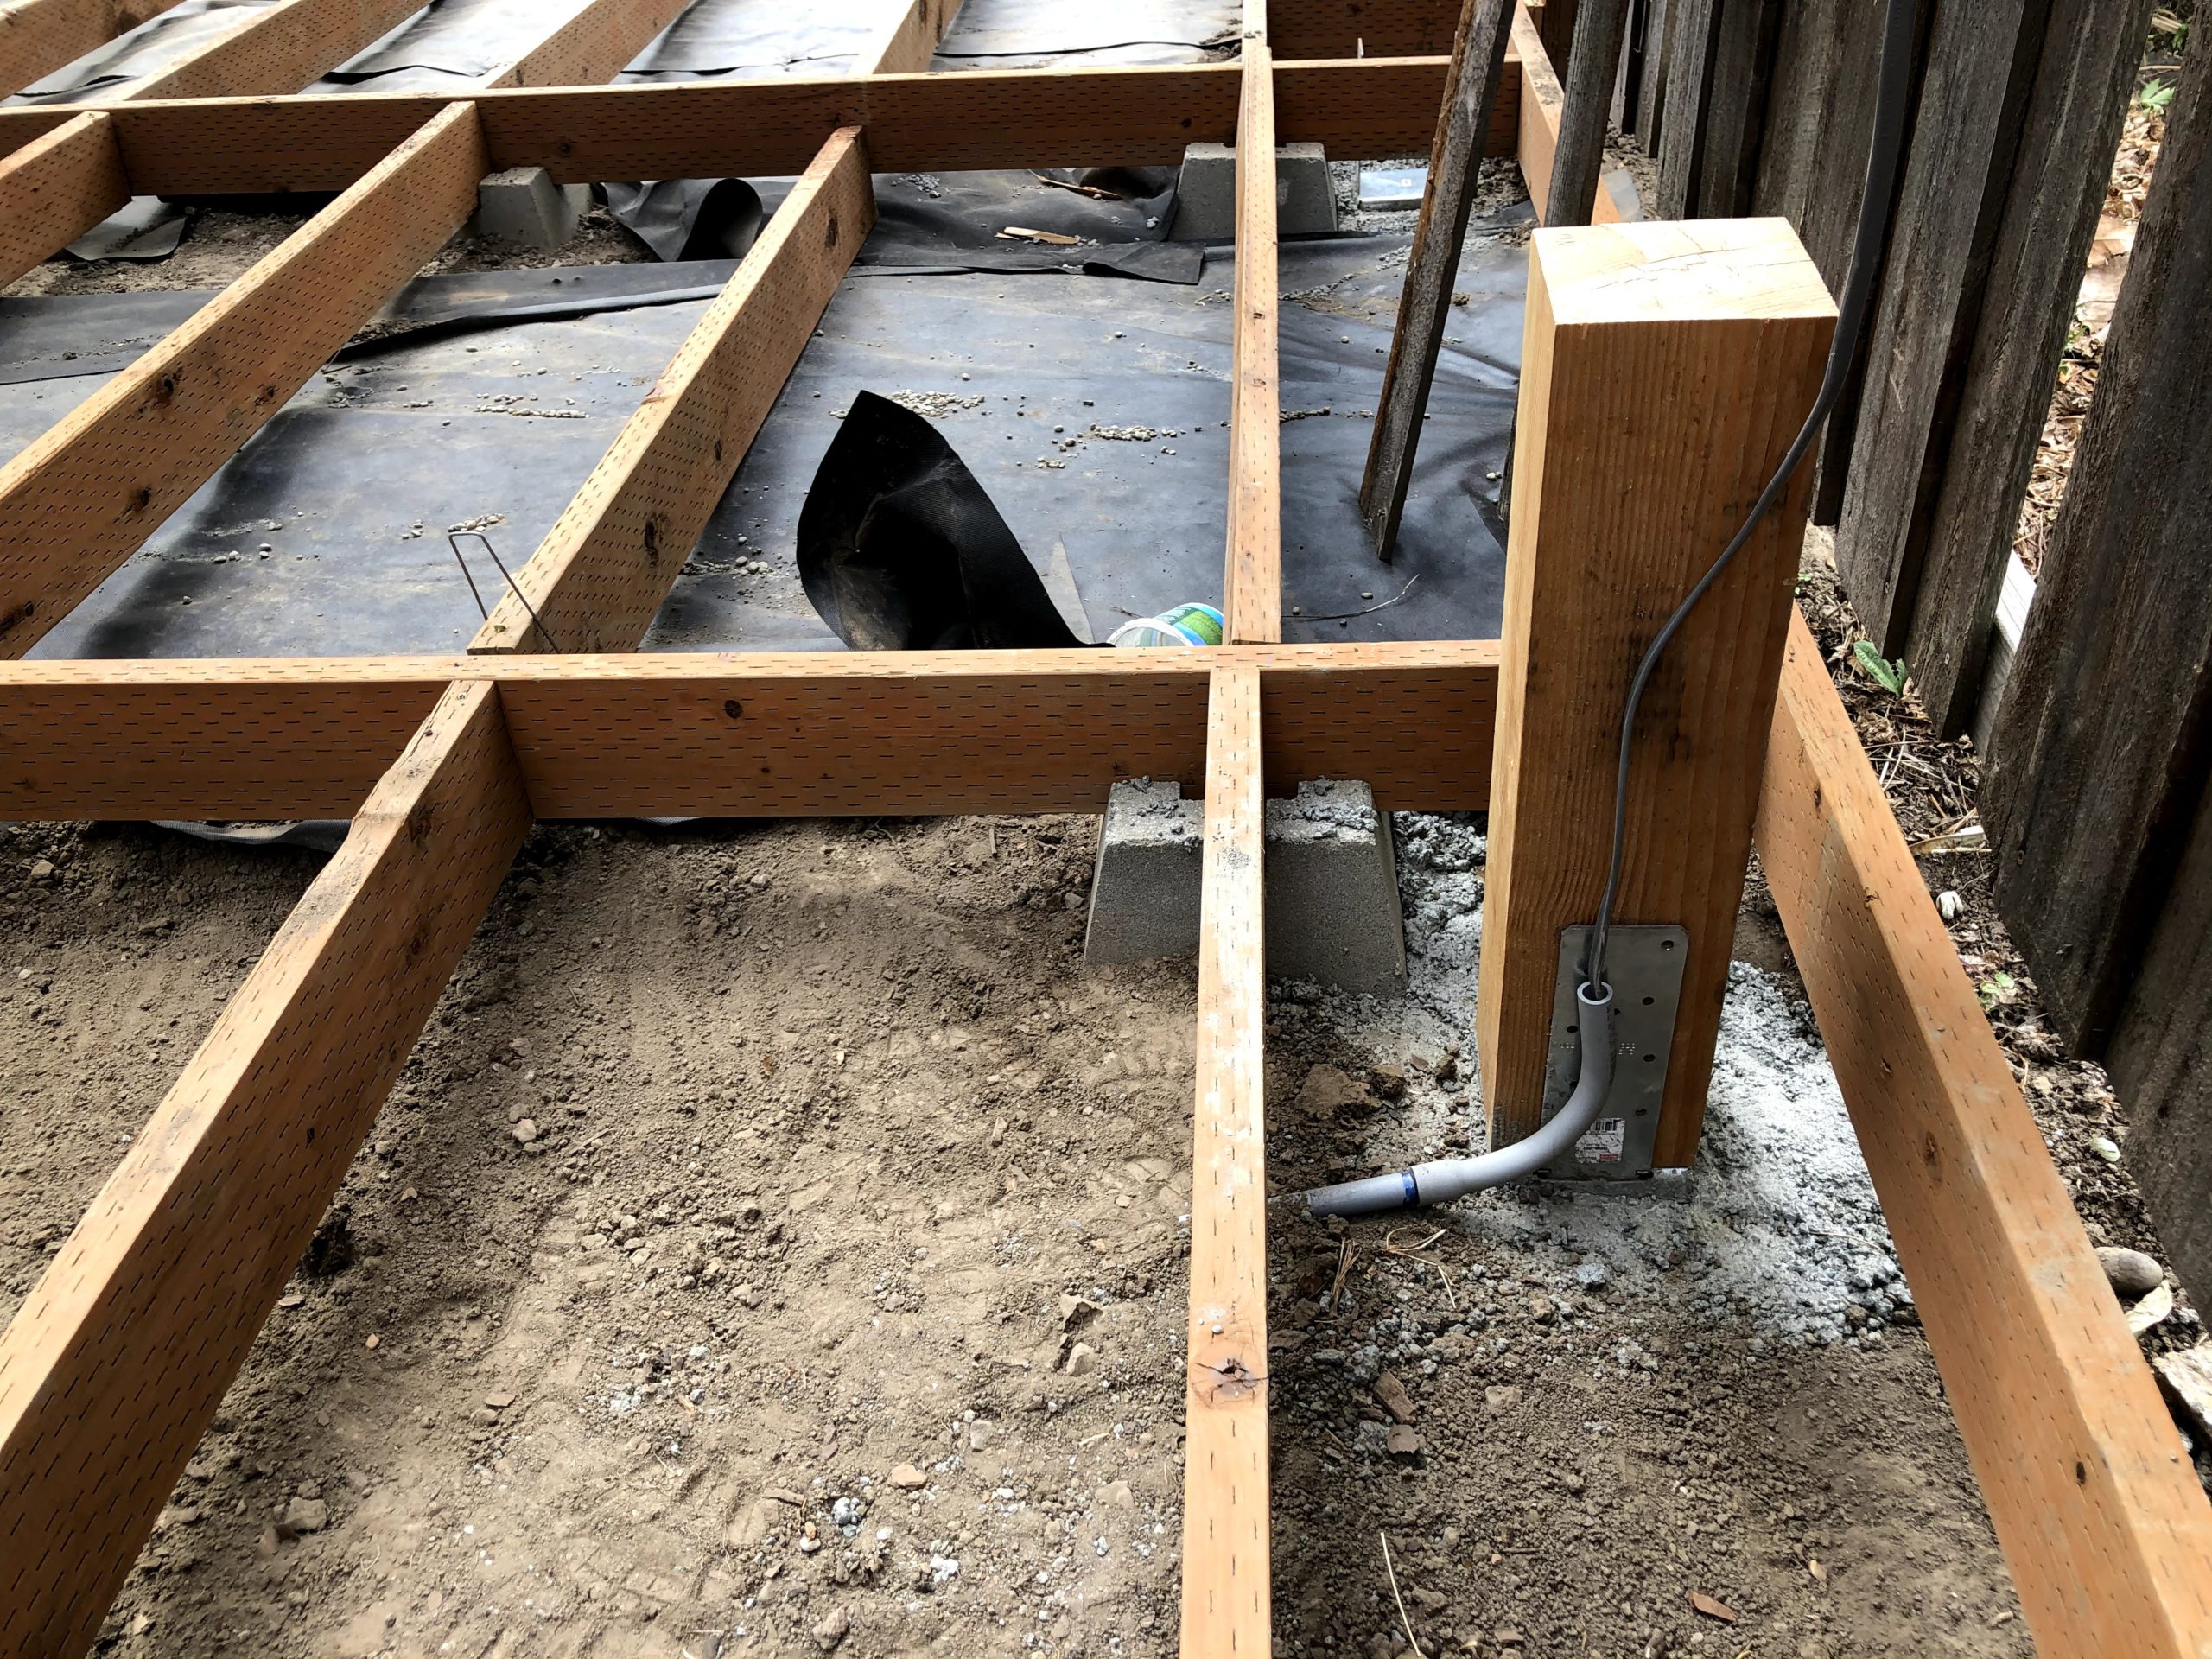
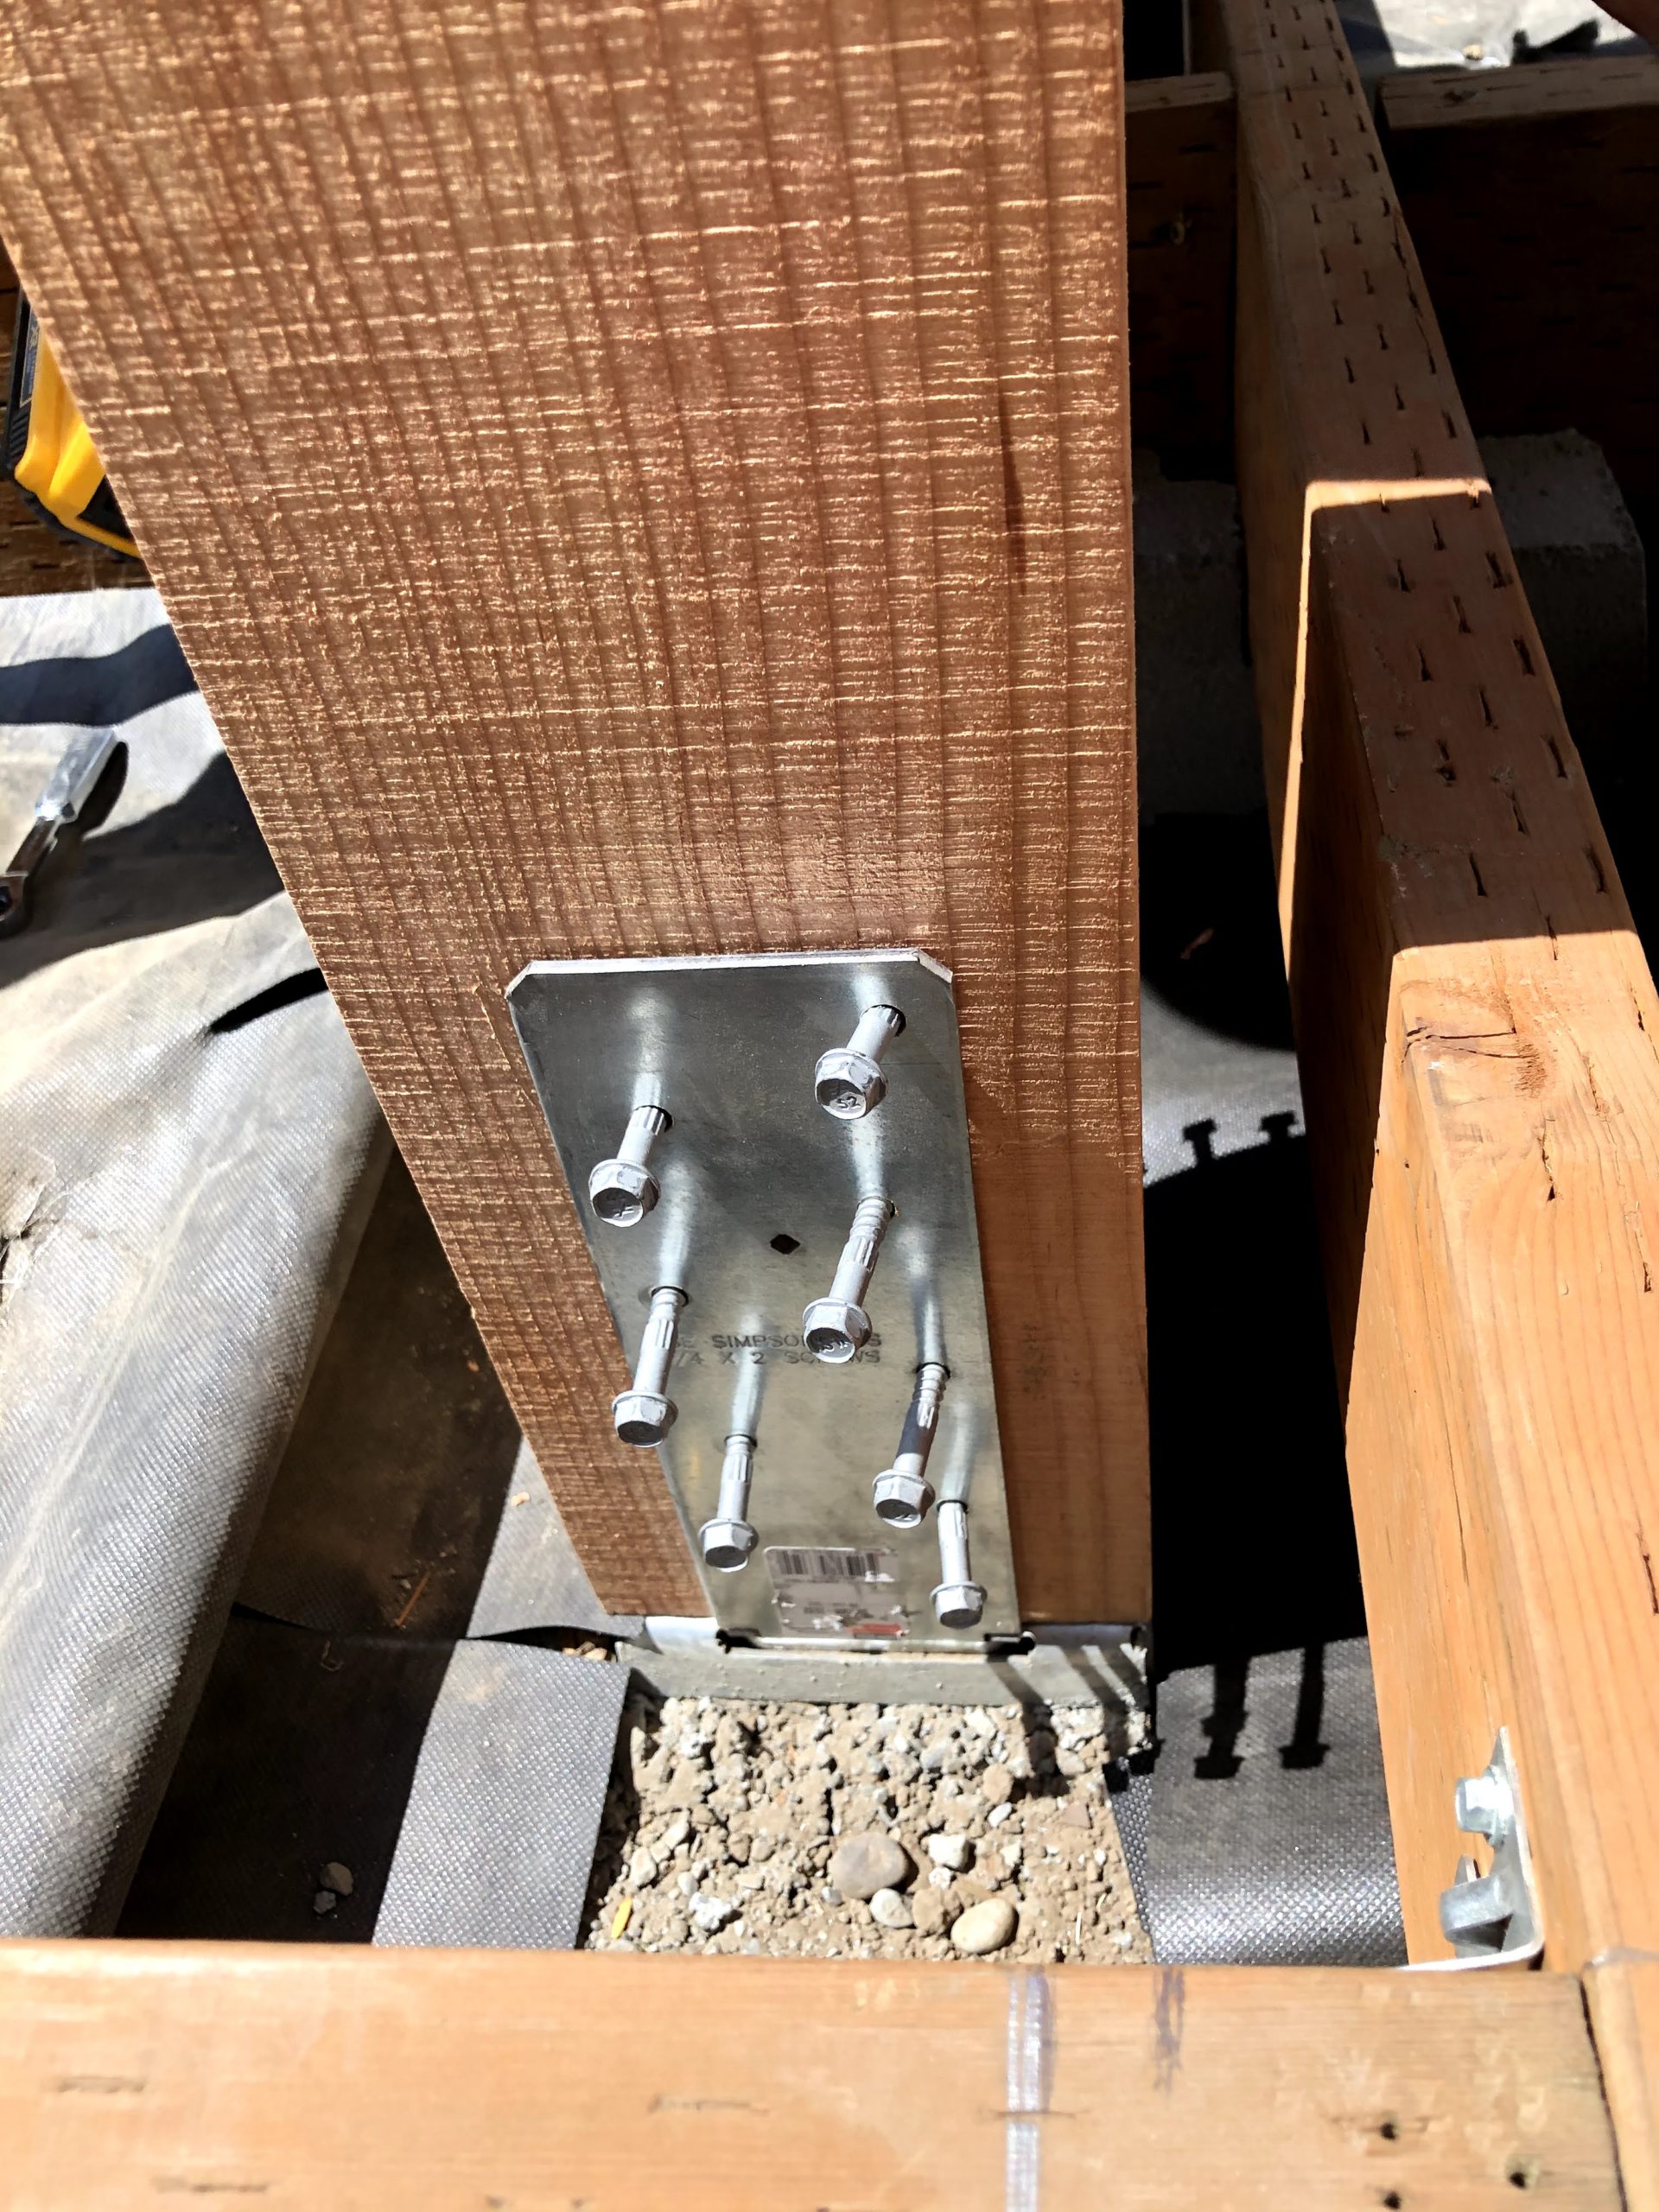
This is the only place in the project where we need to use concrete. We decided to use these very sturdy Simpson 6×6 Standoff Column Base. These are very sturdy and come with all of the hardware including 14 hefty structural screws for the post installation.
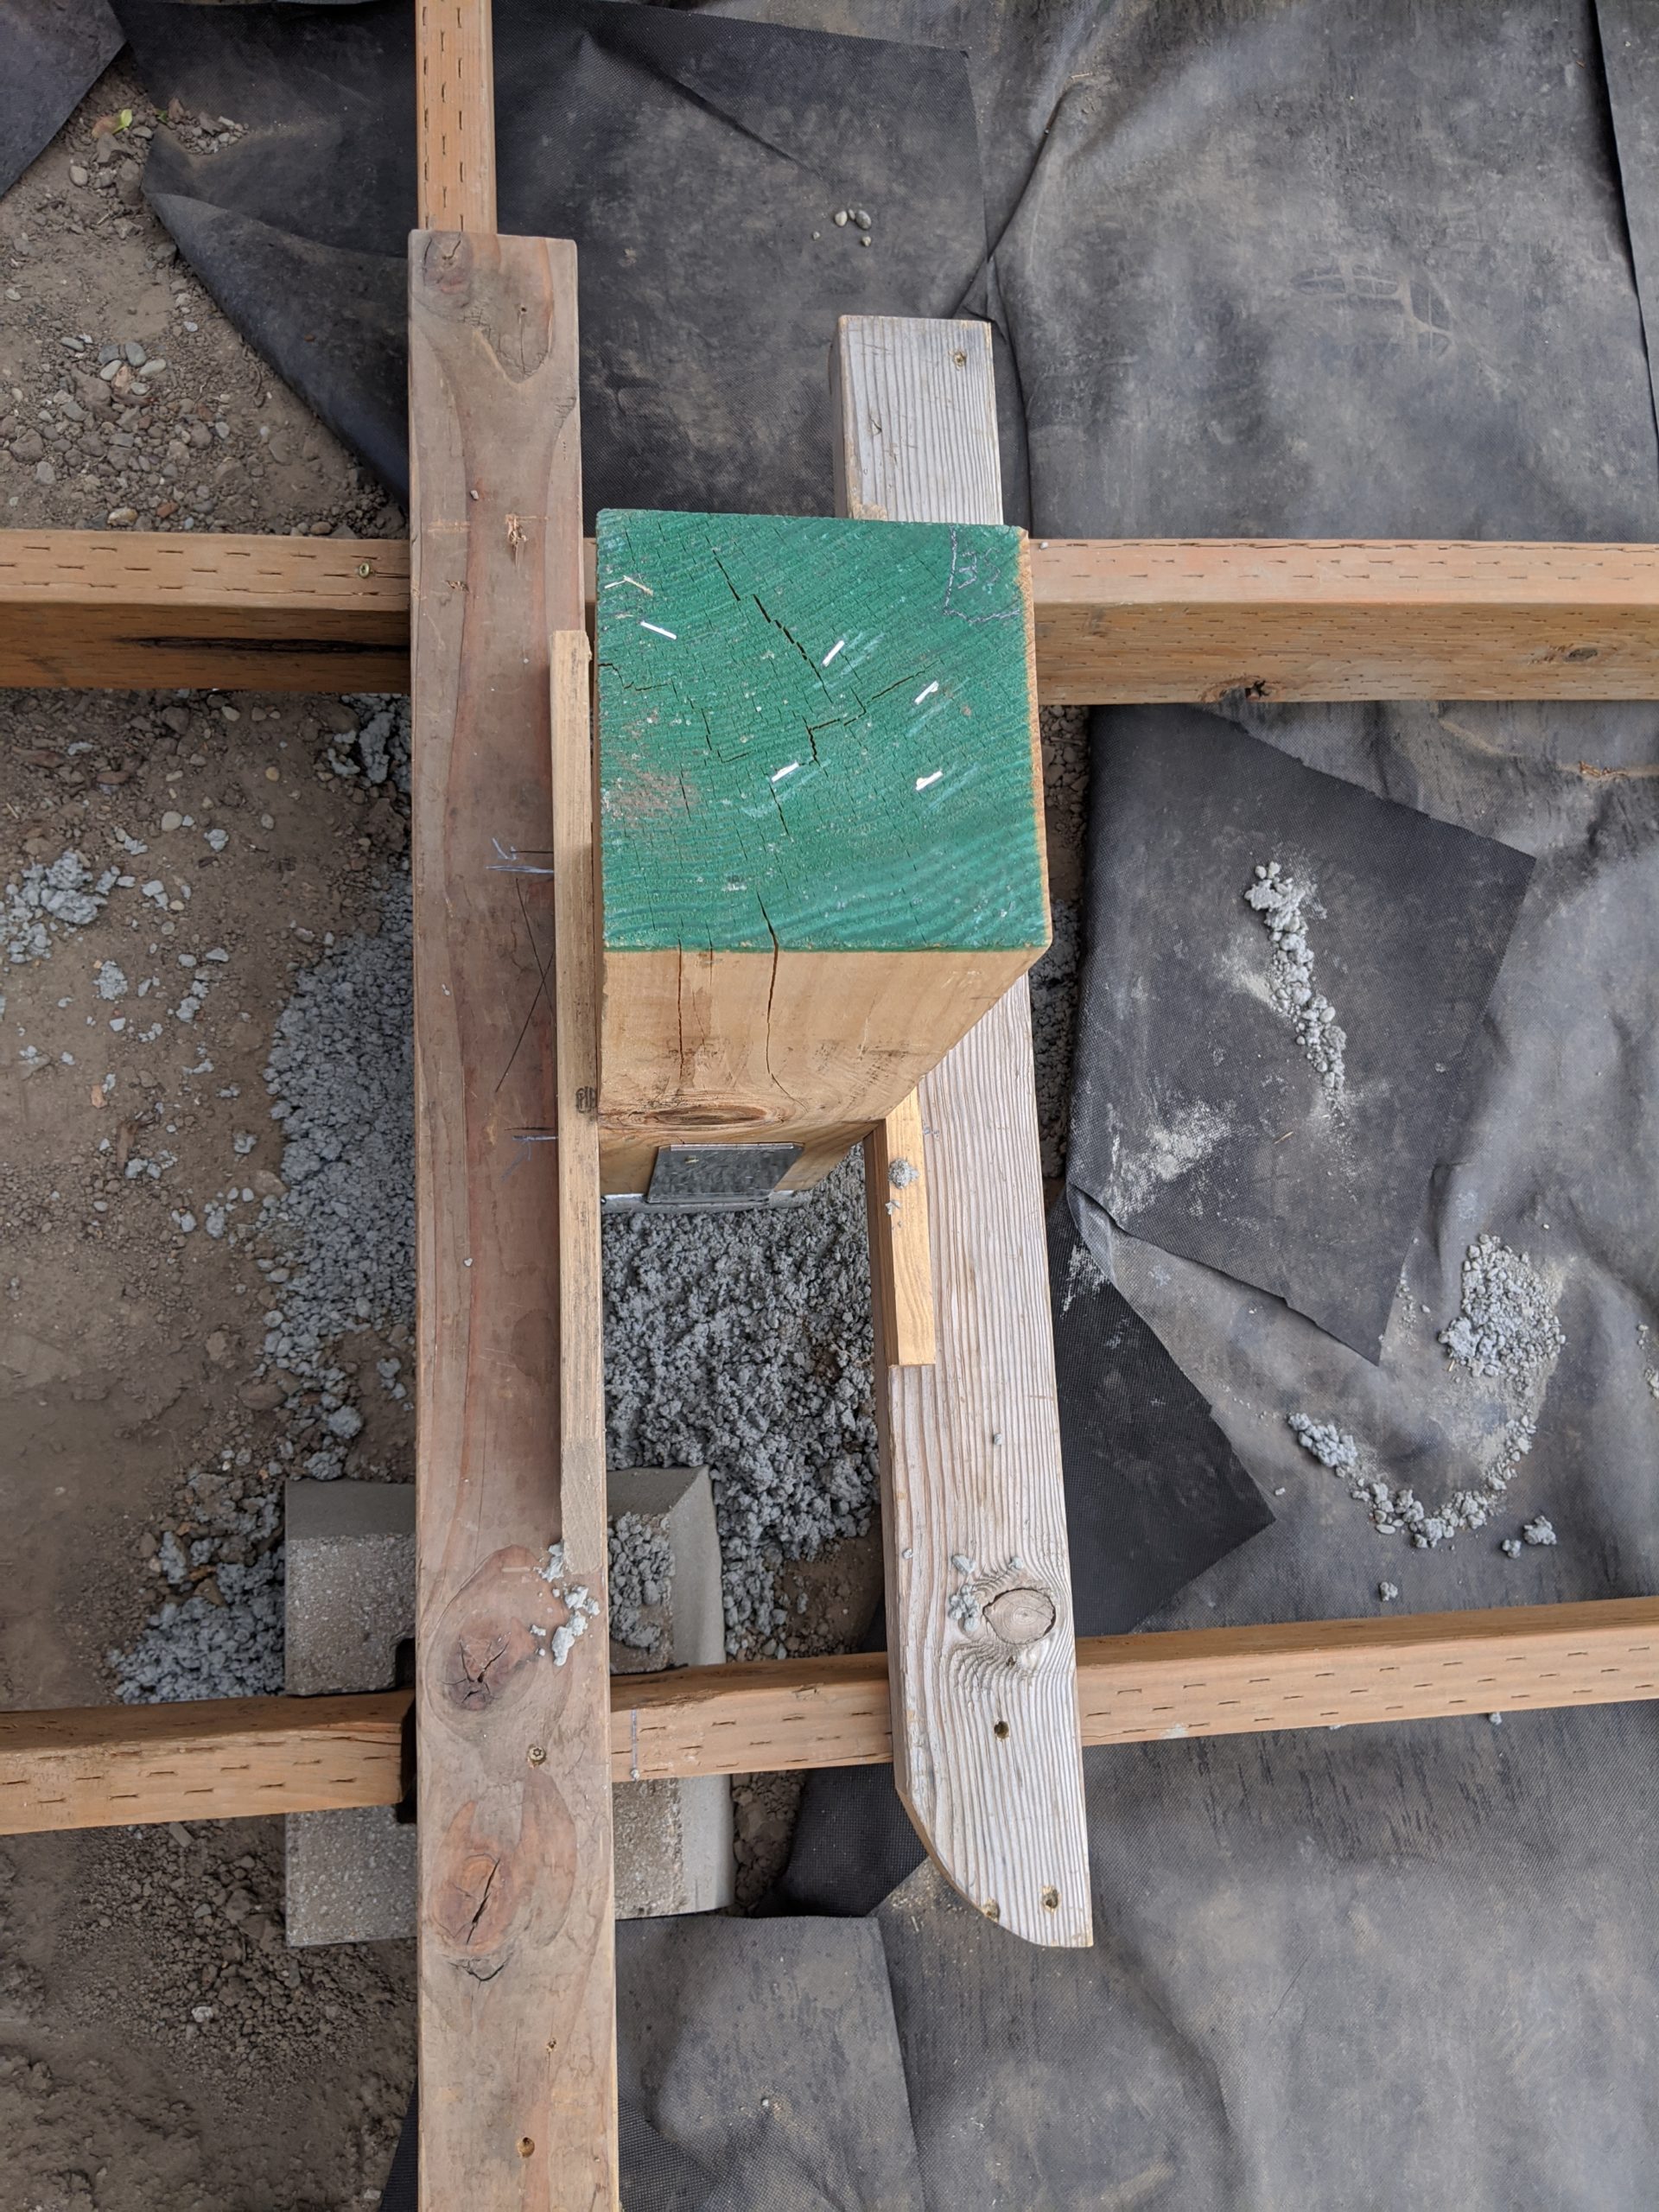
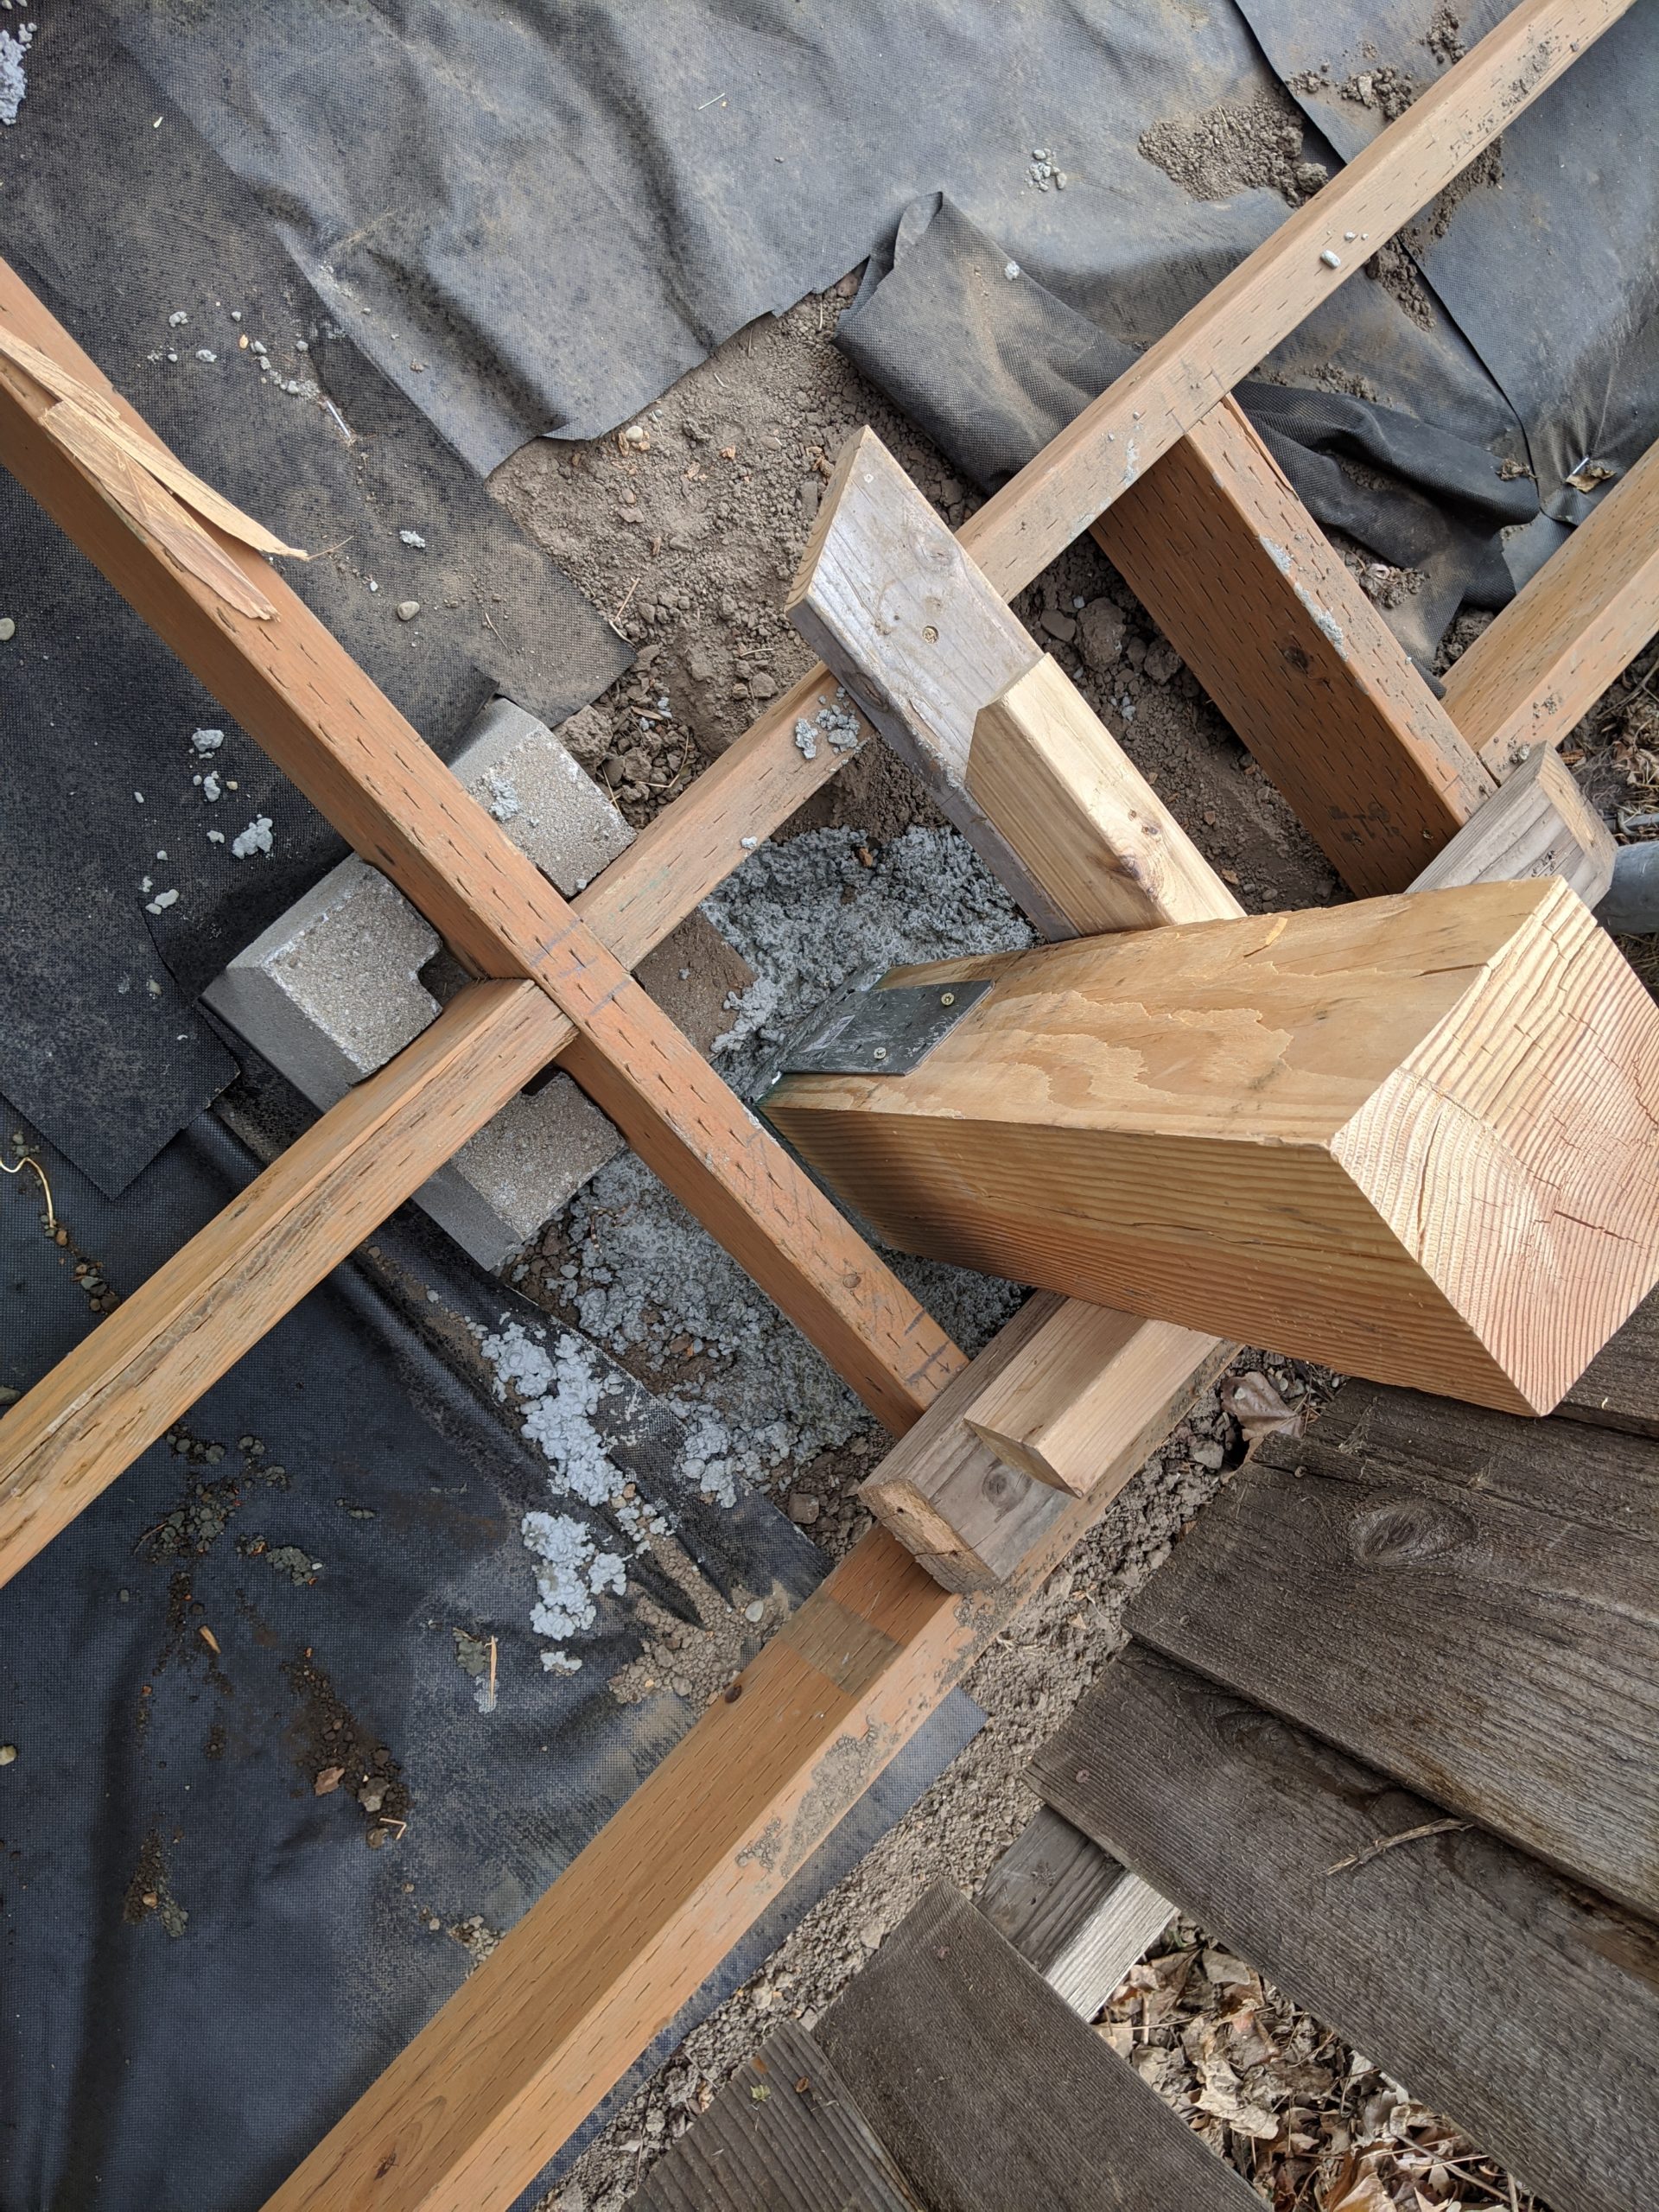
While these brackets are very strong, there’s no way to move them after the base is set in concrete. We needed a way to hold the brackets in place at the correct height and in the right horizontal location while pouring the concrete. We decided to buy a rough 6x6x8′ post and cut it into 4 2-foot lengths. We temporarily mounted each post to a bracket and screwed 2×4’s into the sides of the short posts so they would rest on the framing. We could then screw those down into the framing keeping everything rigid while we poured concrete. We had to be very careful to be sure could take everything apart once the concrete set: putting temporary screws in that could be taken out at an angle and leaving screw heads on the mounting boards easily accessible. The whole process took some back-and forth (of course) to make everything in line, level, at the right height and square. We also had a bit of extra digging to do on each post hole to make the hole line up with the base of each bracket.
Concrete
Once we had the posts set we mixed and poured concrete in each hole. We had calculated 2-3 bags of concrete per hole and we ended up using 11 bags for 5 holes. This part was pretty straightforward, just lots of mixing and shoveling. We used trowels to make sure the concrete was well settled in the U-shape of the bracket. We also made sure the standoff was above the level of the concrete to keep the post base off the ground.
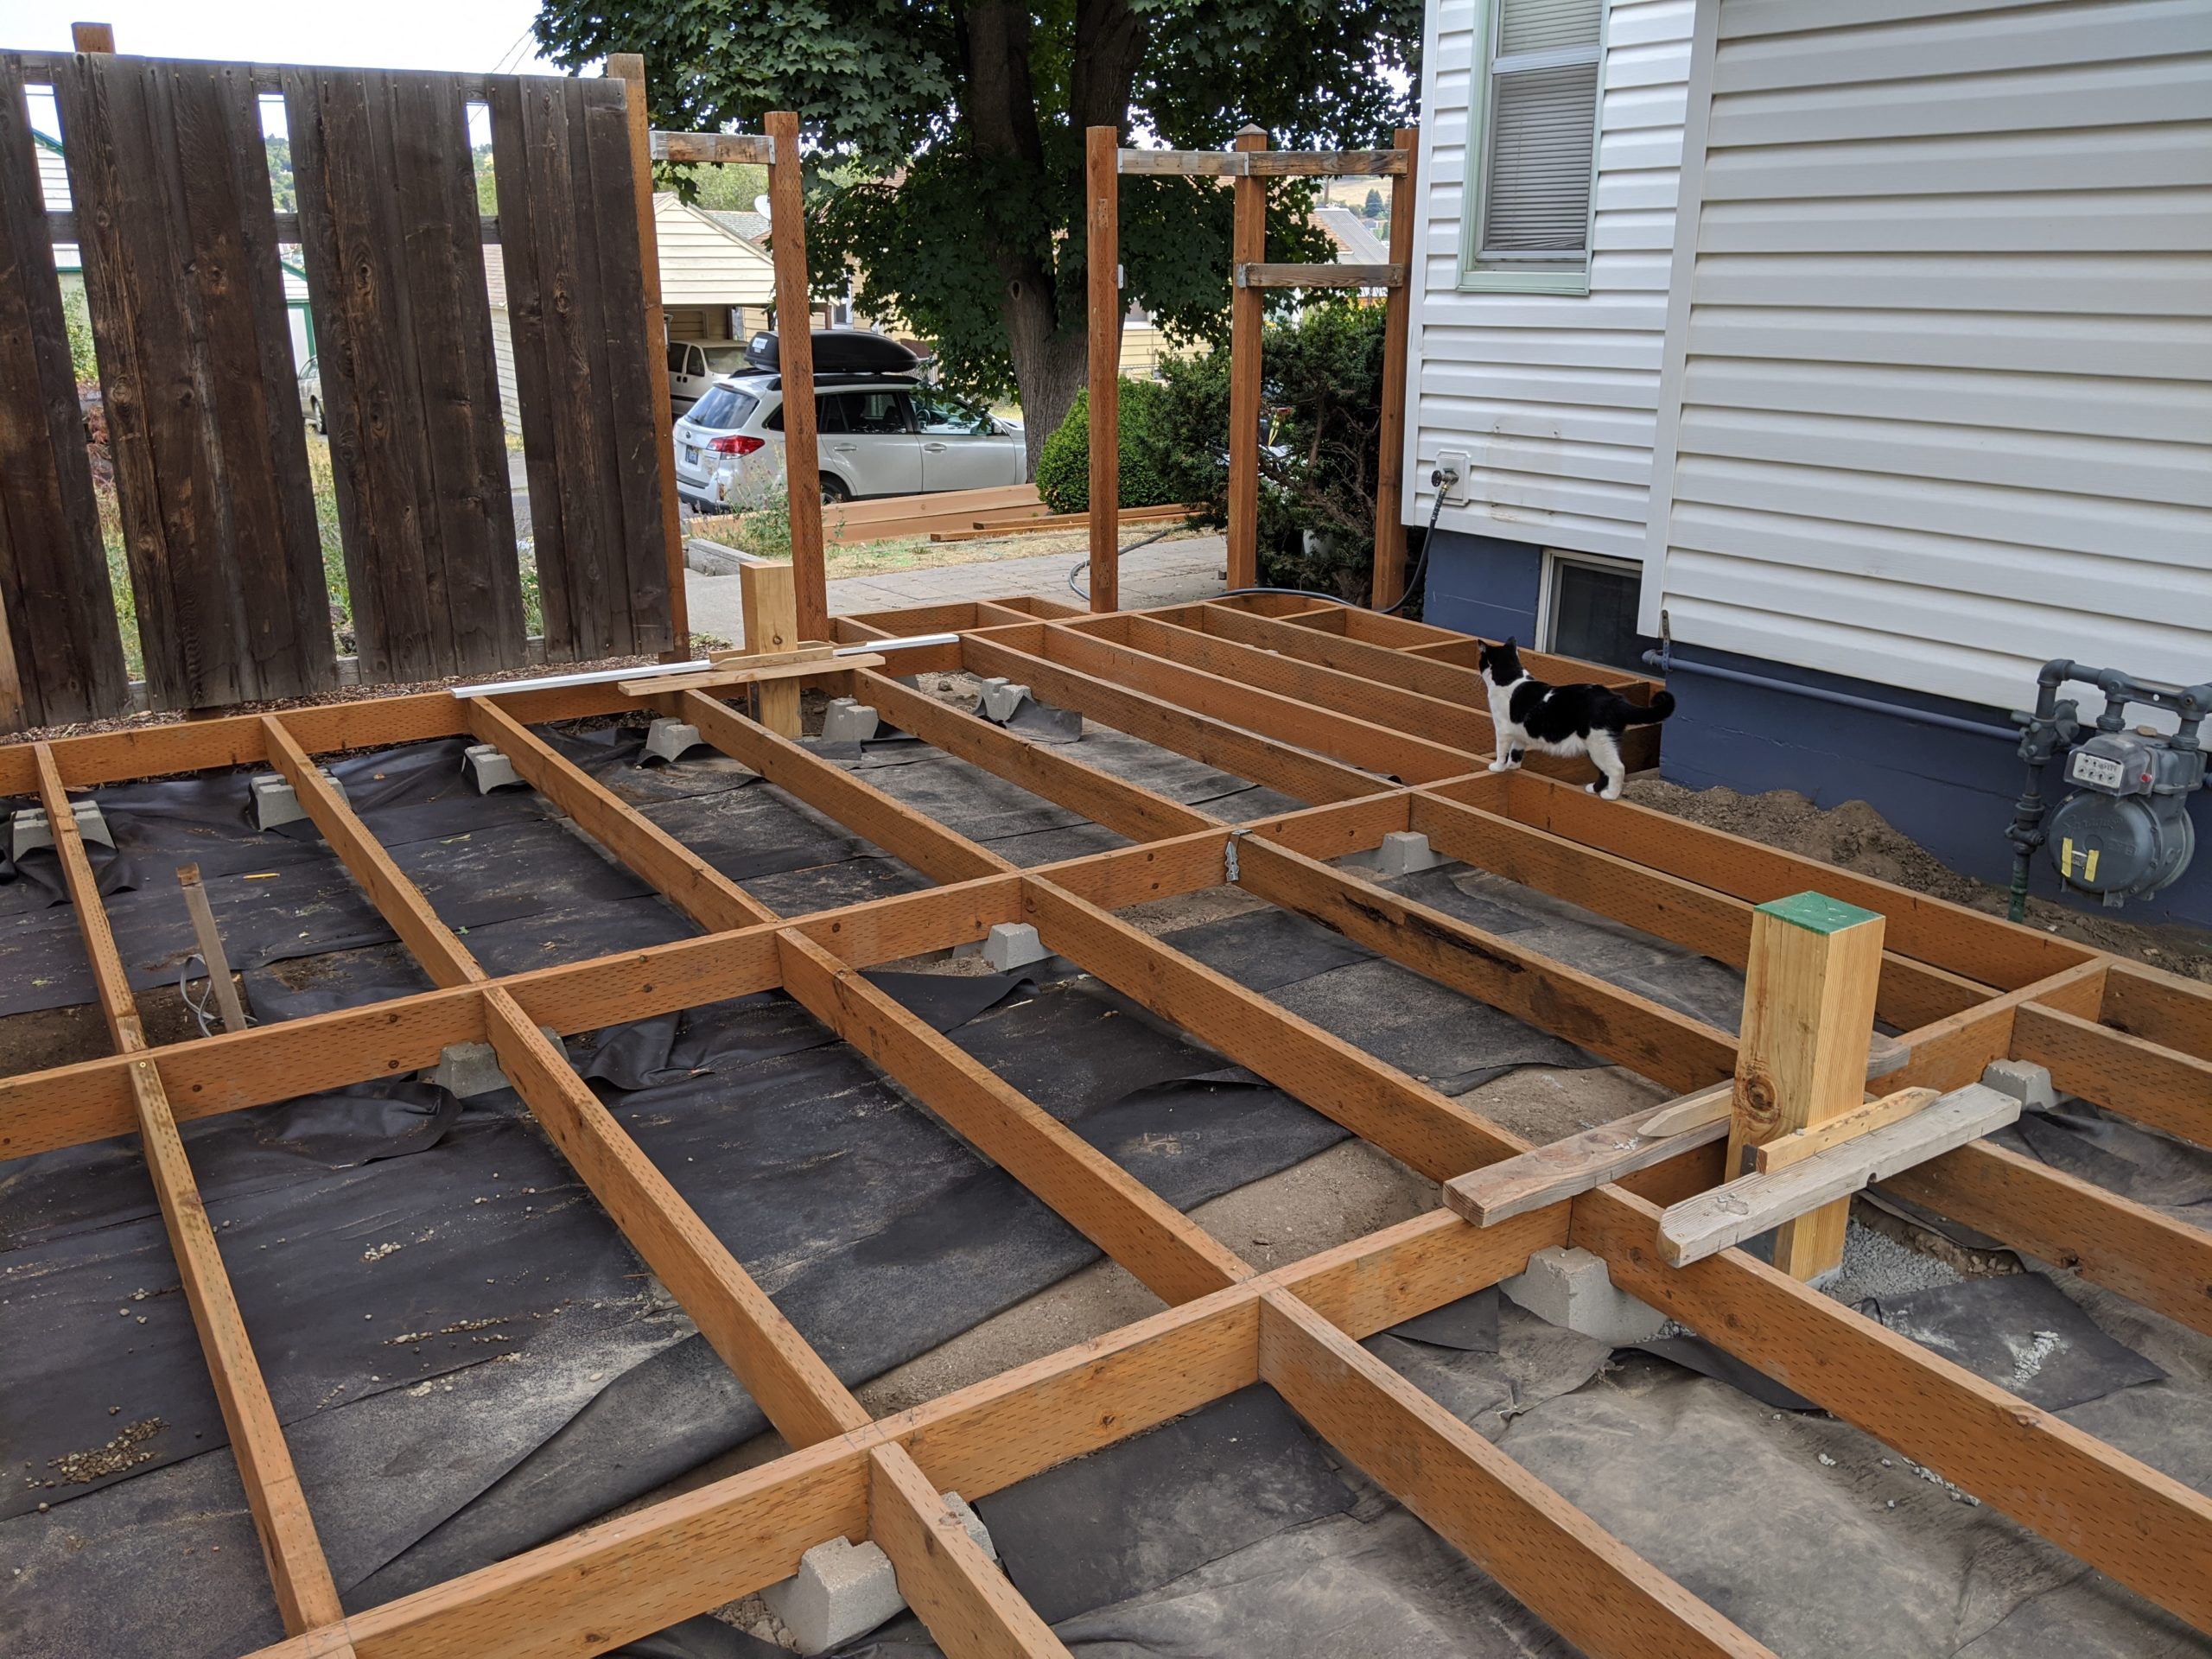
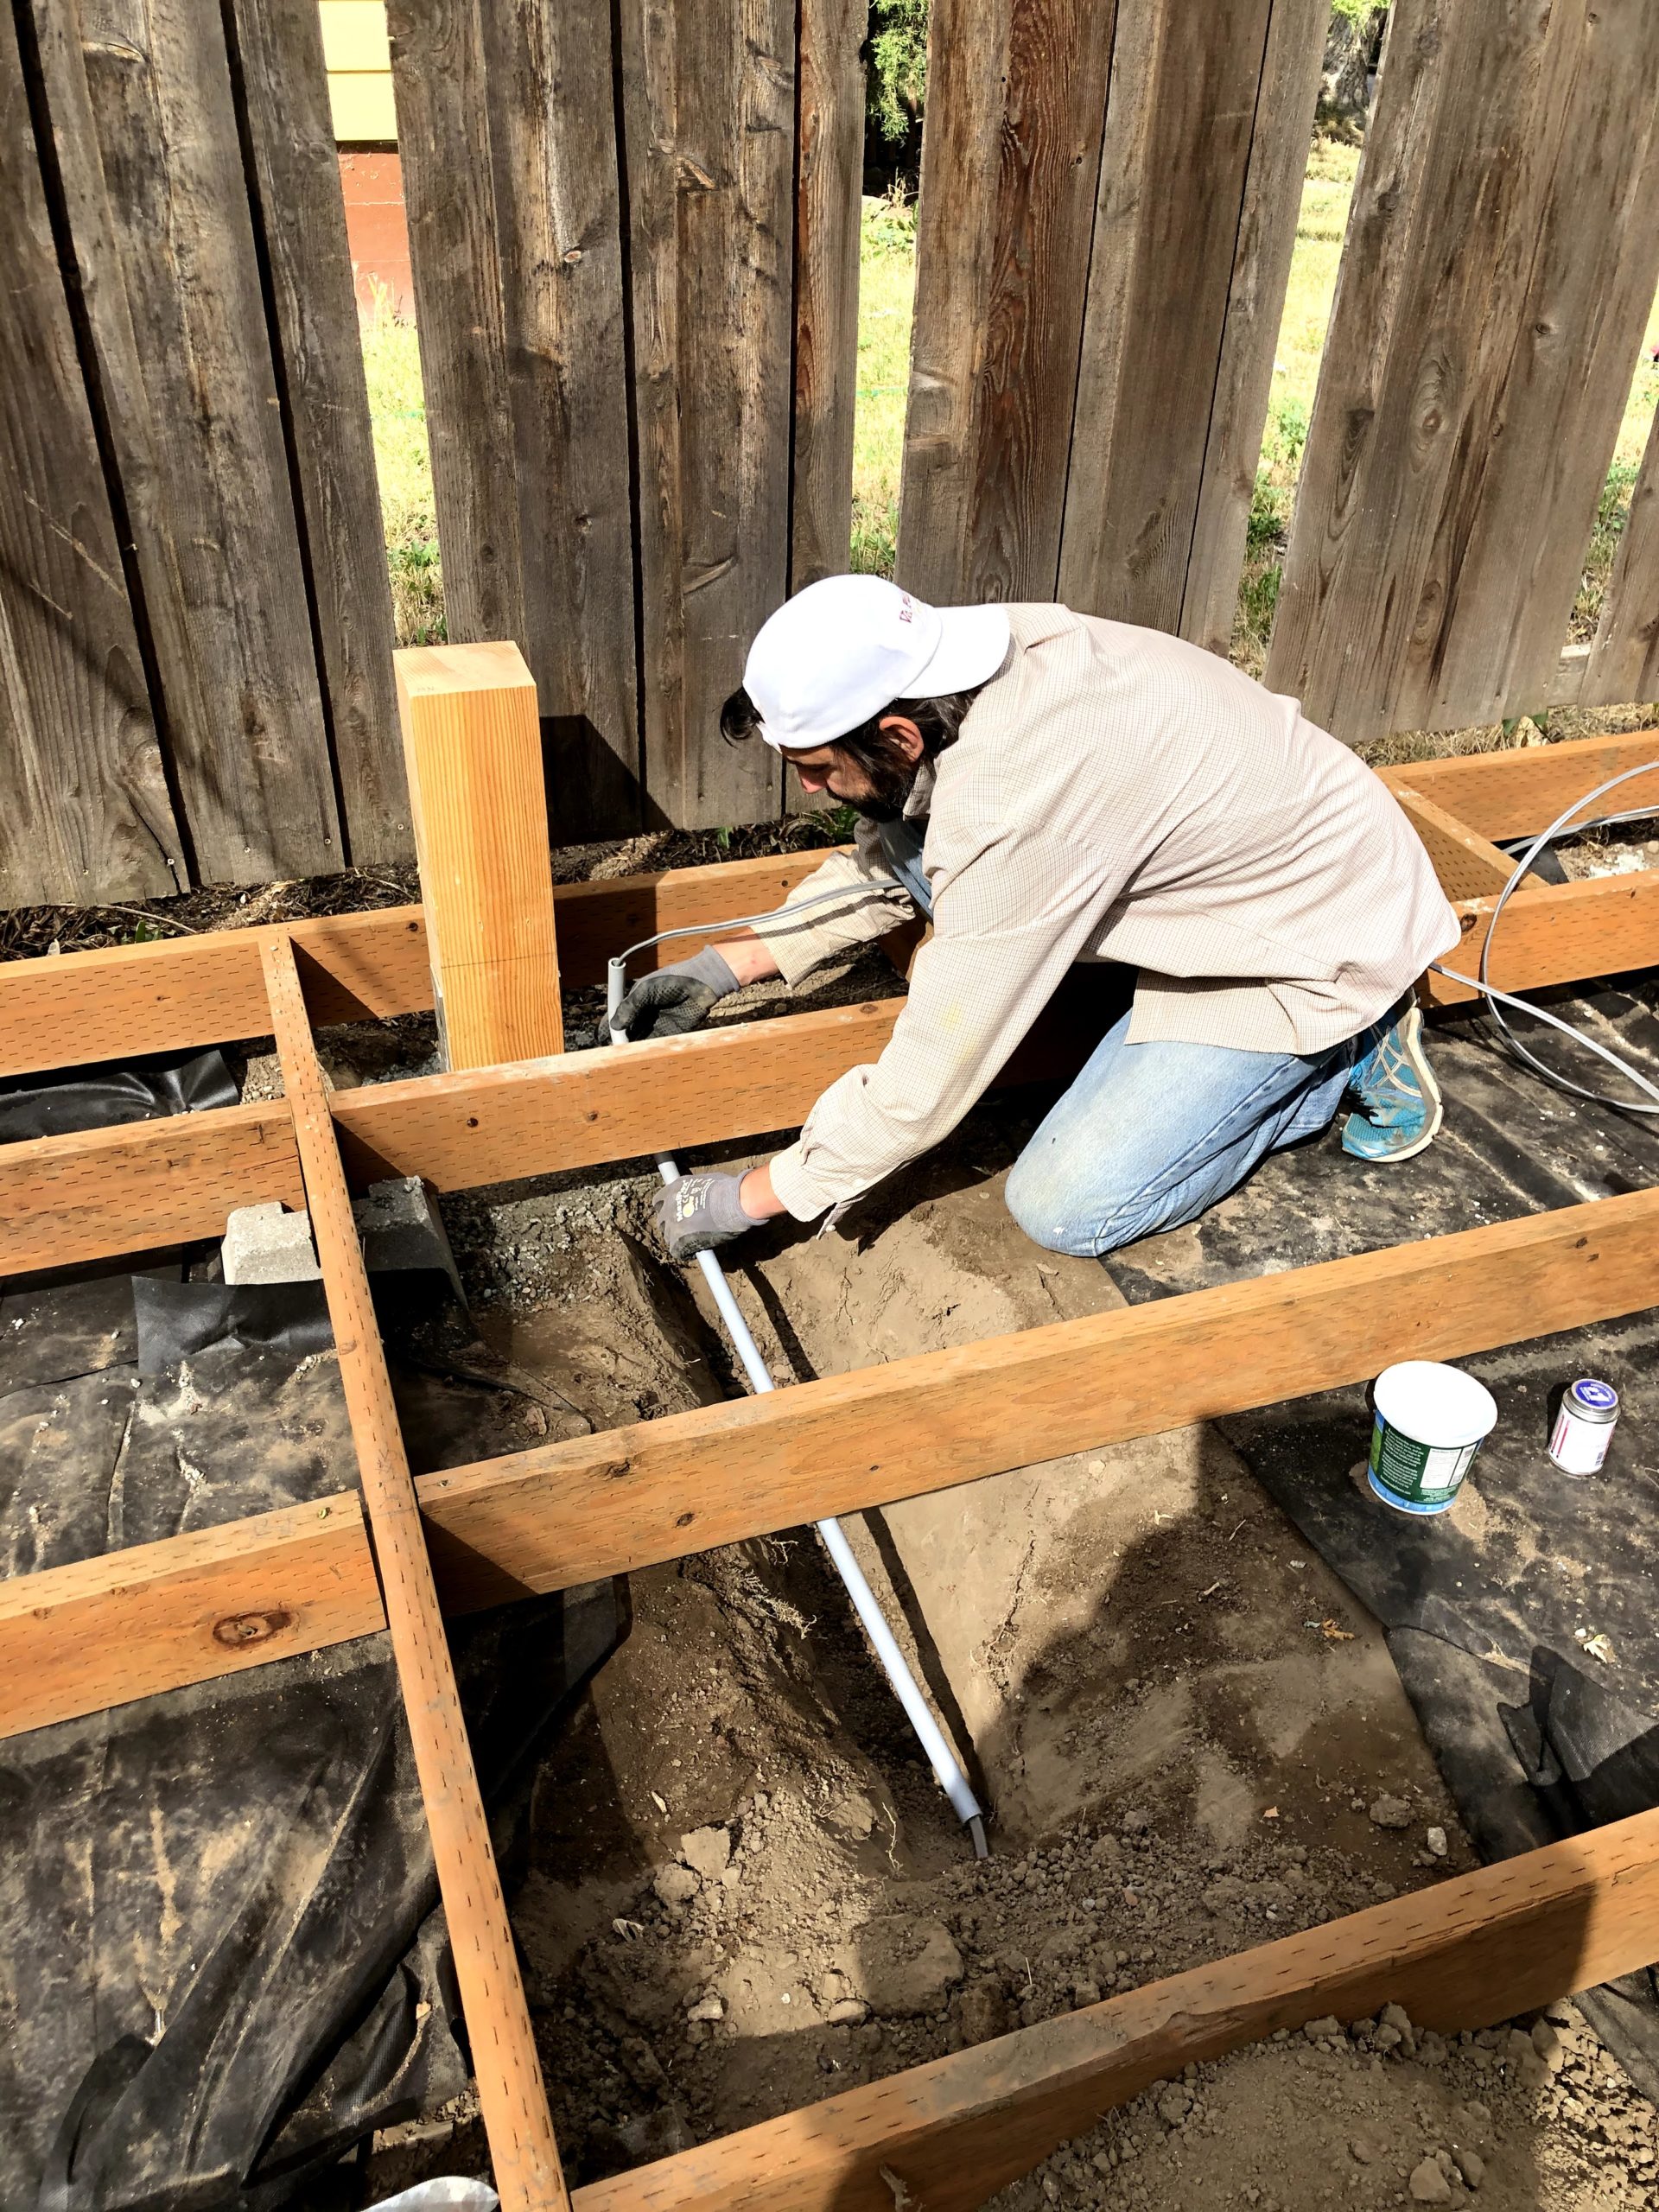
Even though we only had 4 of the short posts, we were able to remove the first post after the concrete had cured a bit and do the final hole. We really wanted to be done with all of the concrete in one day. The last bracket, which is the middle one in the back, is the one that will have the electrical conduit attached to it. We finished running the wire through a short piece of conduit and a 90 to come up the side next to the bracket. Once the post is installed we’ll decide on a height for the outlet and switch and finish running the conduit.
Mounting the Posts
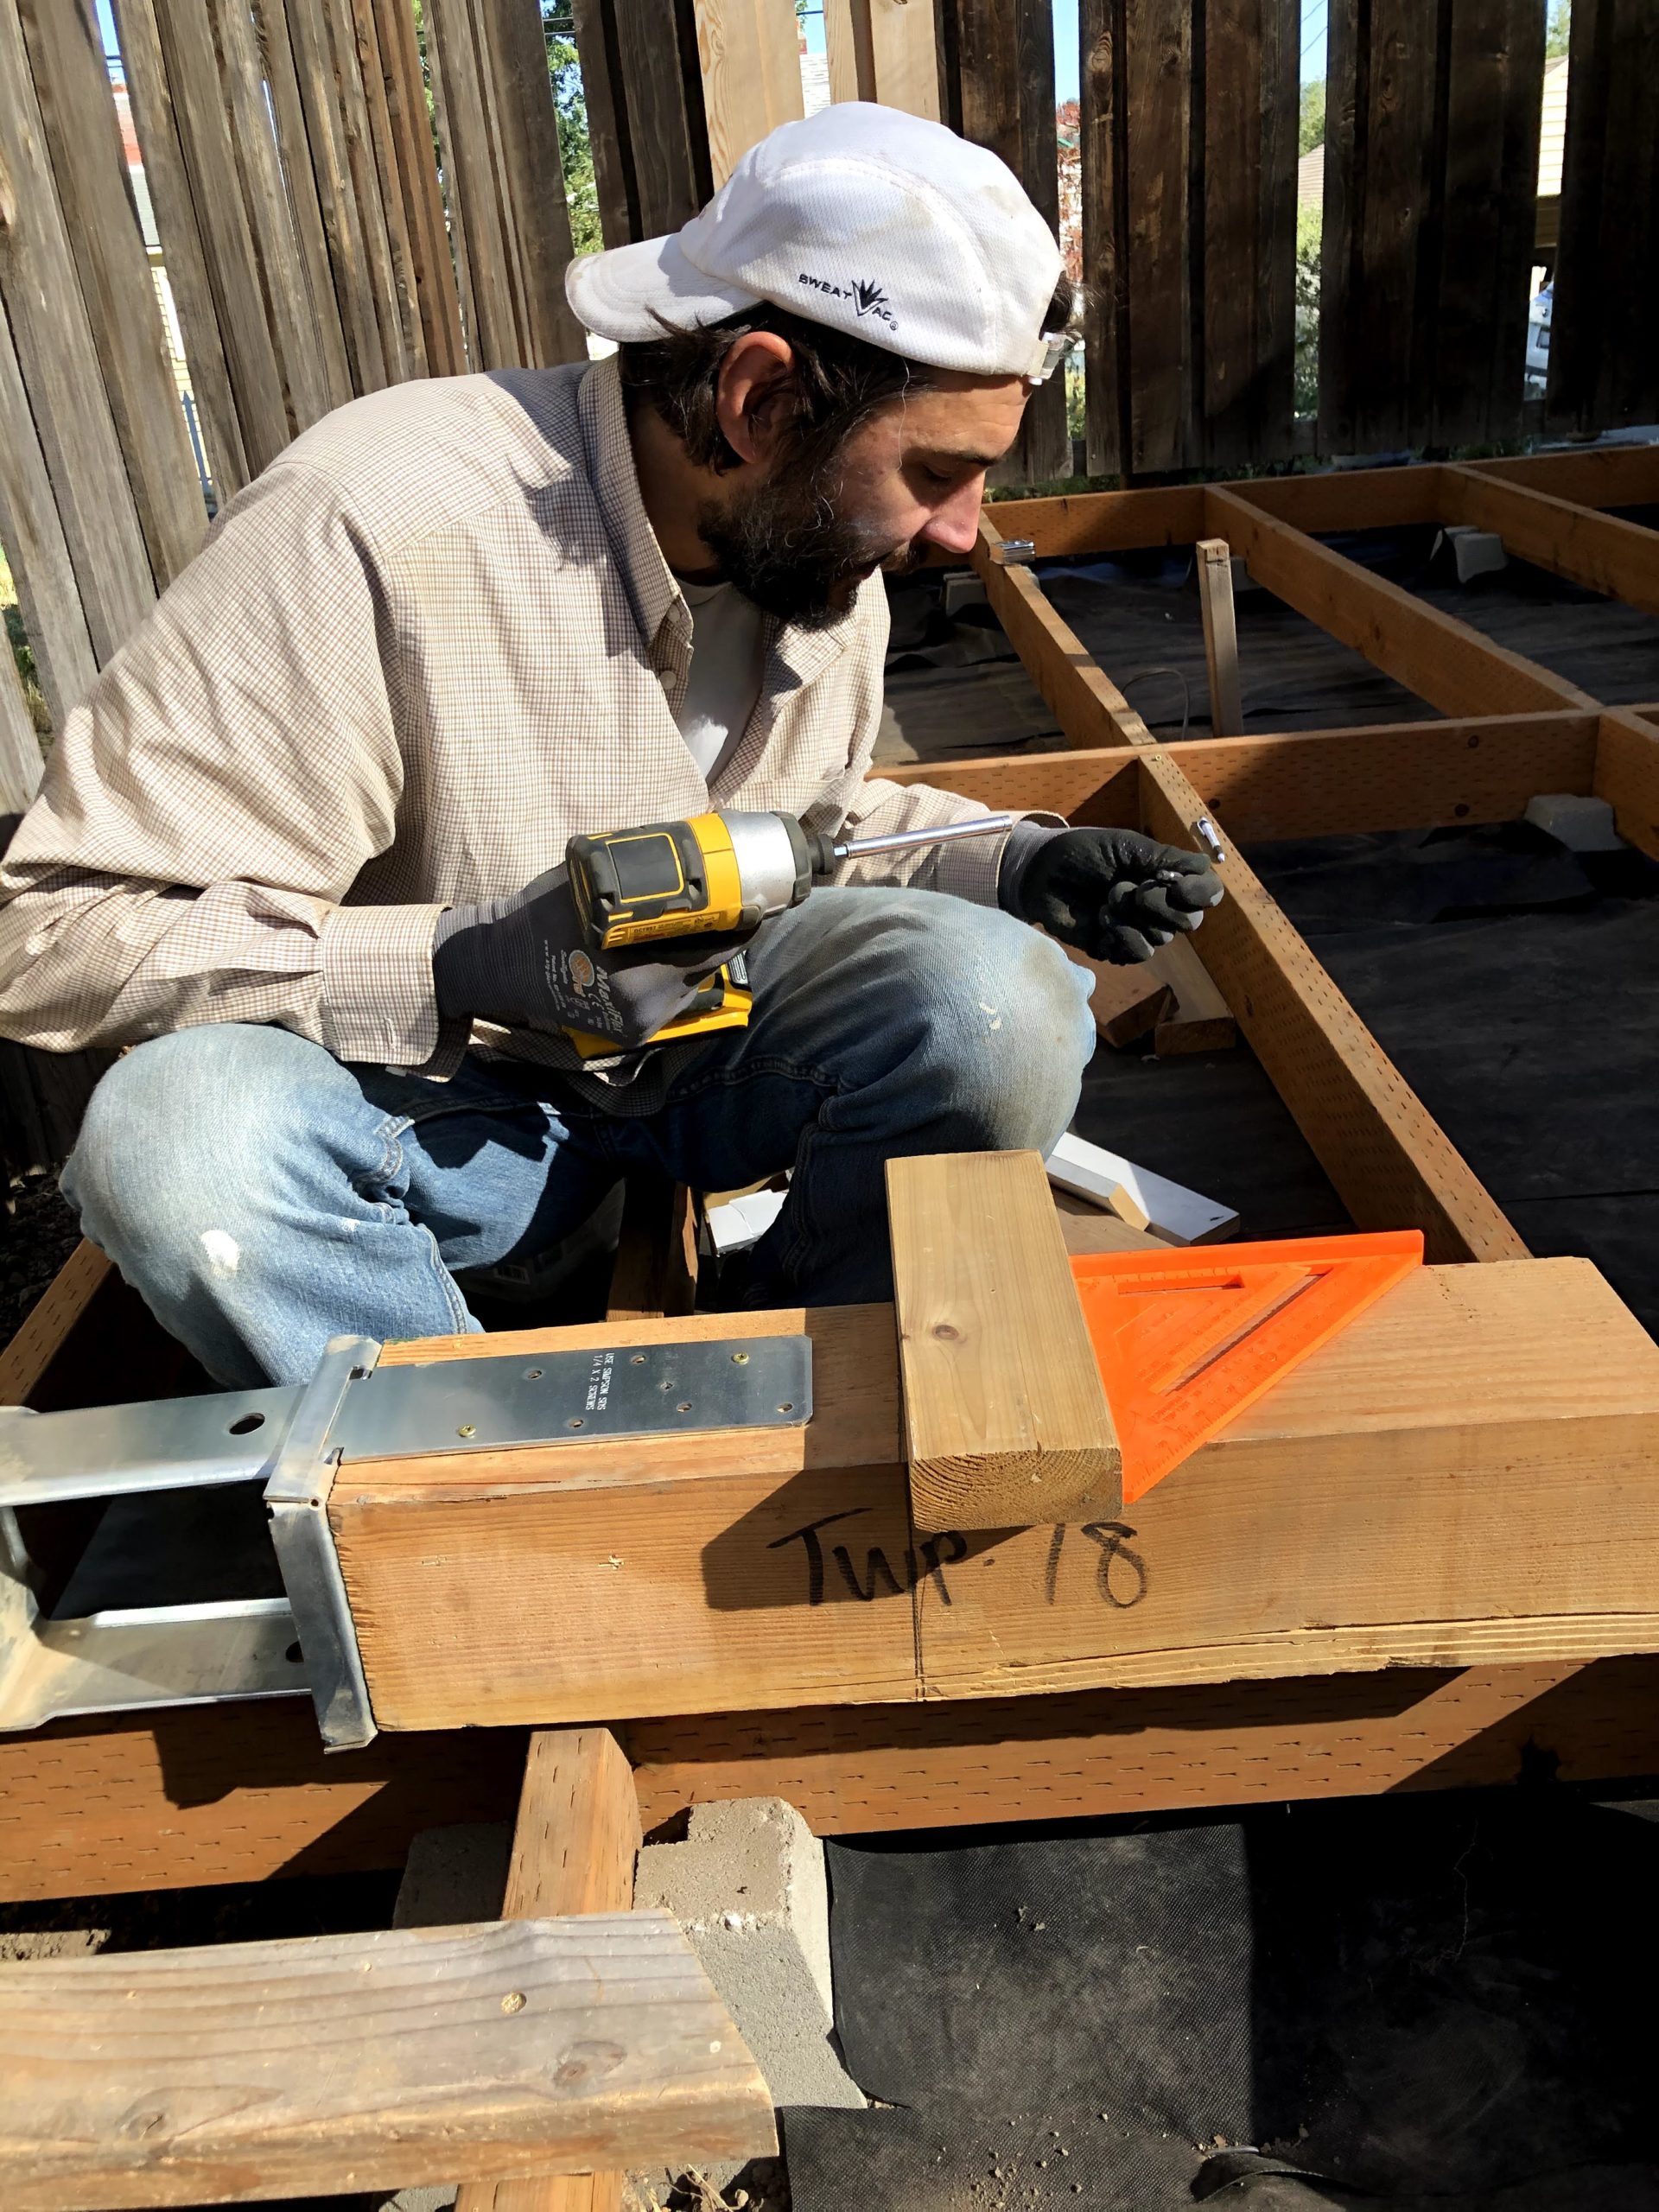
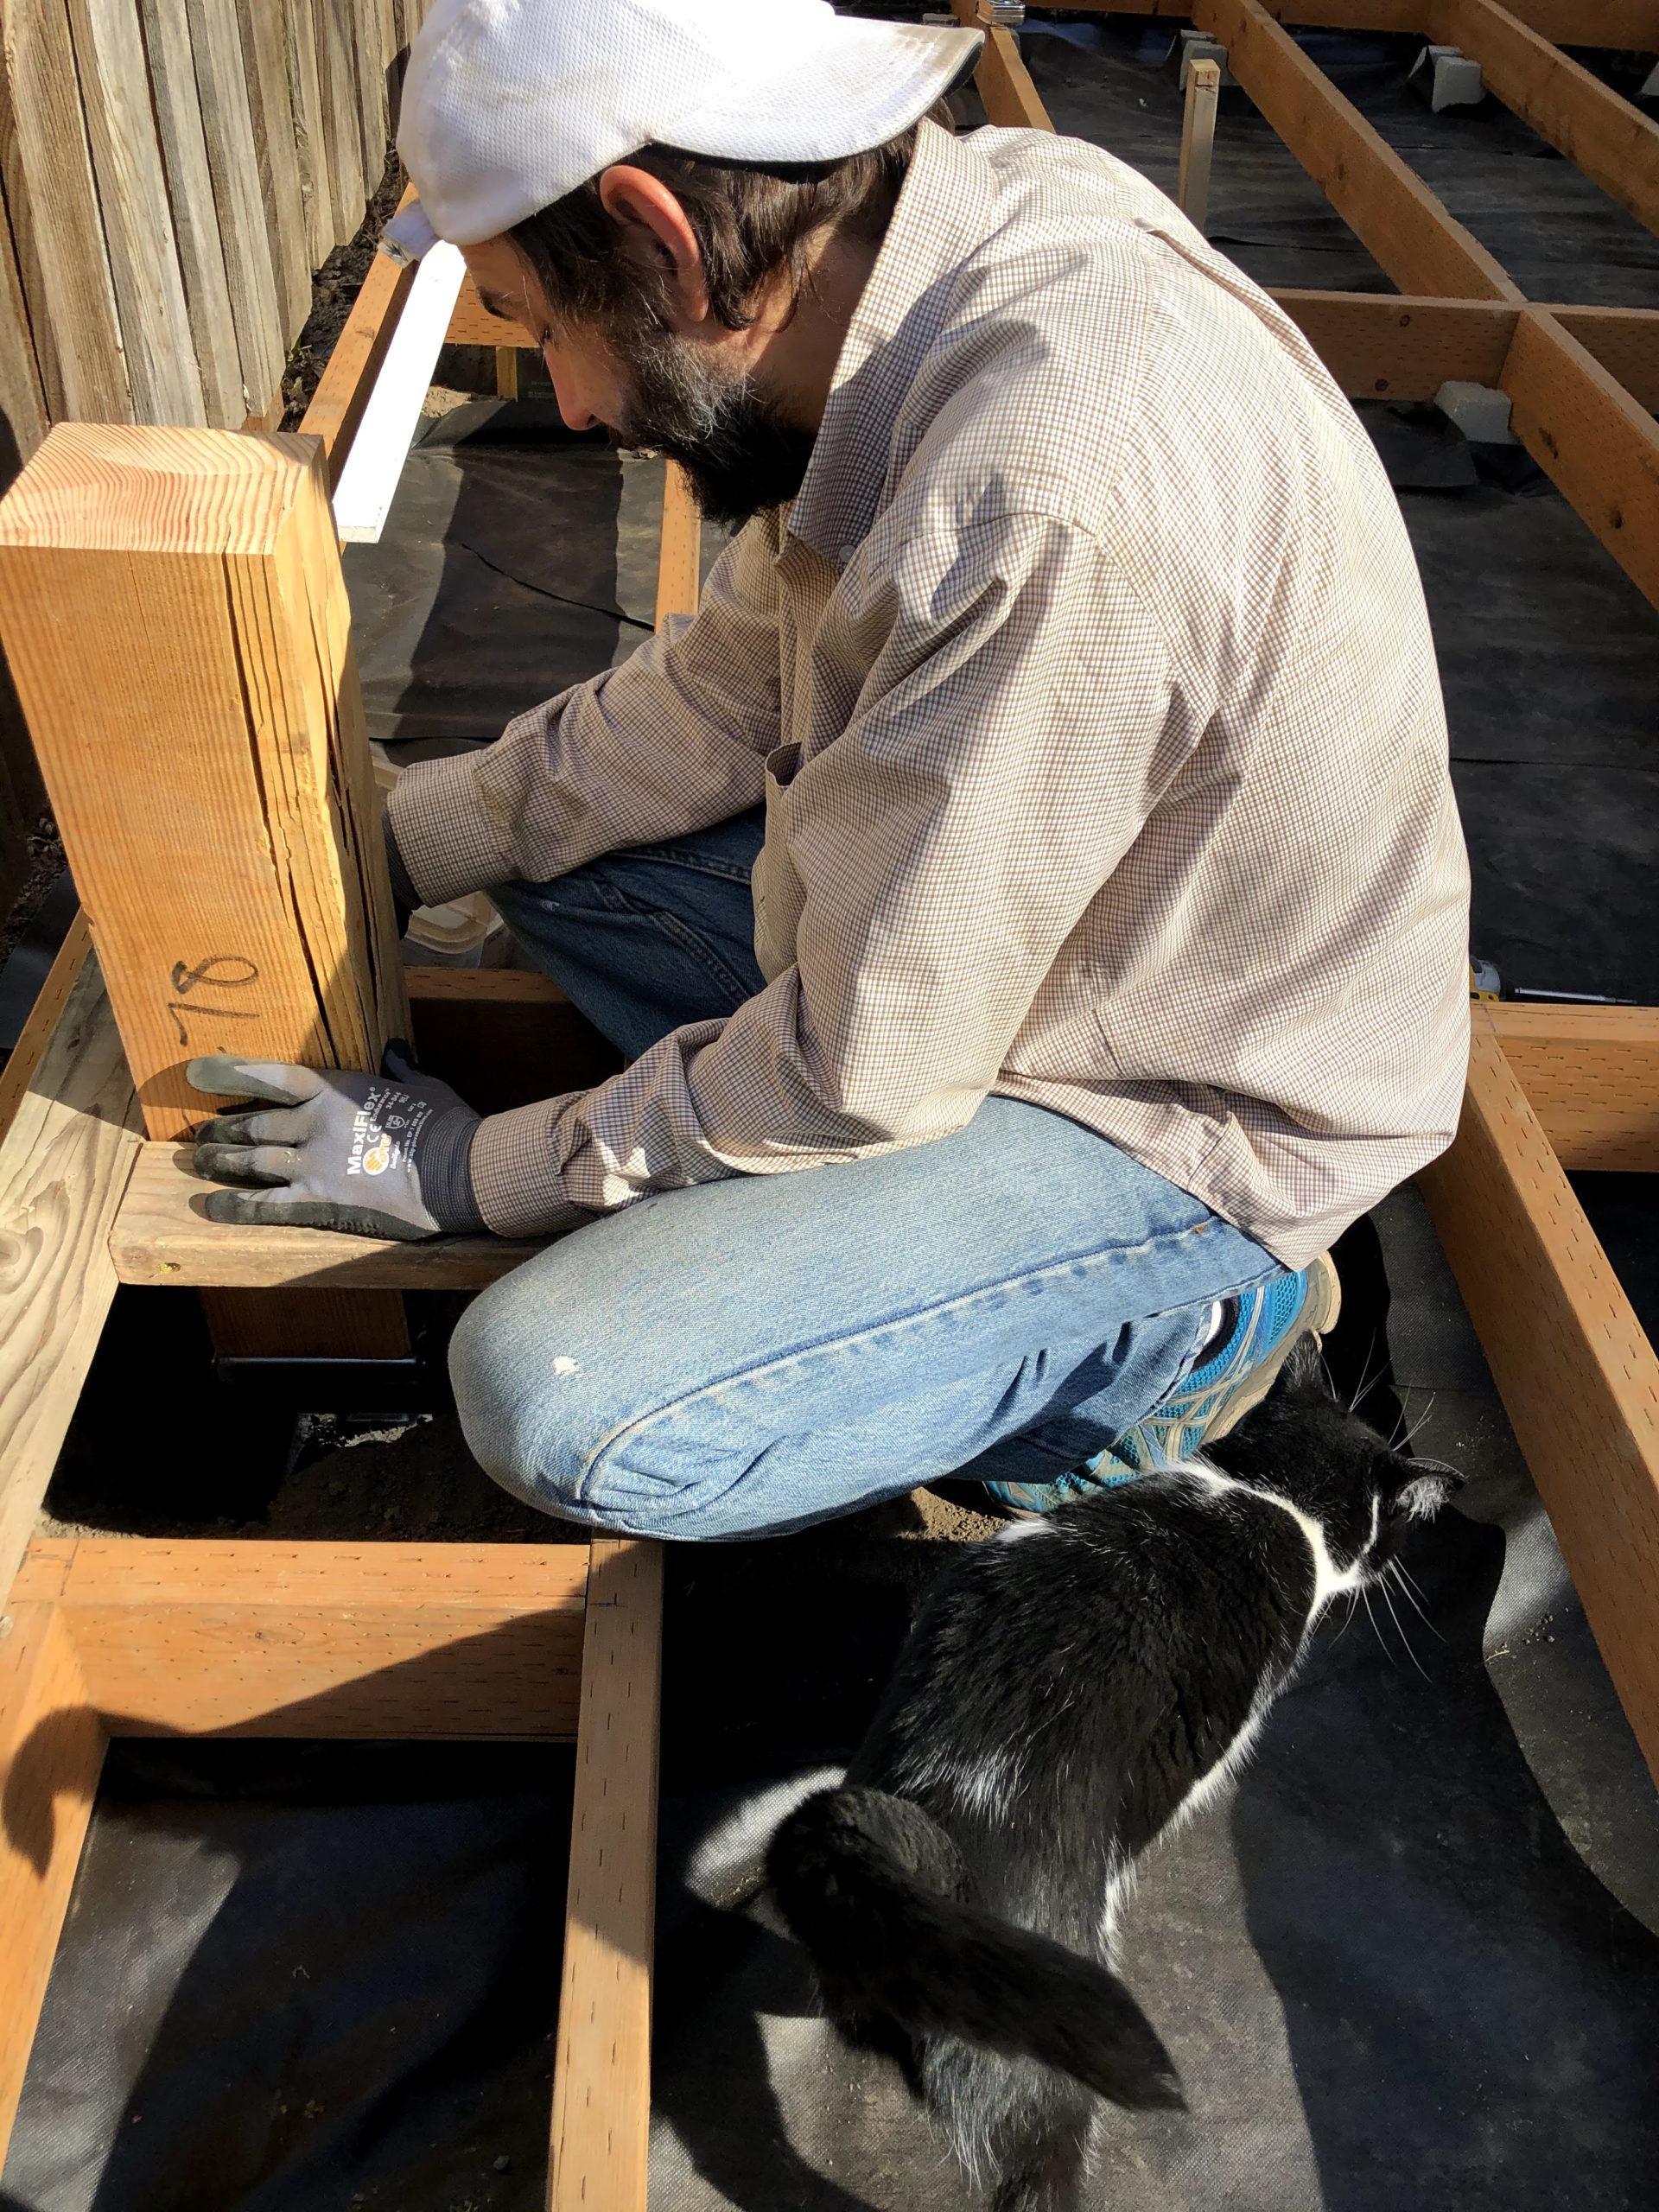
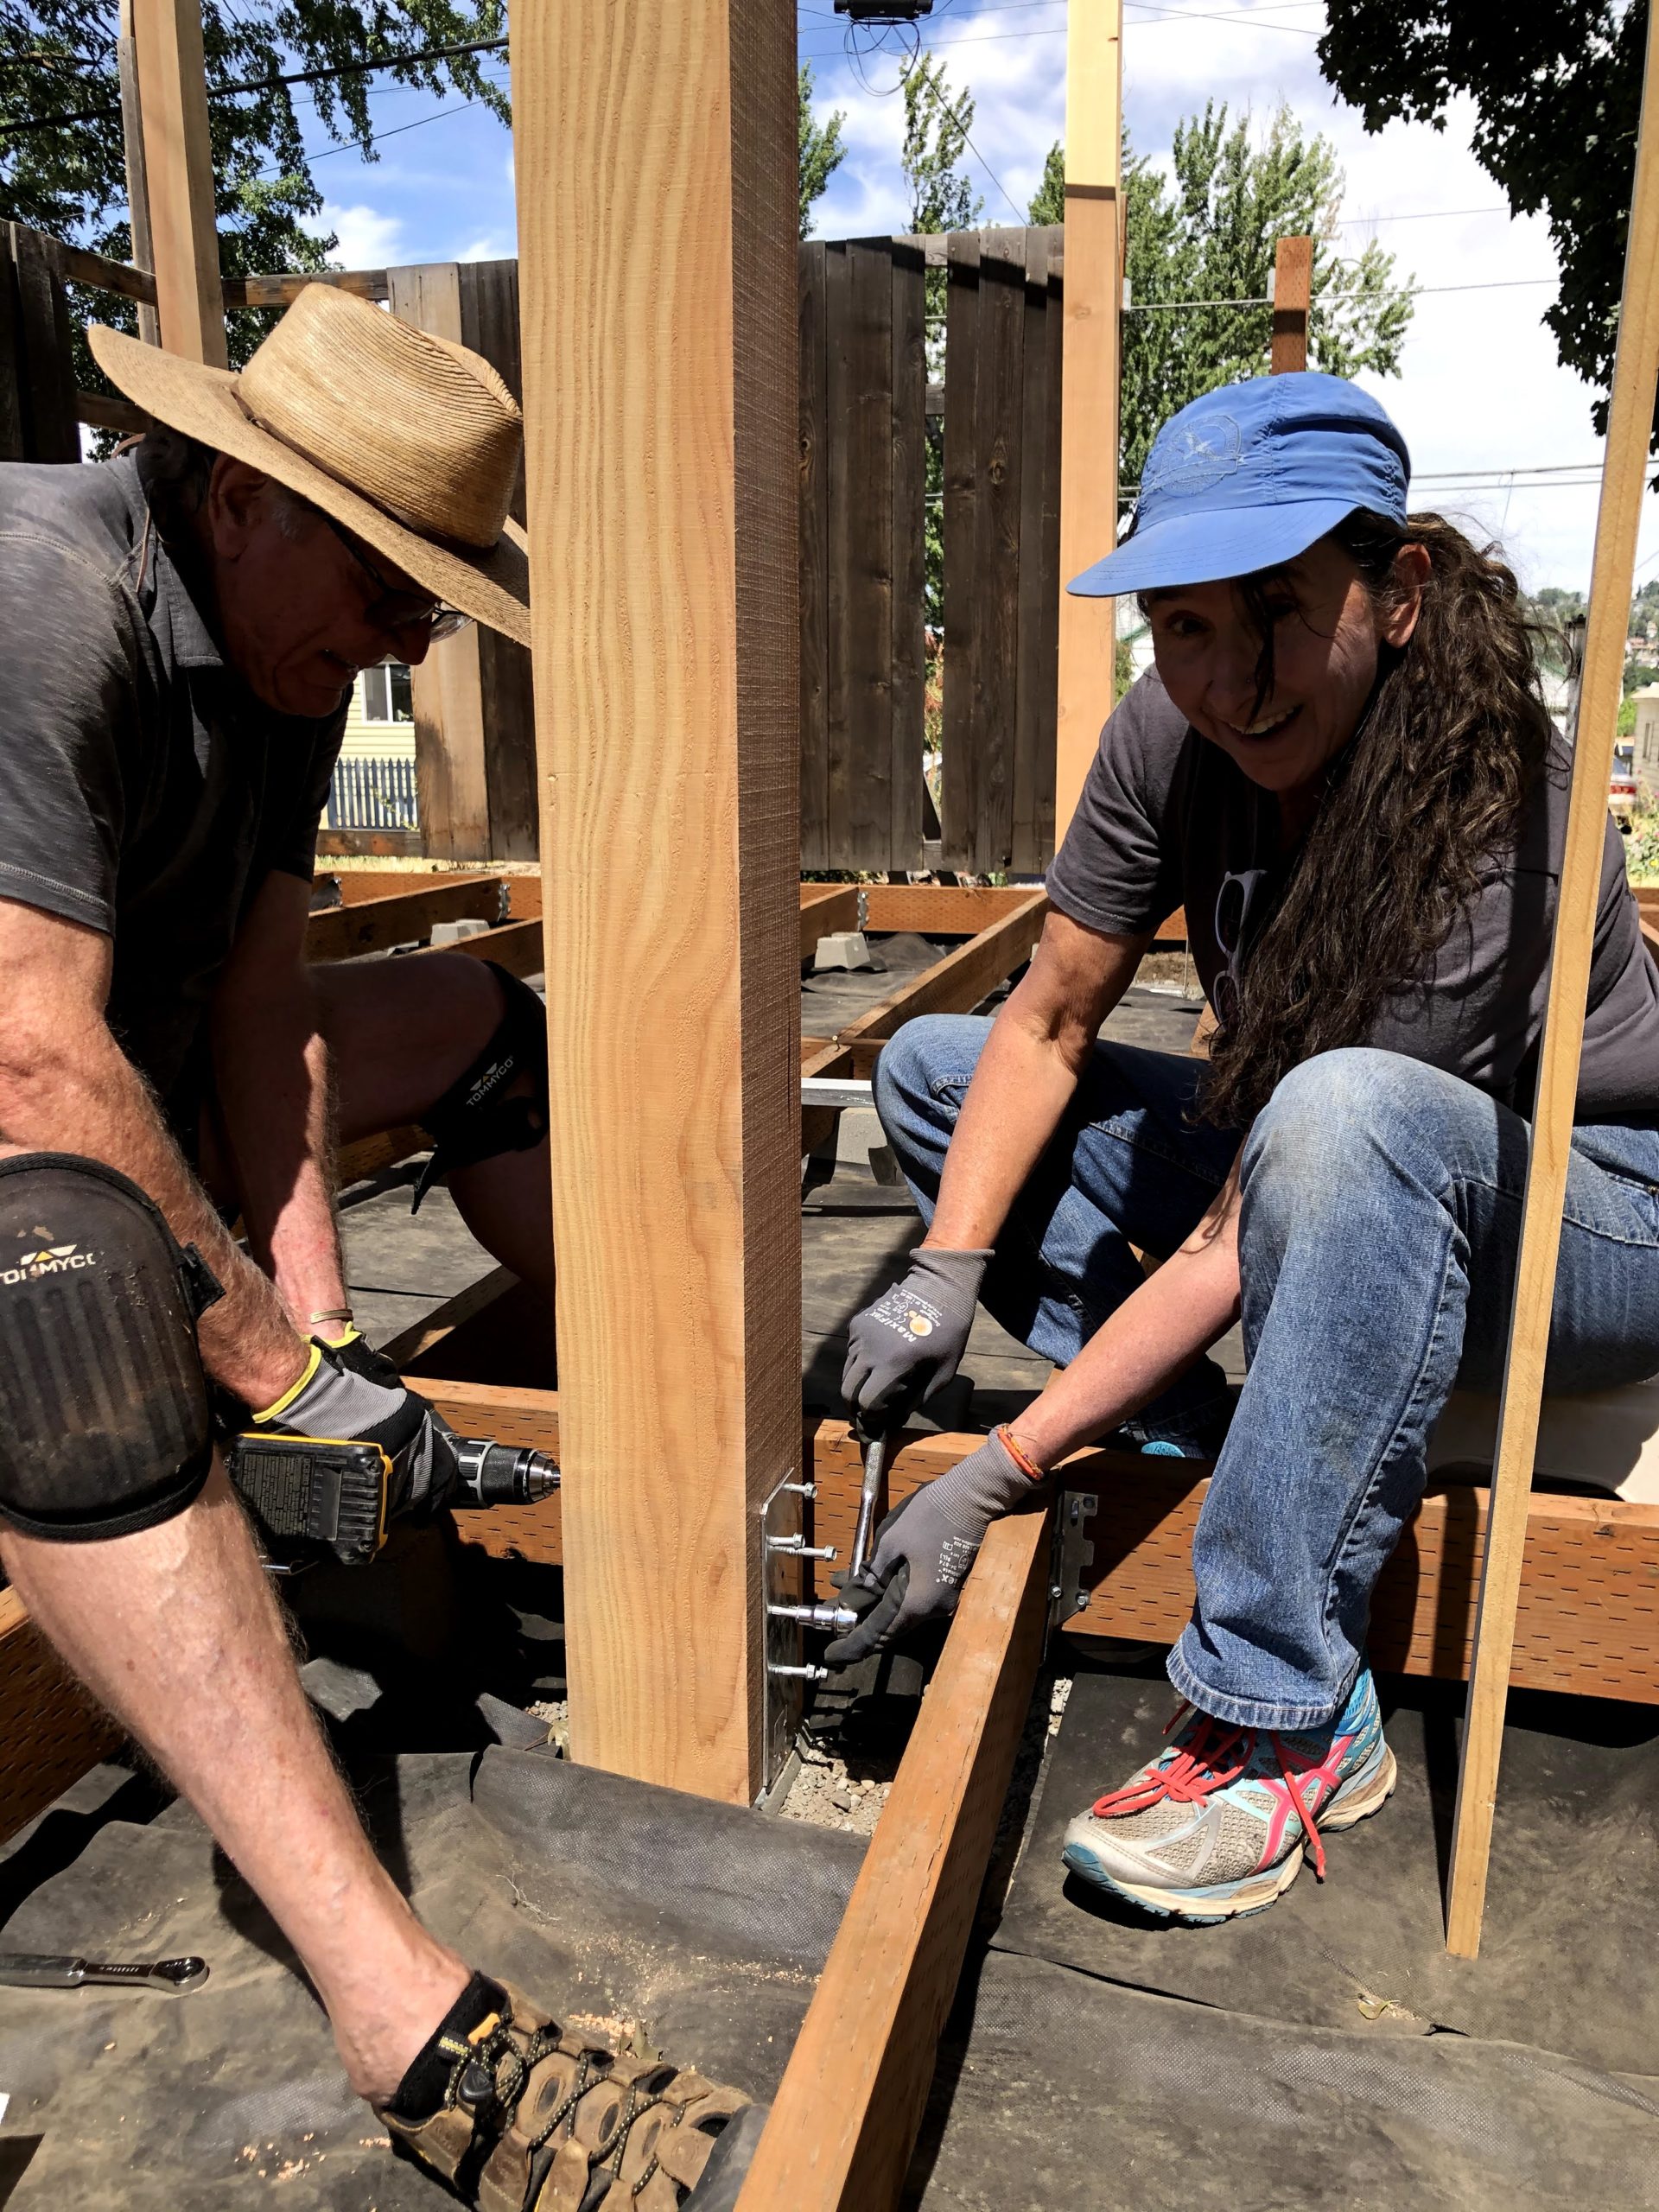
Our friend Ron very generously offered to help us with the next step: installing the 6×6 posts. Each post is 10′ and very heavy. It really helped to have an extra person for lifting, leveling and steadying.
We decided to pre-drill each of the 14 holes in each bracket so we wouldn’t have any chance of splitting the wood. We set each post in place, marked the holes on both sides, took it out and drilled the holes then set the post back in and fastened the screws. We had a few issues with holes being a bit off but by the last post we had our system down.
Overall this would have been easier without the framing in place so we would have had full access to the holes for drilling and screwing. However, that would have made putting in the framing much more difficult and it was also hard for us to visualize exactly where we wanted the posts. Our system worked out fine, we just had to be careful with our spacing between the bracket and nearest joist or beam so we could get a socket wrench in the space to tighten those screws.
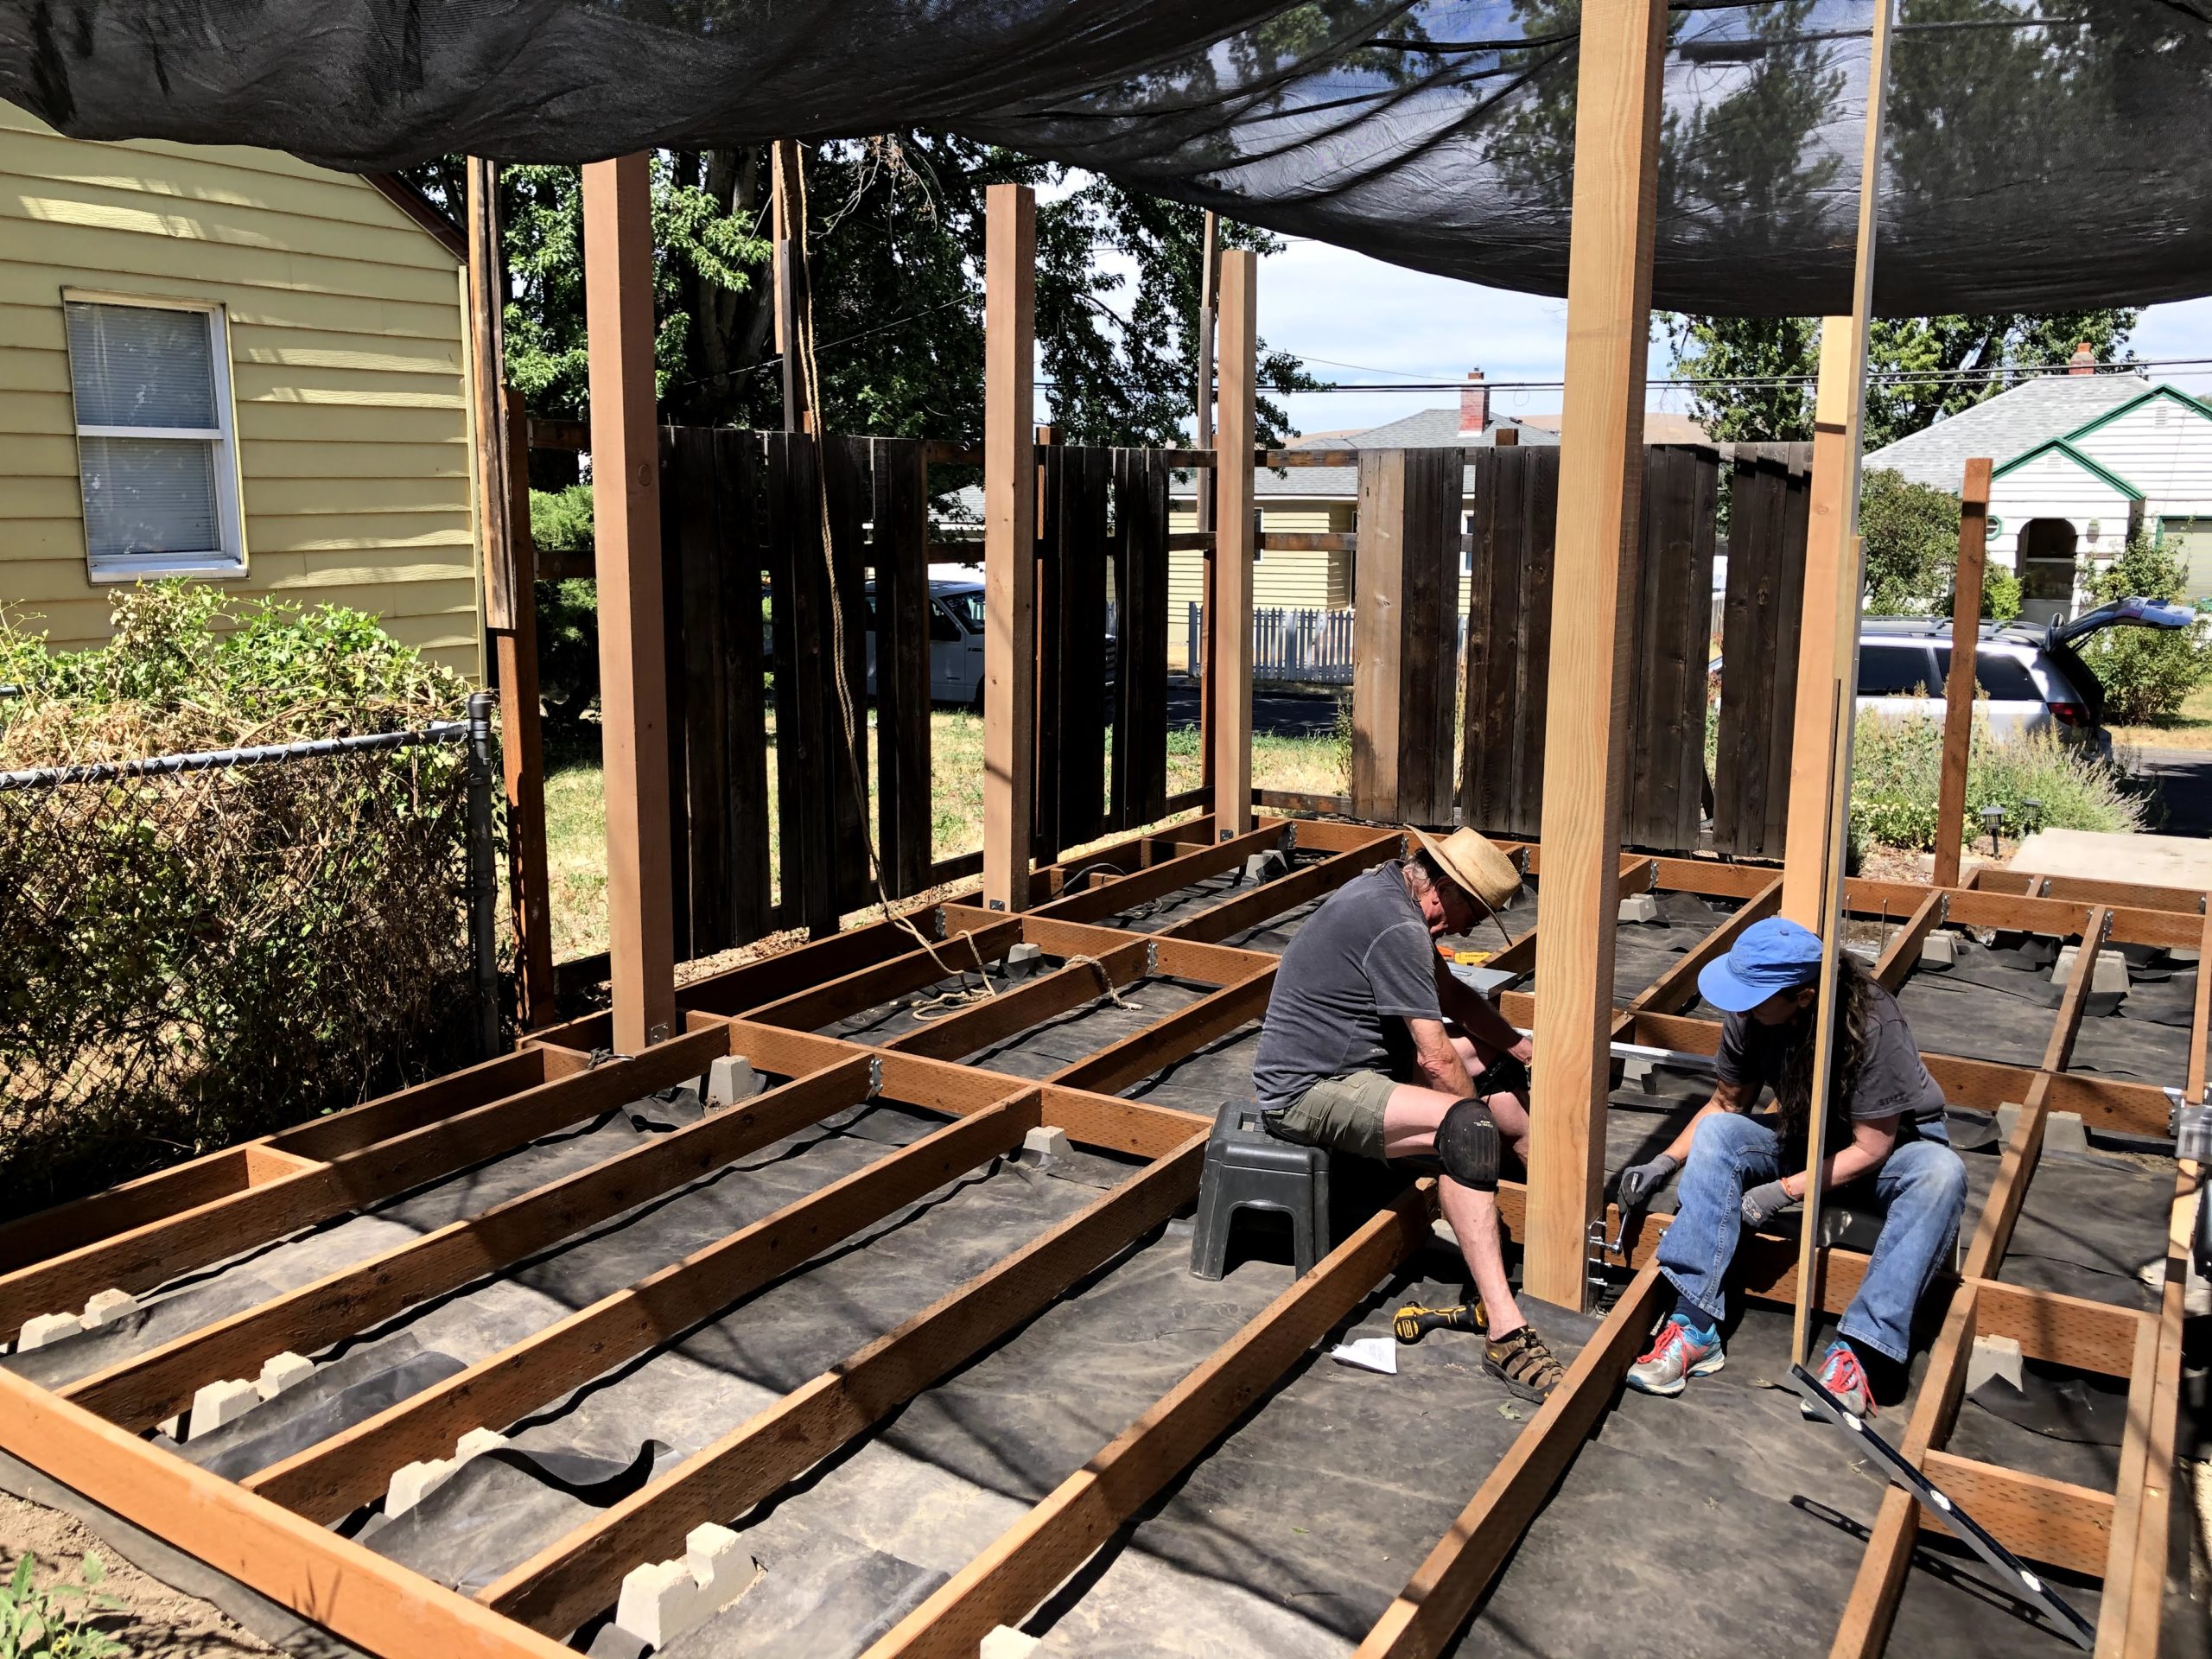
At this point the joist hangers are still not in place so that is one of our next steps. We also need to order the wood for the front and back beams for the pergola and put those in place. We are planning to at least install the pergola beams before putting in any decking so we don’t damage the deck wood.