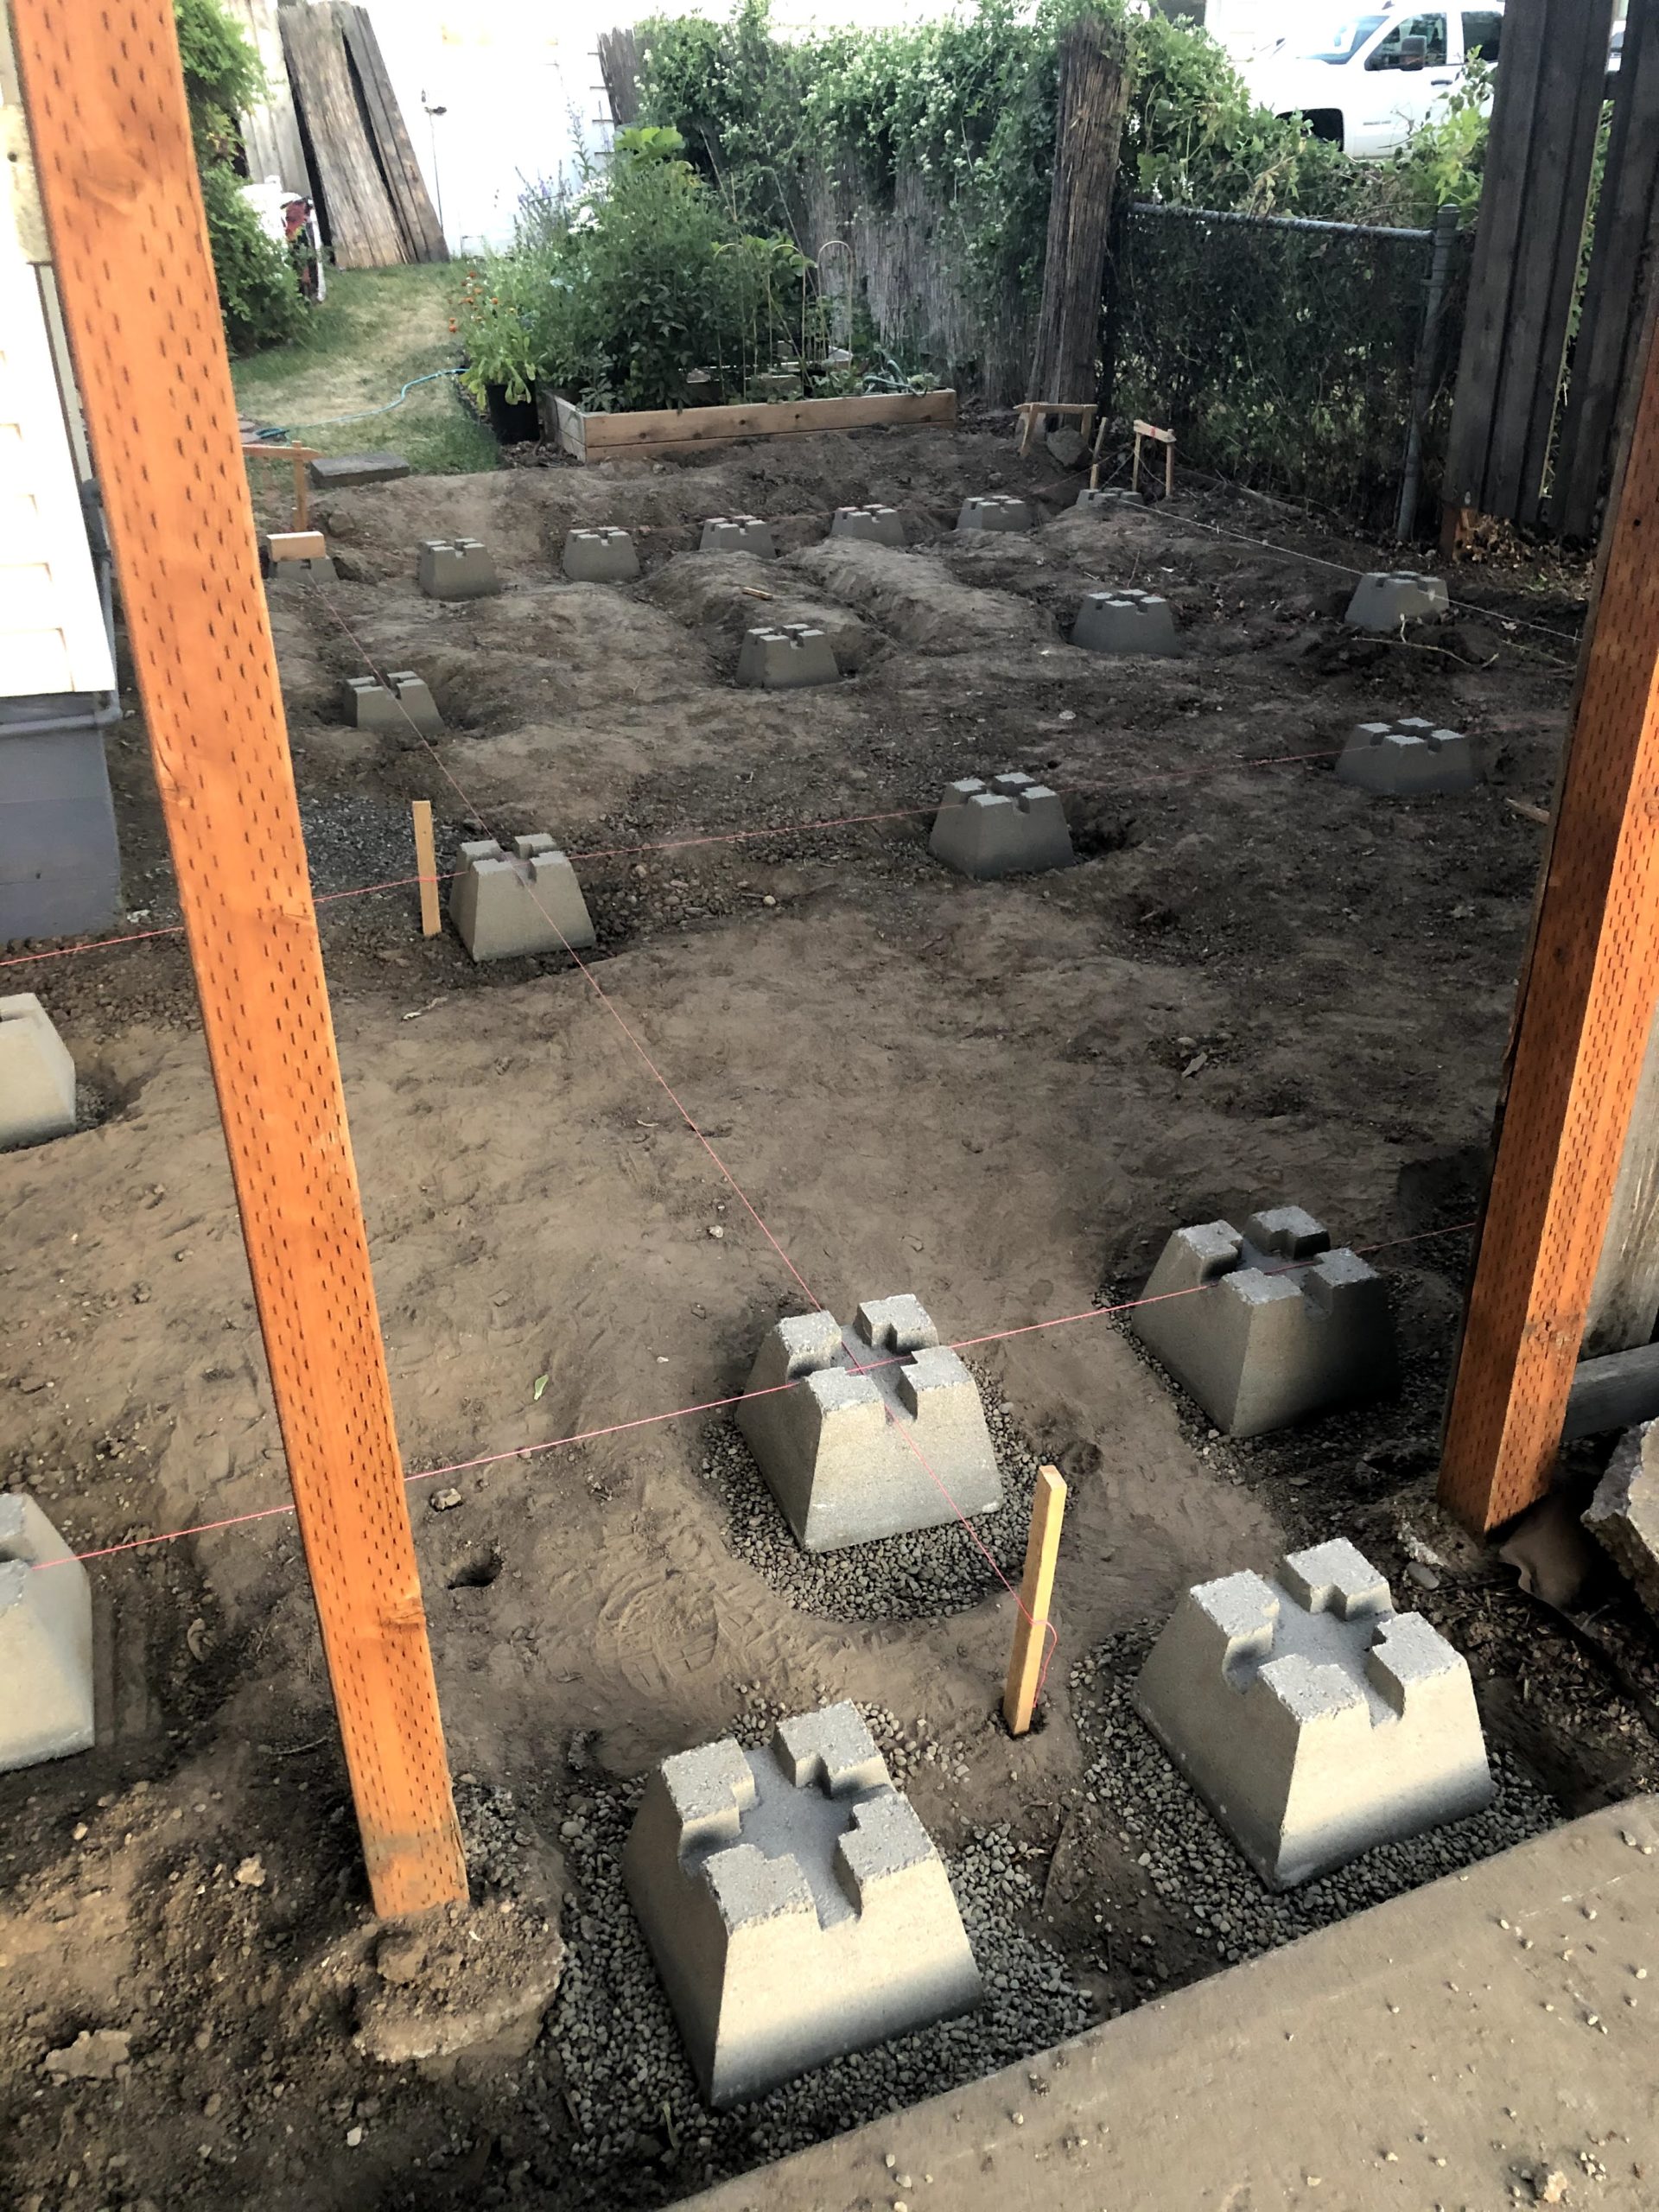
Now that the ground is level we’re ready to add deck blocks for the framing. Since this is a floating deck low to the ground we will use deck blocks for one side of the joists on each end, and beams down the middle through more deck blocks. We’re using 2×6 pressure-treated lumber for all of the framing. We want the deck to be as low as possible without having to excavate a bunch of dirt.
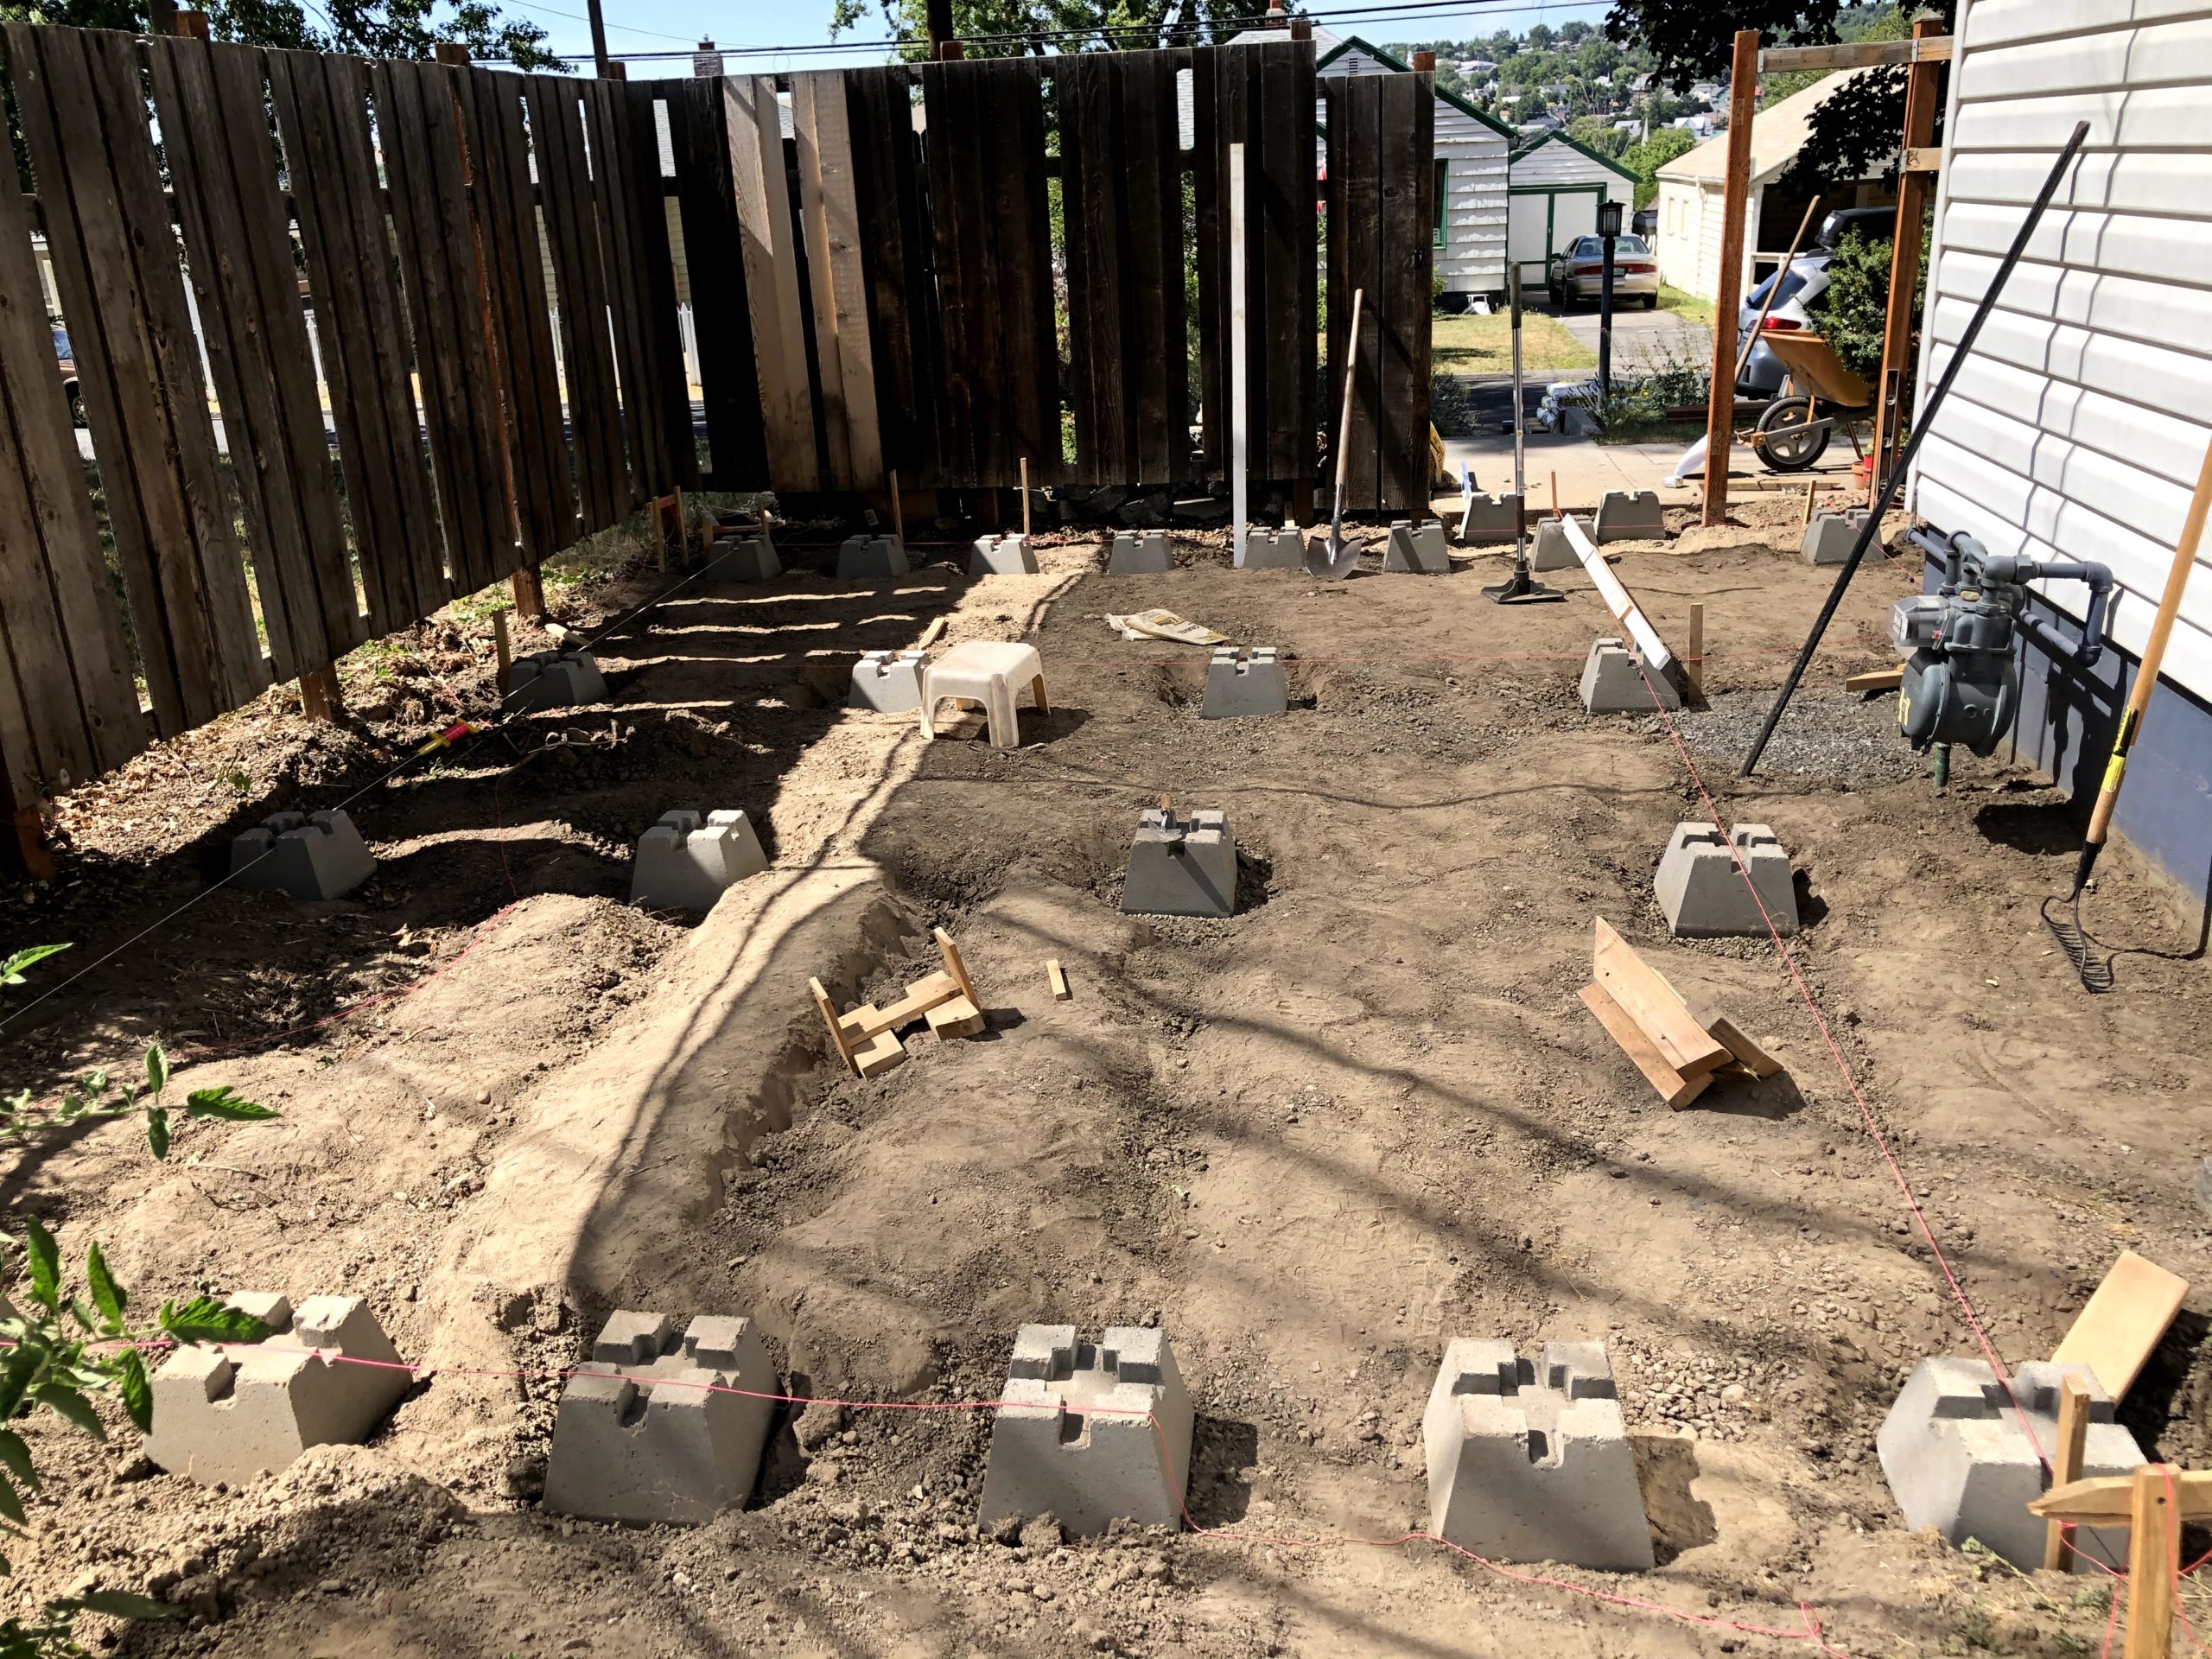
Deck Blocks: First Attempt
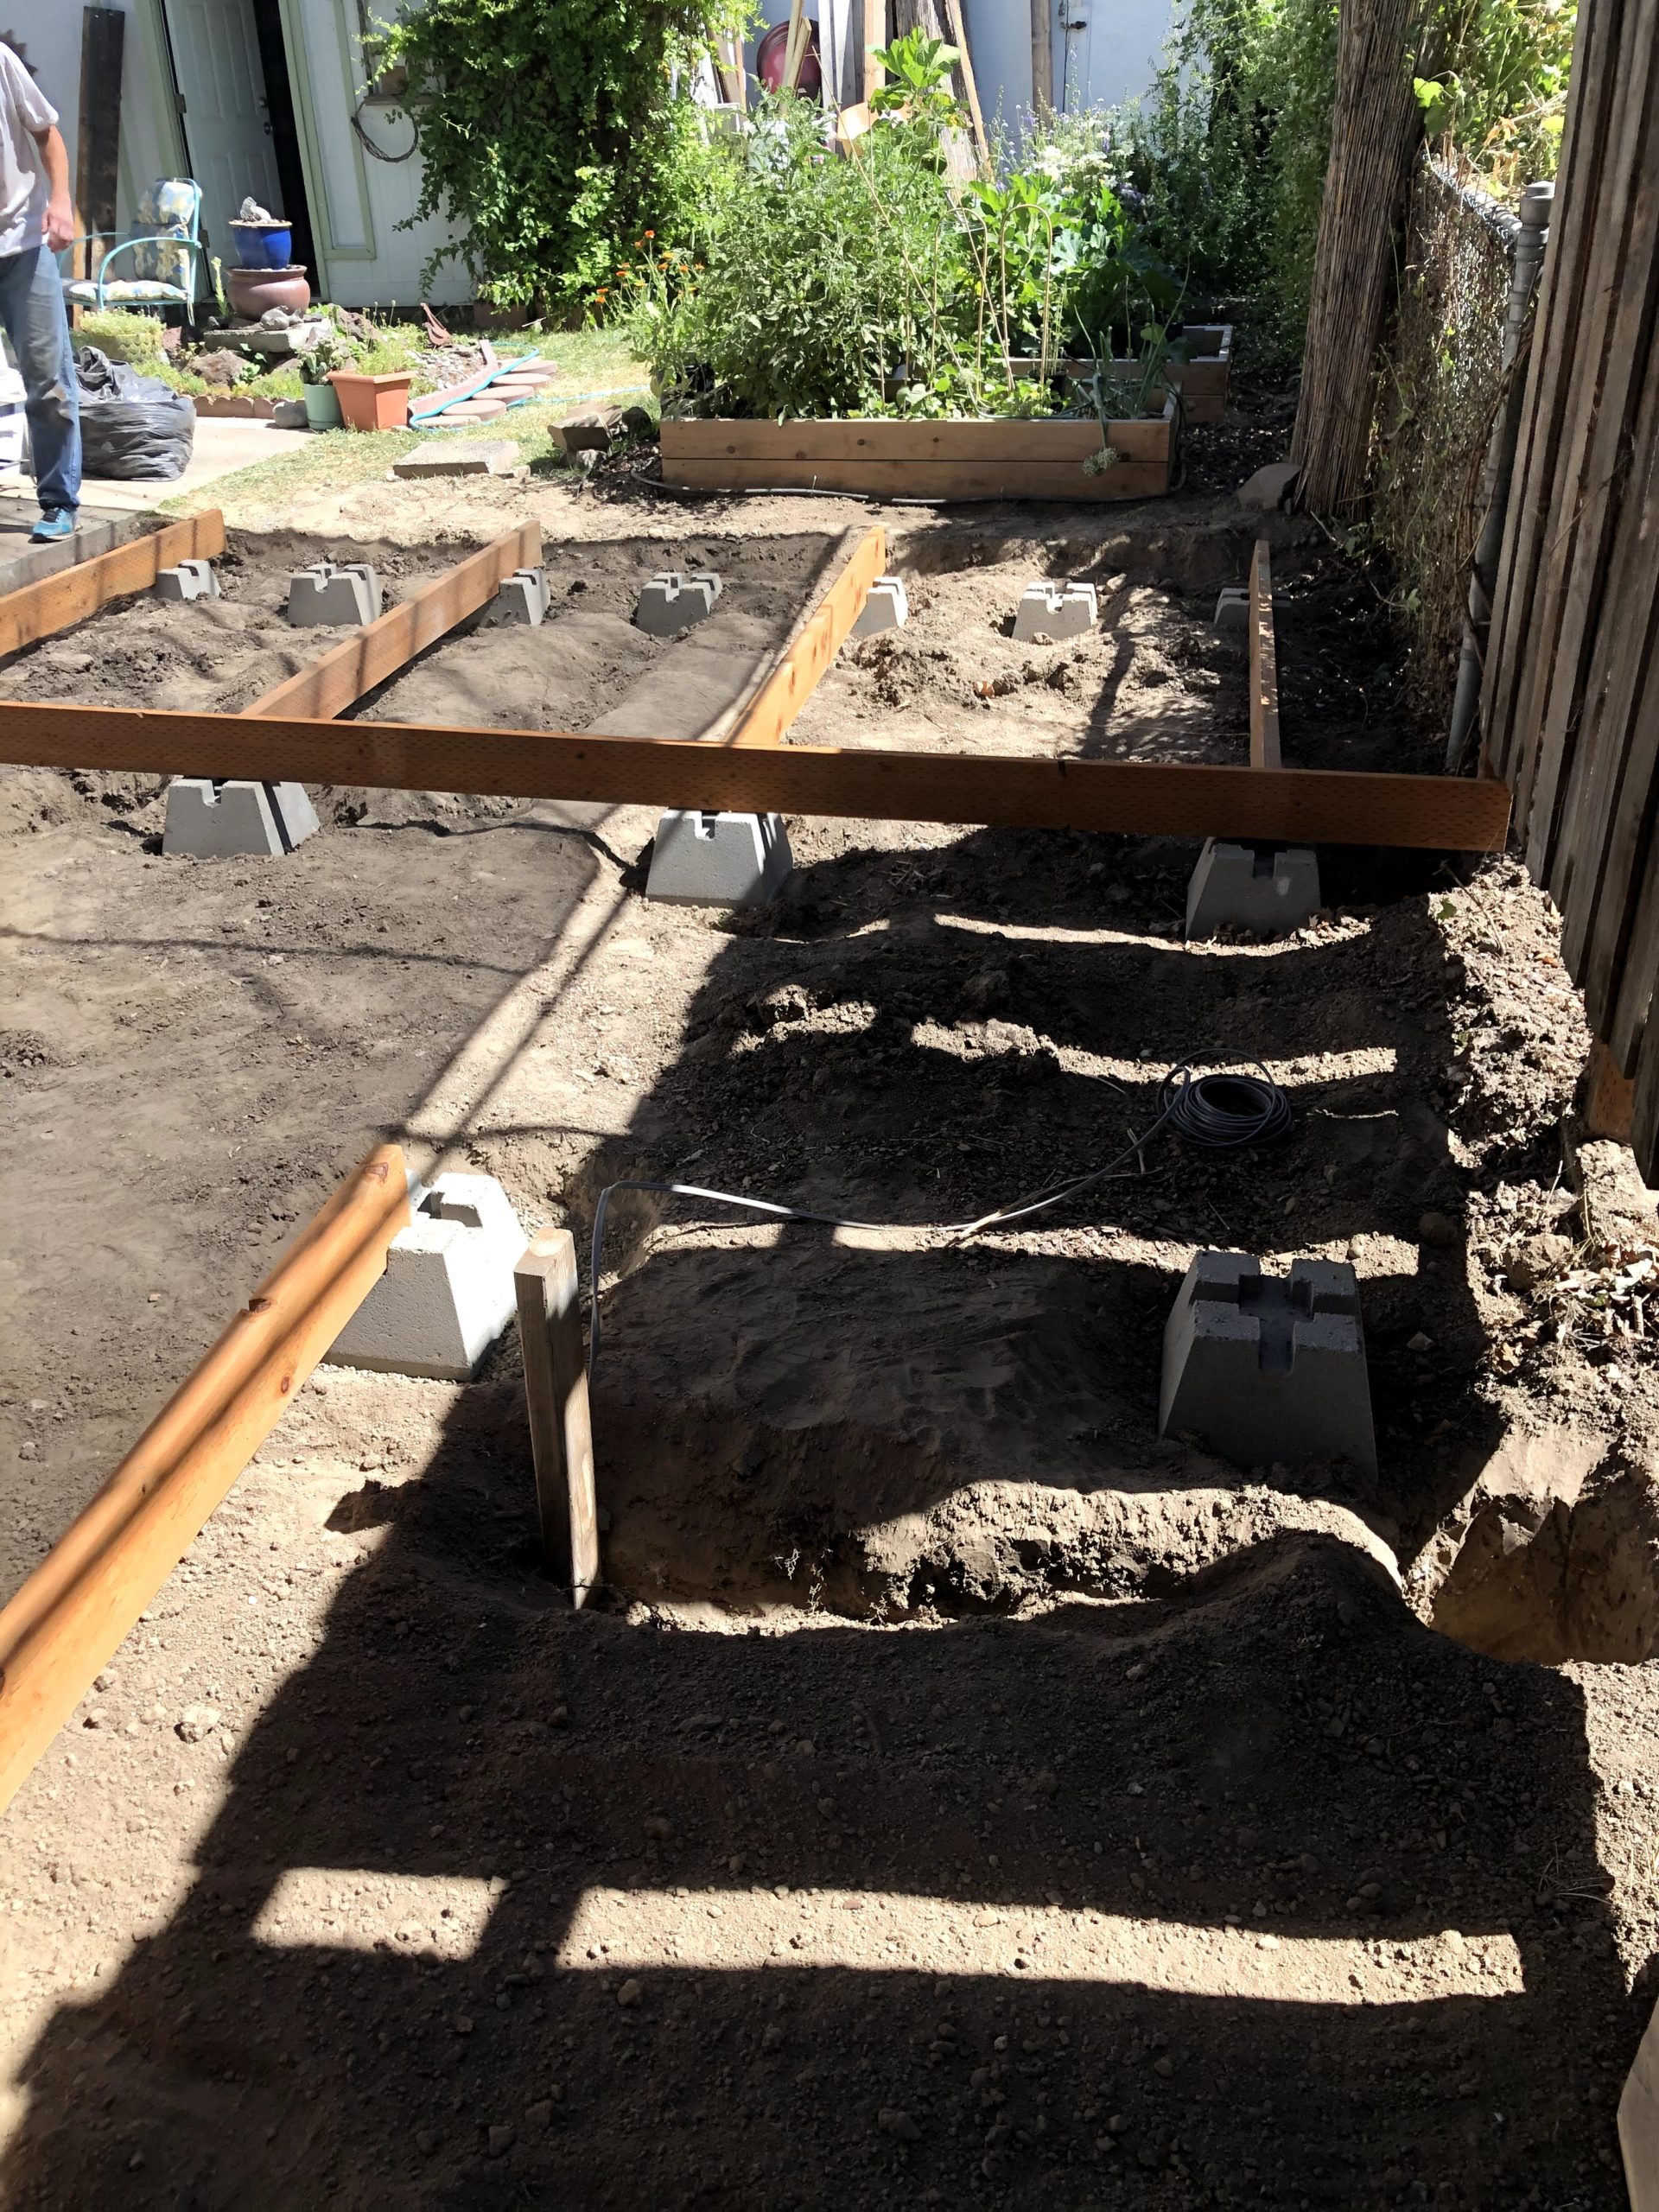
Since the yard slopes down toward the front of the house we expect there to be a step up at the front, where the gate is, and our original plan was to make the back at the same level as the concrete existing patio . We started by using string lines and various line levels to set the corners of the deck and figure out the correct height in the front. We used that as a guide for how to set the deck blocks.
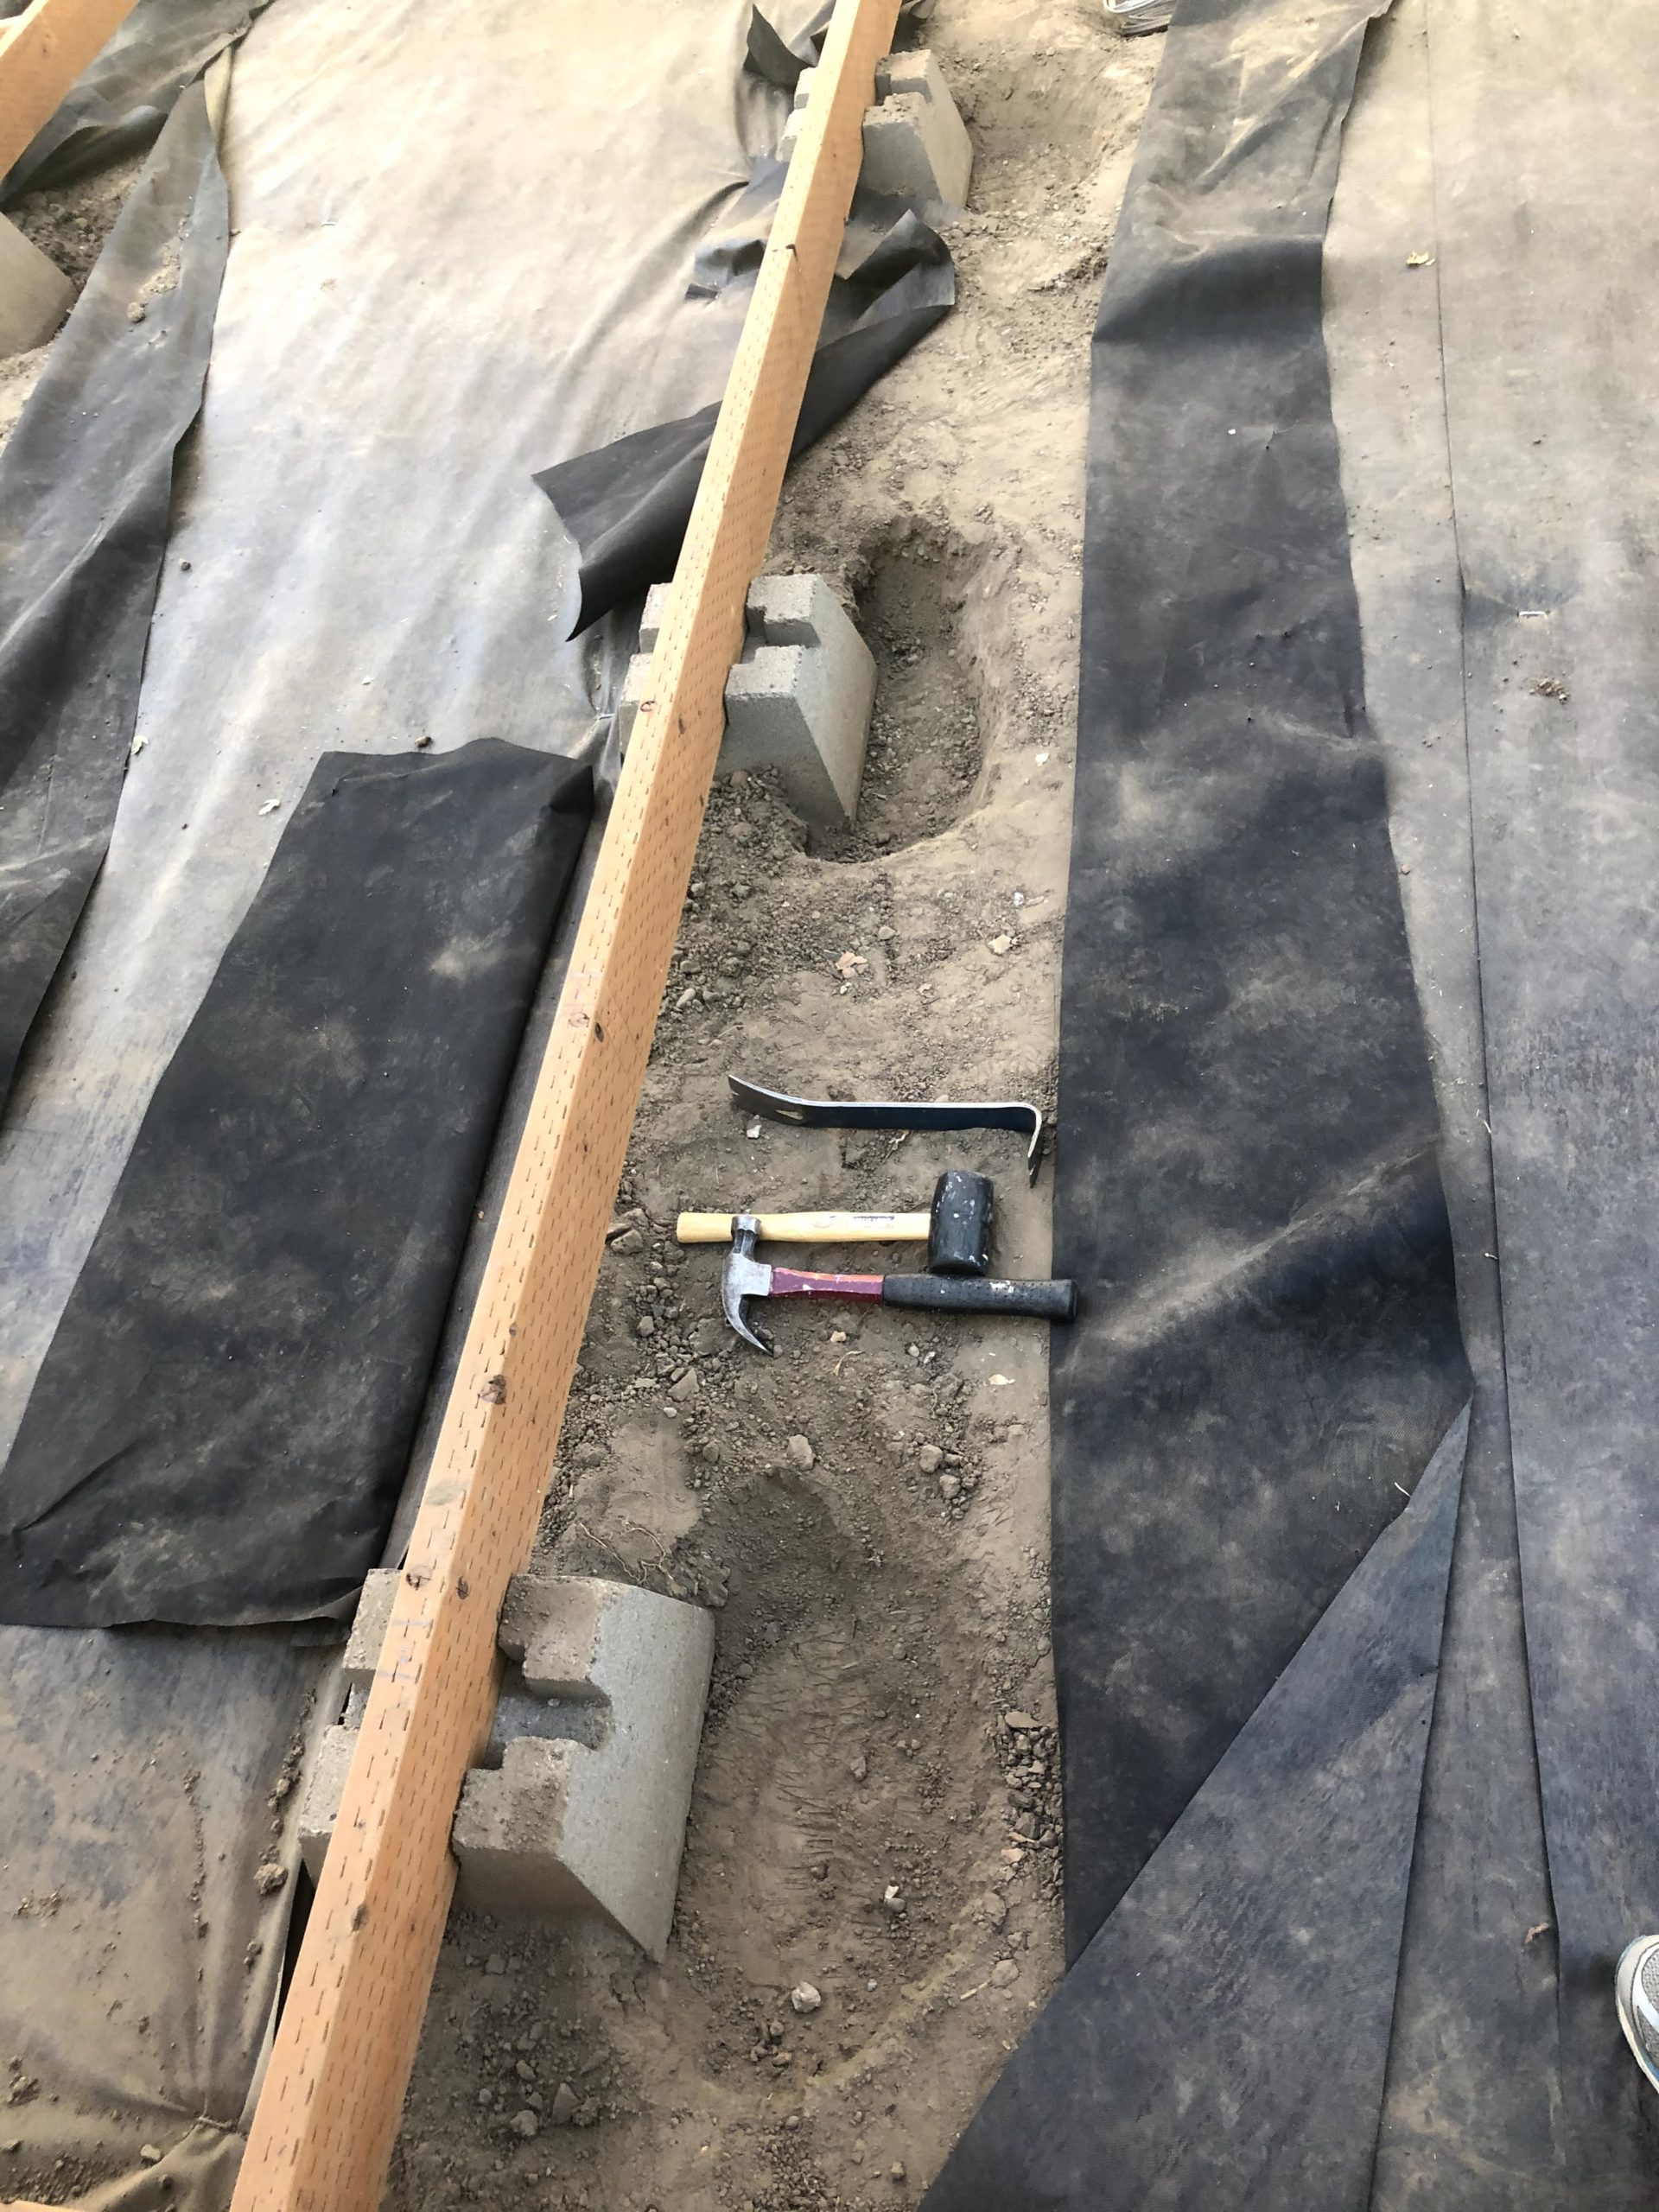
The ground was high enough in the back that we had to dig to set the first row of blocks. We dug and tamped holes for each block, 7 of them, and kept them in line and level using the string. It was harder than we thought and trying to change the level of a deck block while it’s in a hole is not easy. We used some 3/4″- gravel in the base of the holes hoping we could wiggle the blocks to make them go down and add more gravel if they needed to go up. It worked, sort of, but took a long time to set those first 7. We also realized that the ground was high enough in the back that the 2×6 framing would need to be slightly below ground level. We dug trenches where the framing would go and started to set the next row of blocks where the beams would go.
This step took the better part of a day and we were hot, frustrated and not sure how the whole thing was going to work out. We discussed and decided that maybe we didn’t need the level in the back to be the same as the patio. If we allowed for a step up in the back it would make setting the blocks much easier. And we wouldn’t have to dig any trenches for joists. It was time to start over.
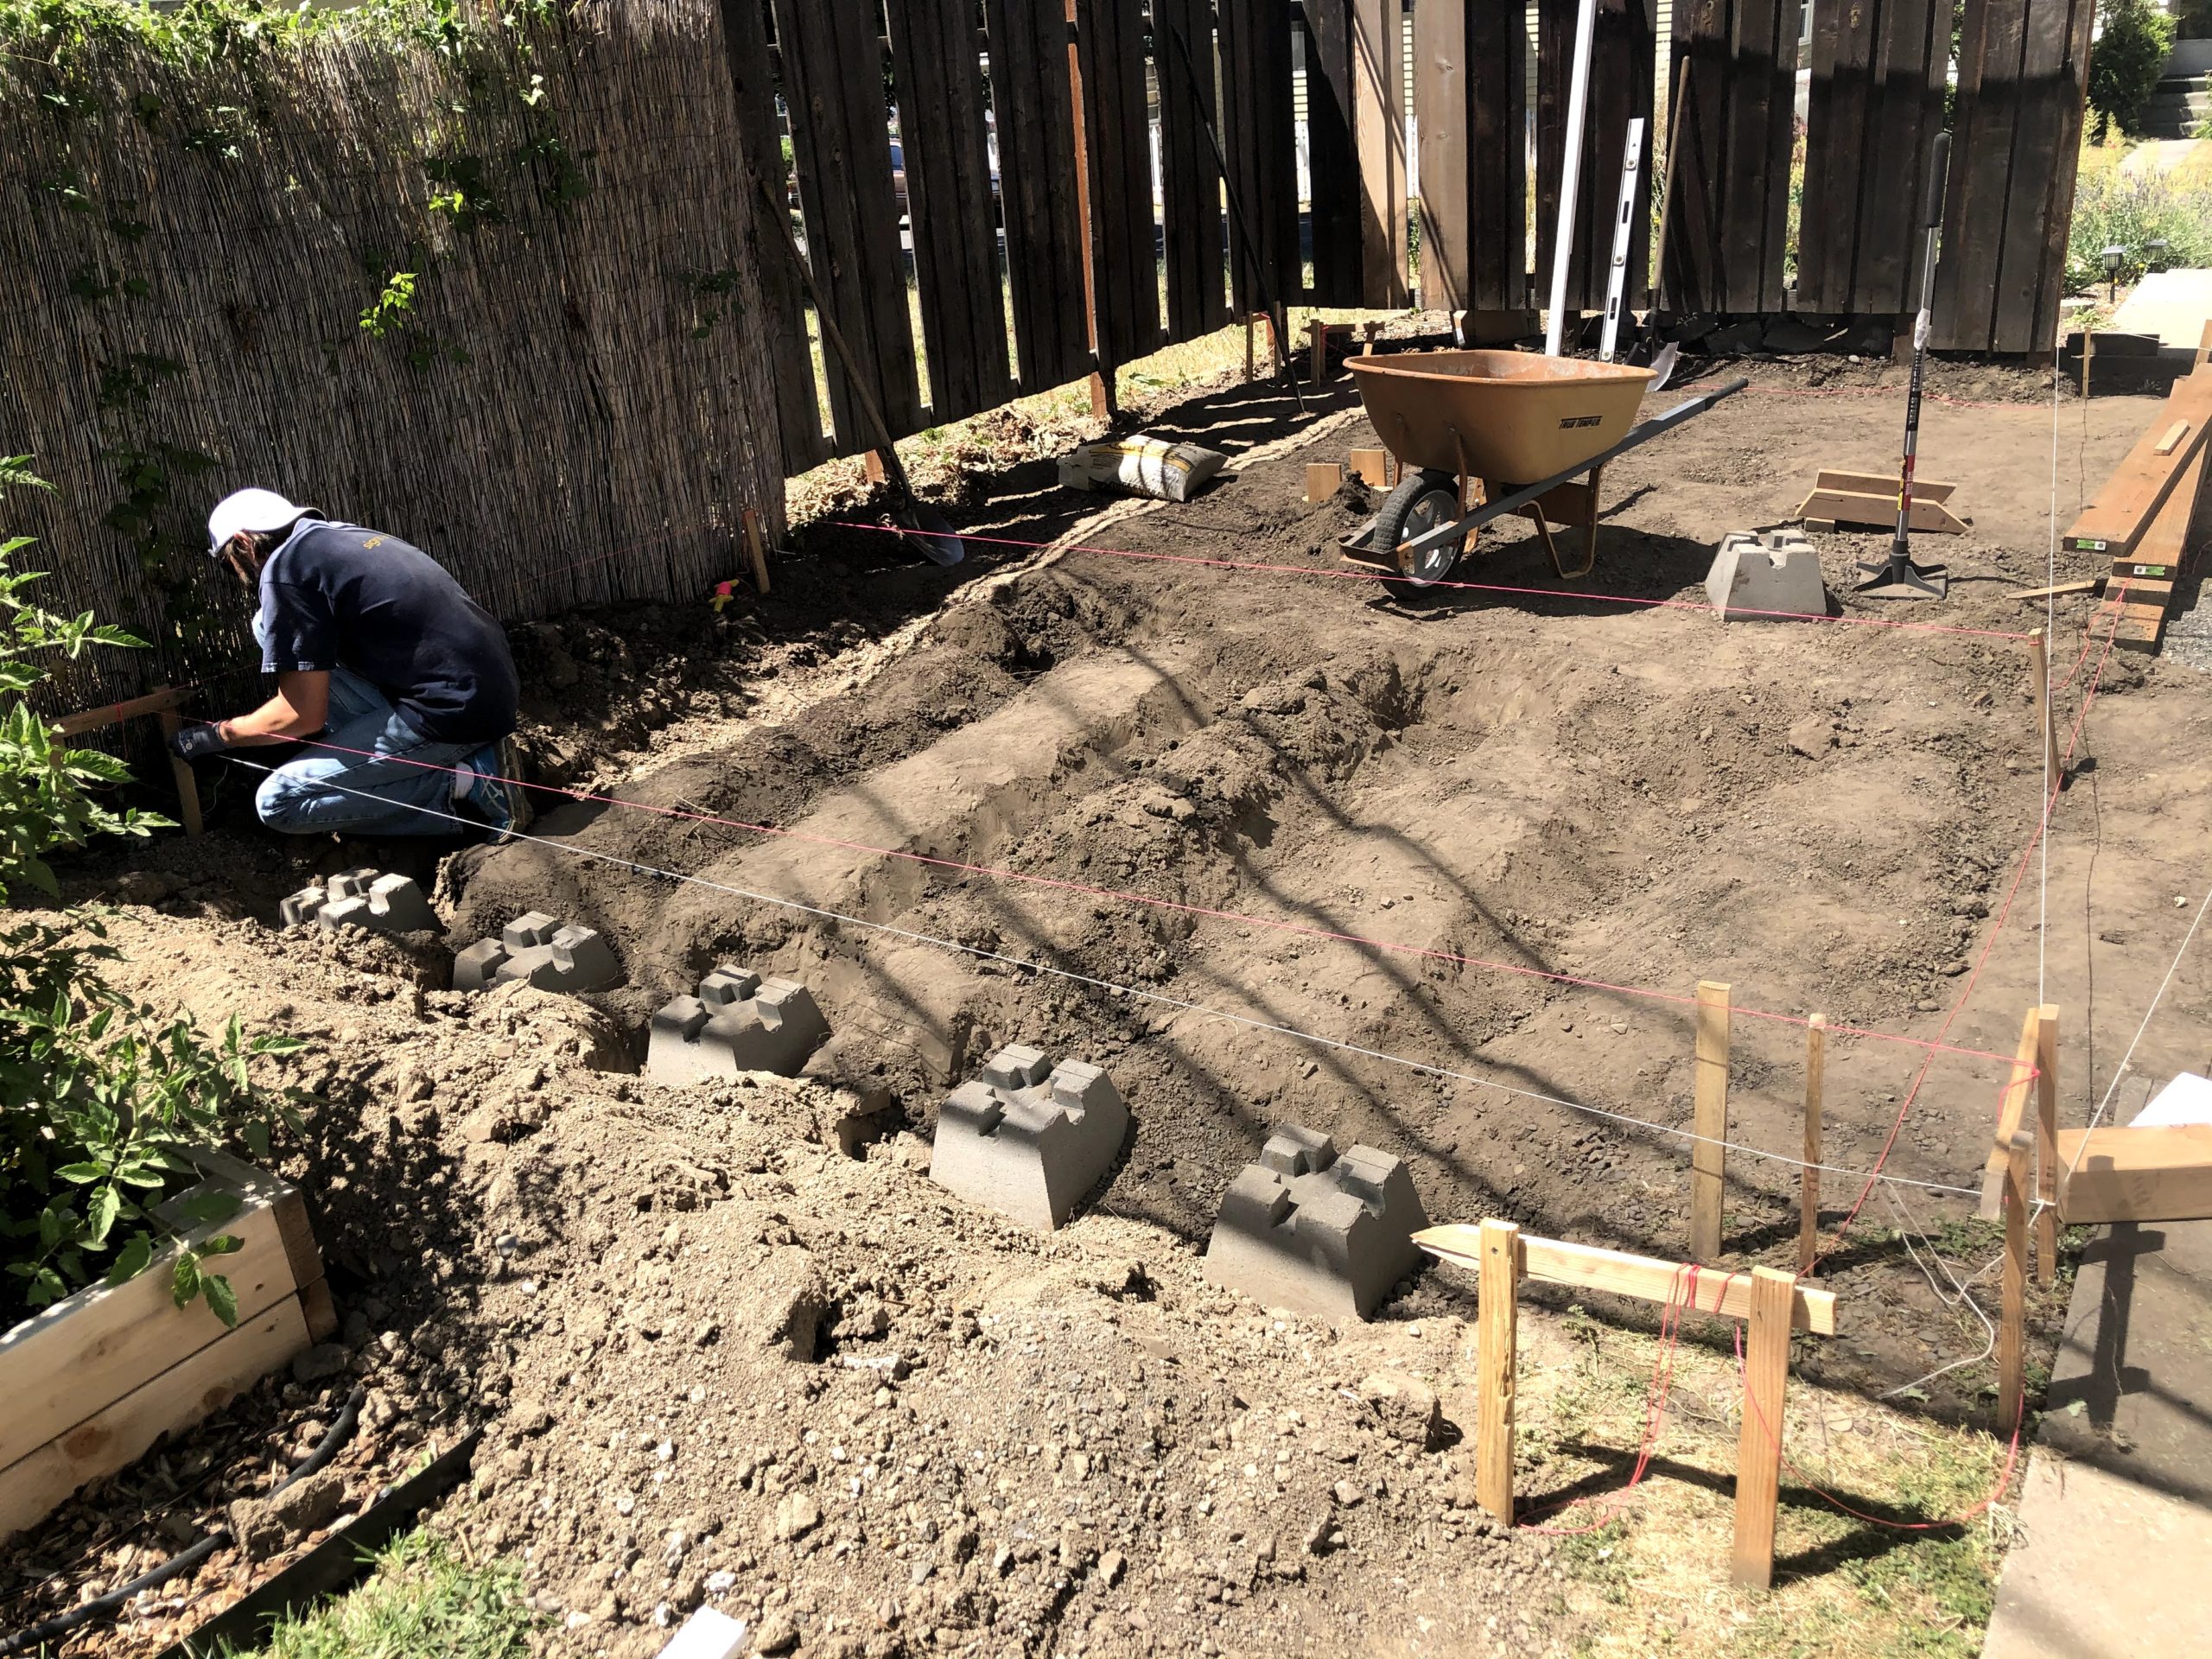
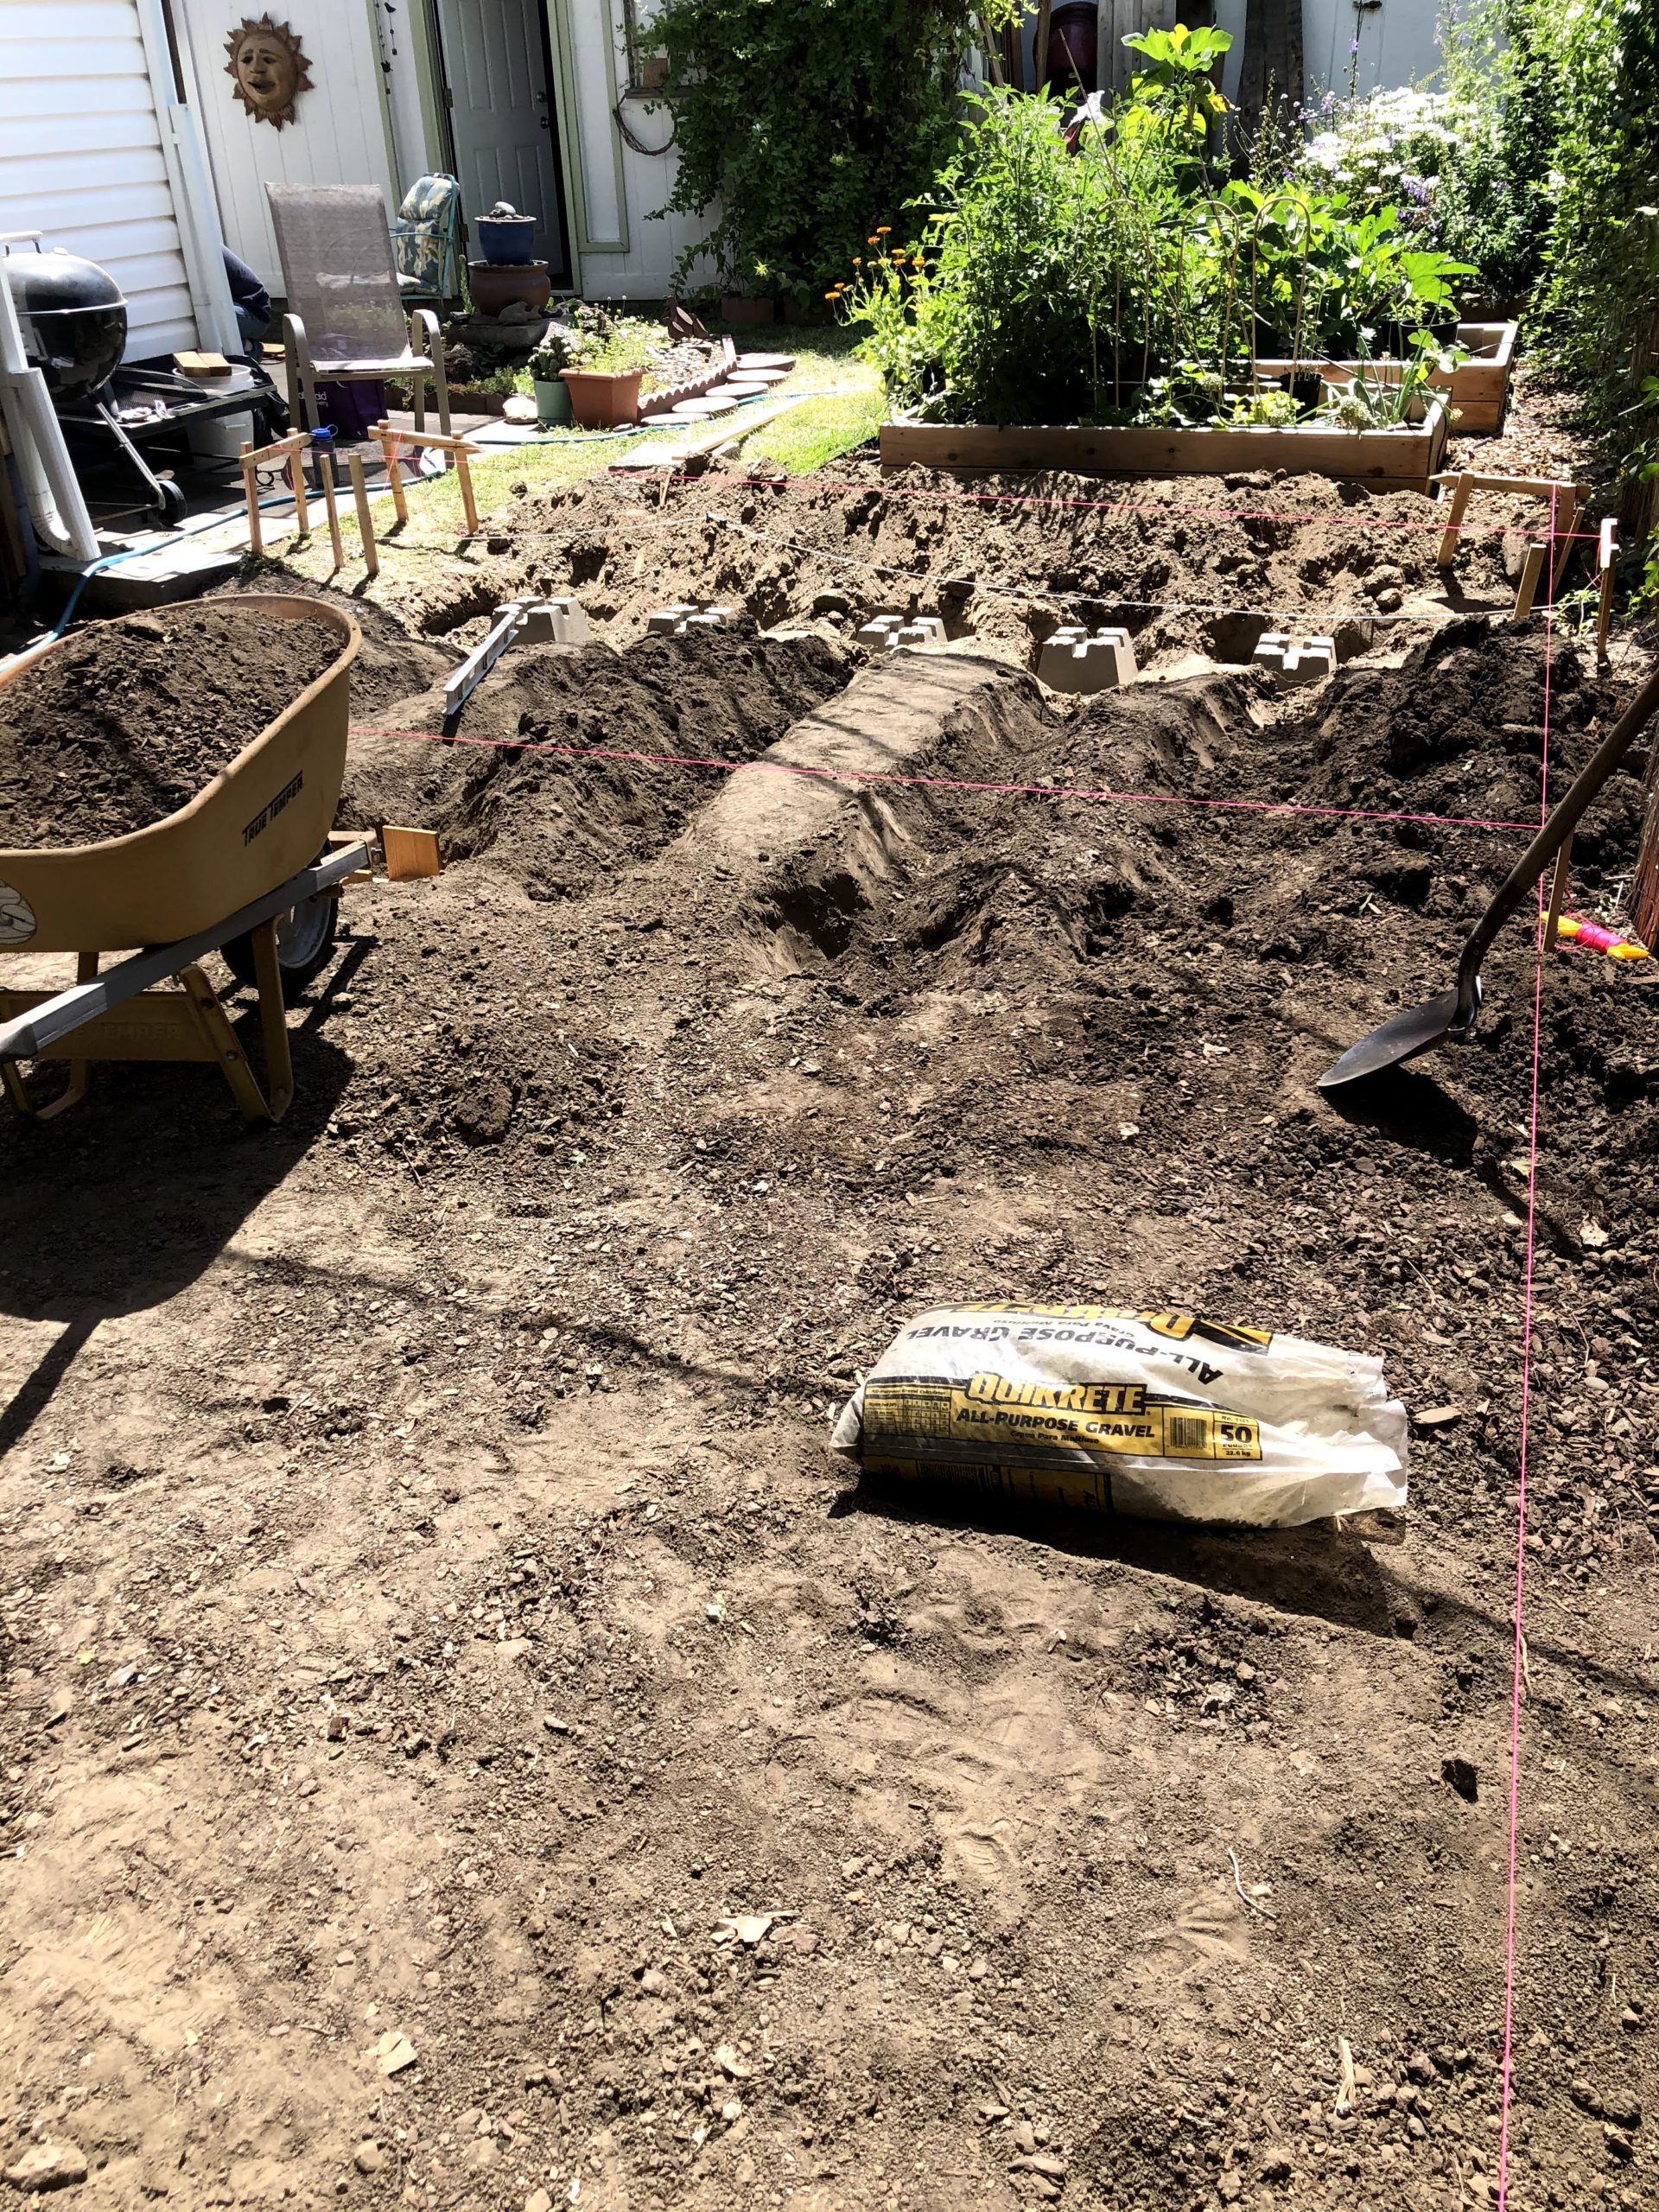
Deck Blocks: Second Attempt
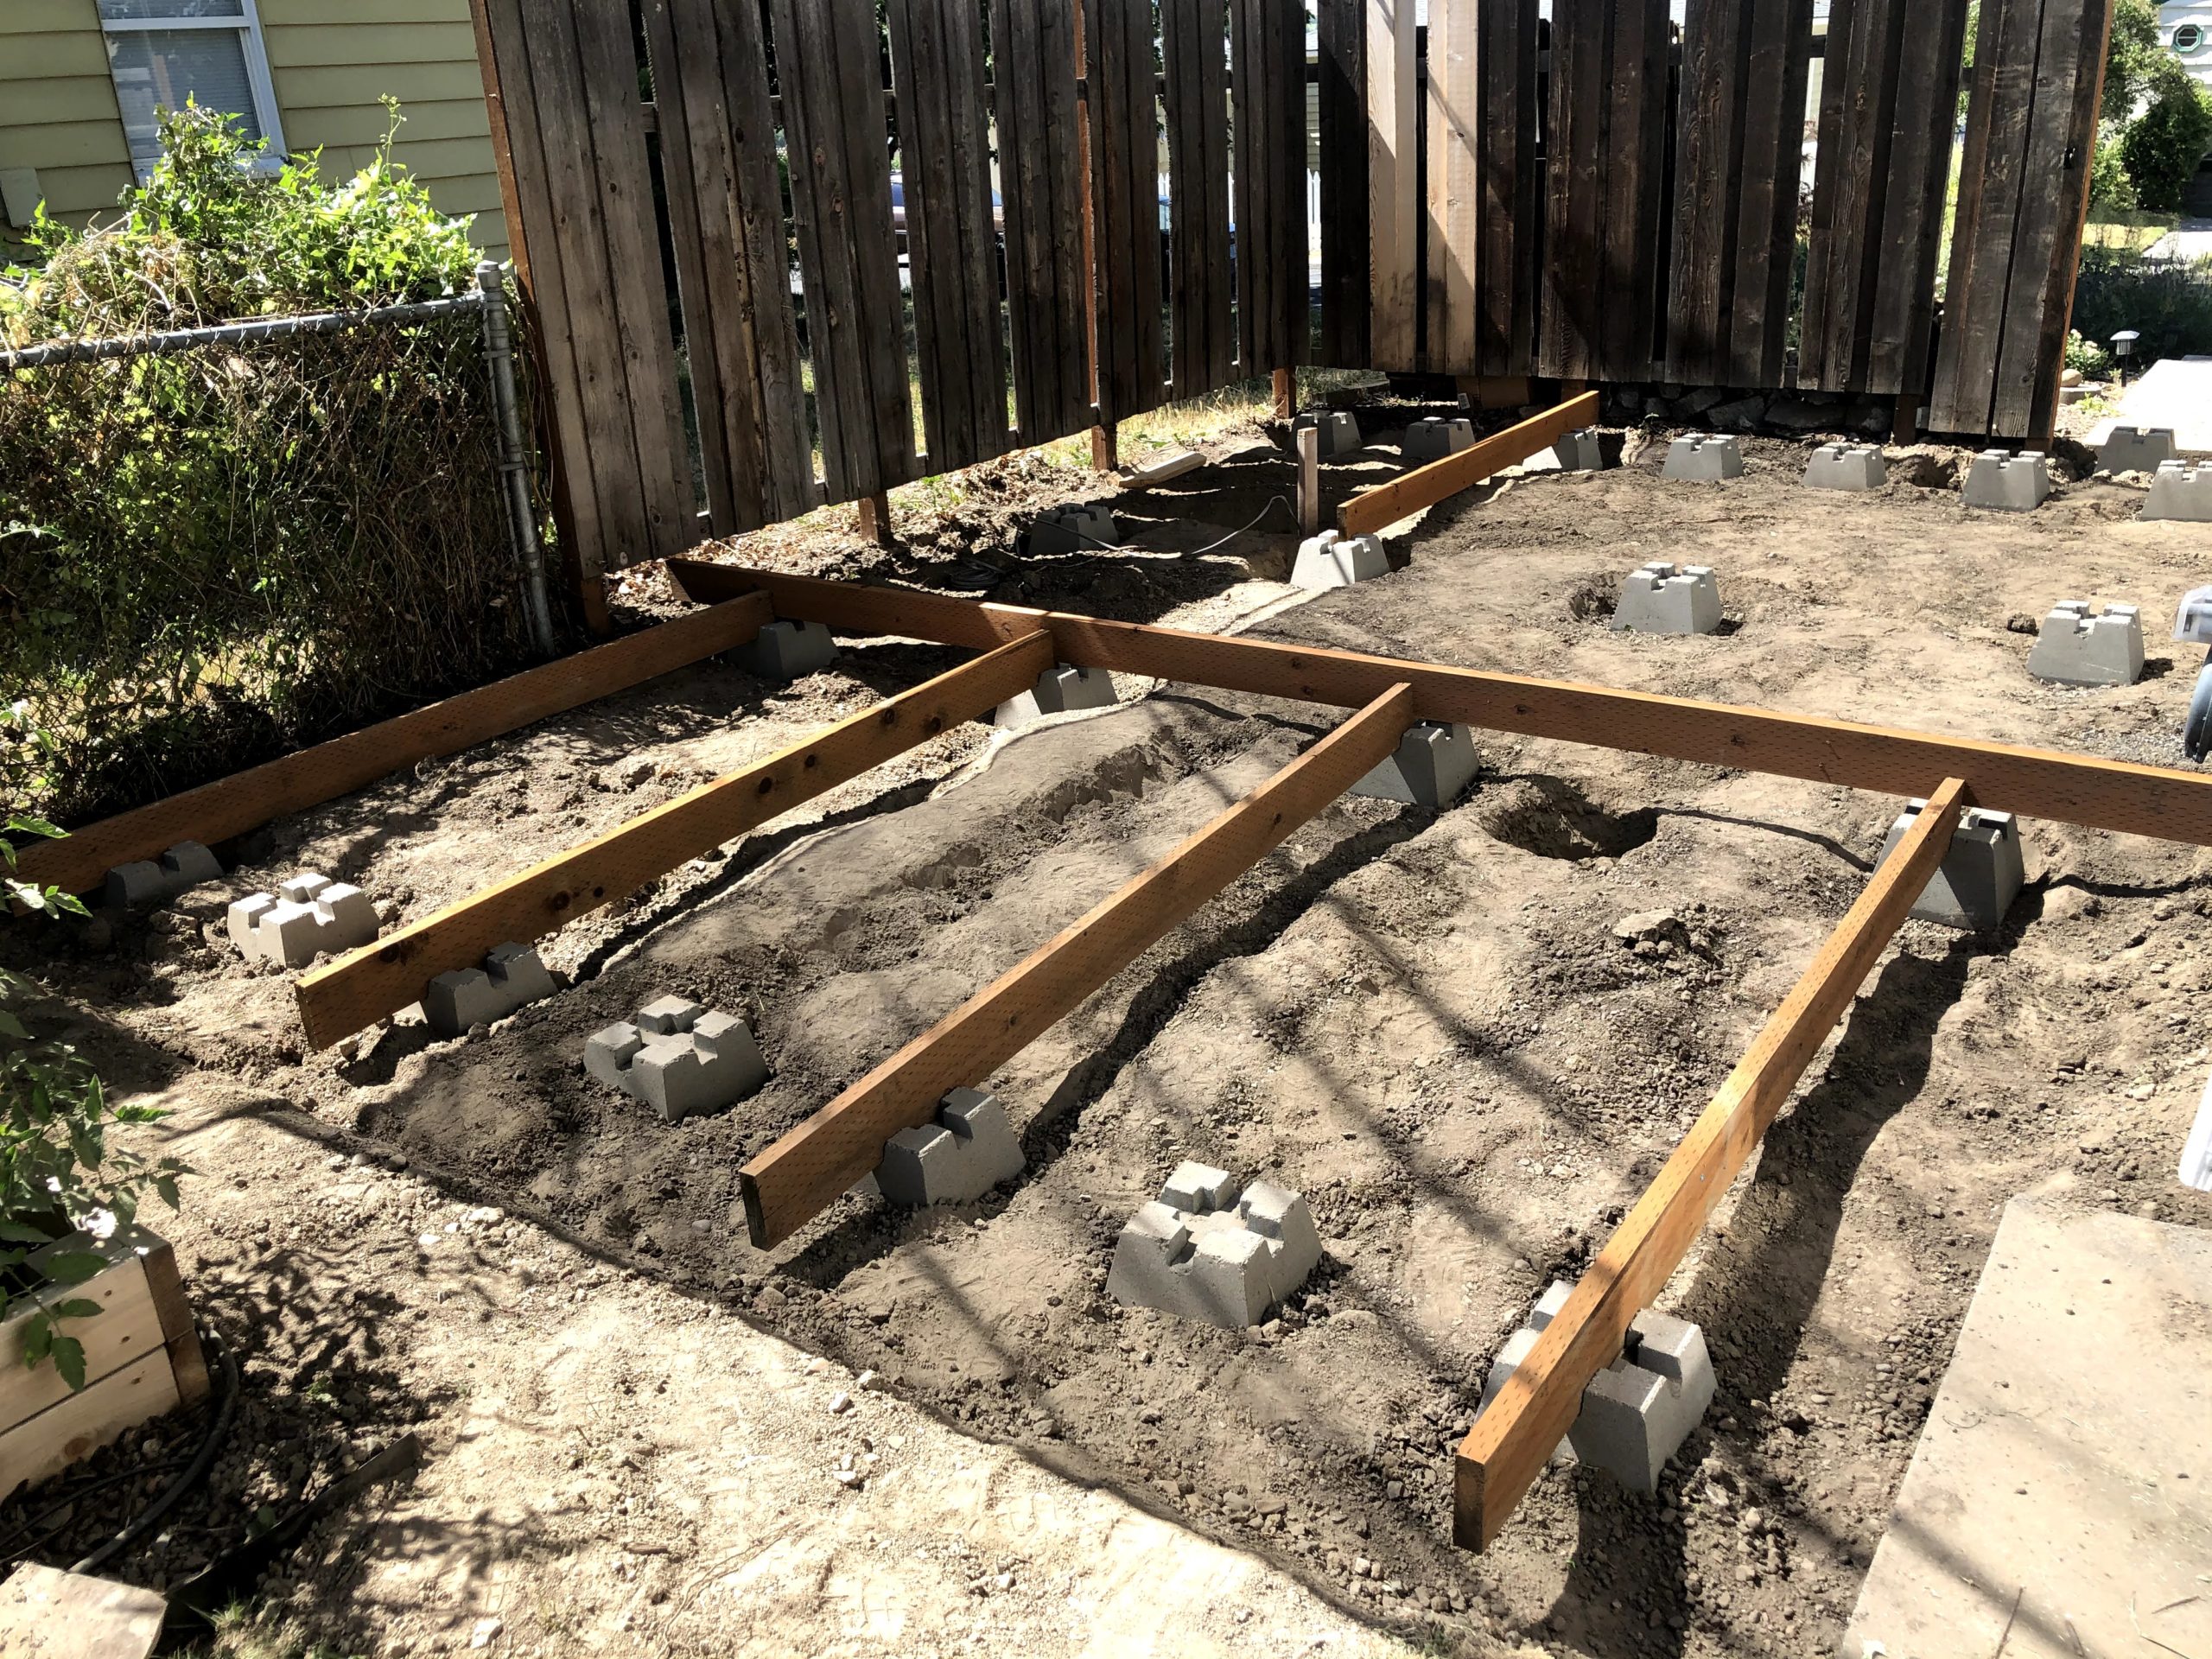
We left our string lines for the corners and raised the back level and adjusted the front to match (using several line levels). We knew it would make for a larger step up in the front and after looking at it decided we would probably need one extra step in the front, and we were both fine with that.
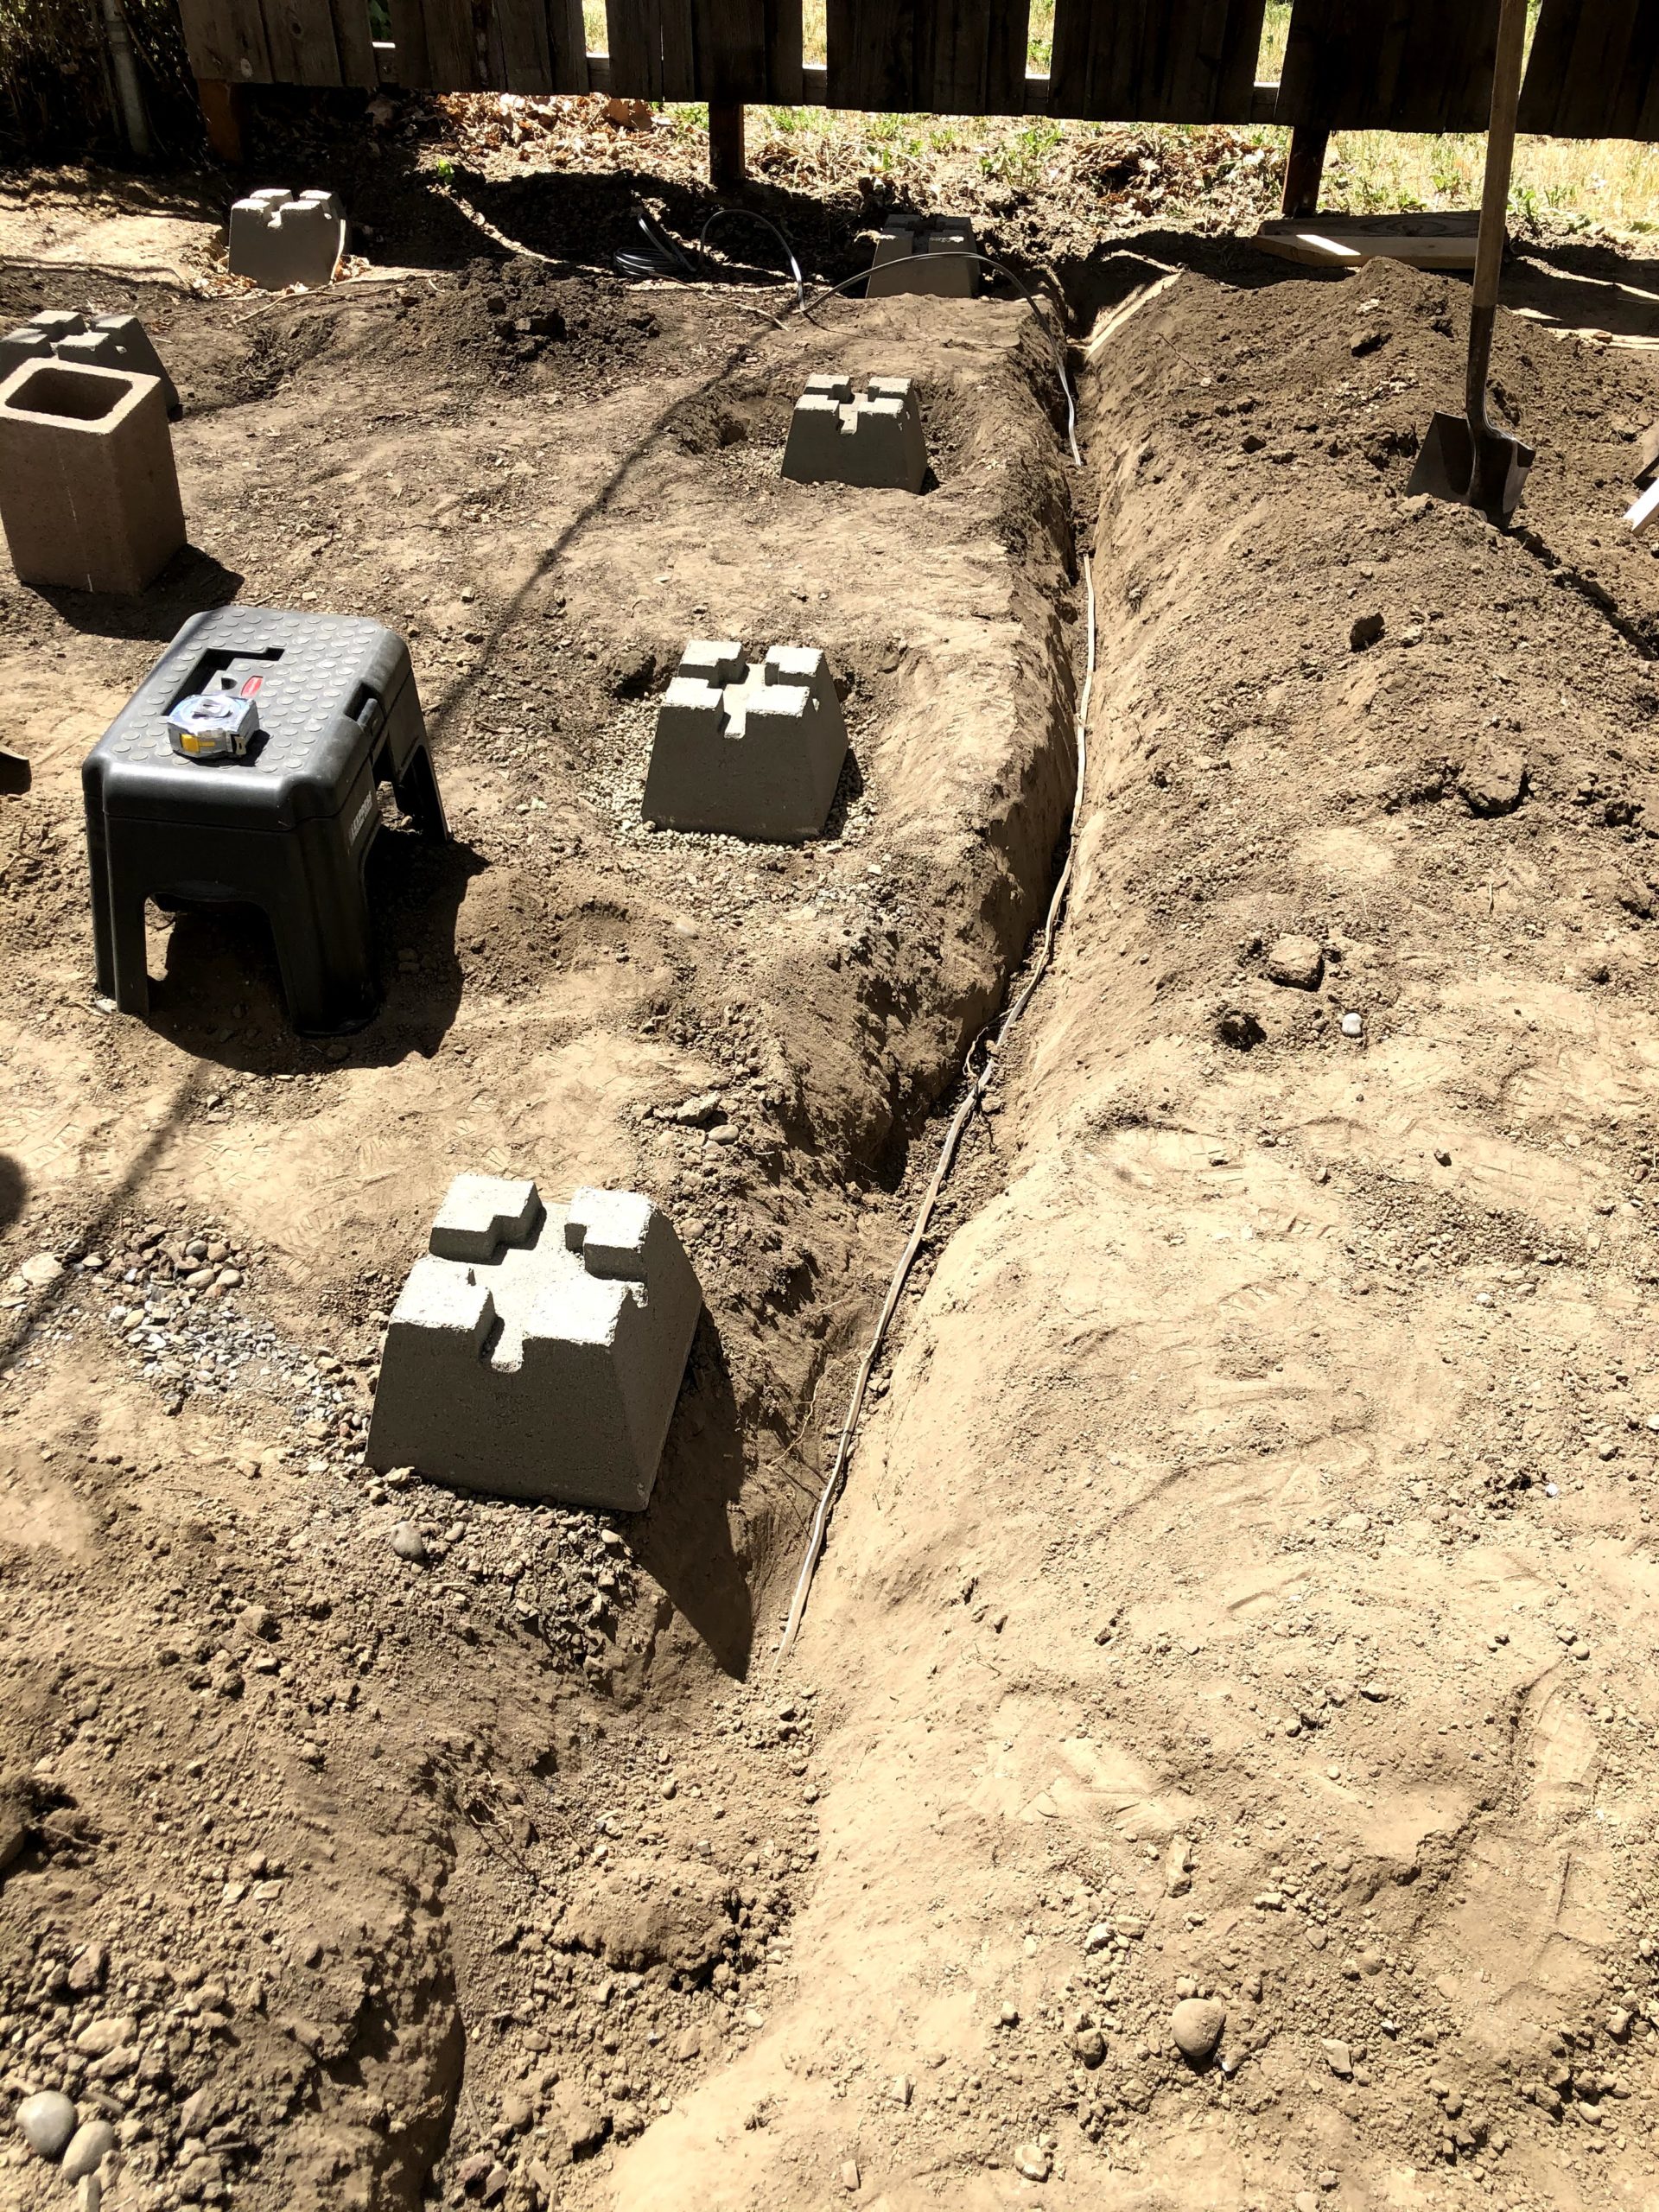
We dug out the original blocks and raised them all up. They still had to sit in a slight depression but the tops of the blocks where the joists sit were high enough off the ground that we could fill in our trenches.
The rest of the process was very slow for each row and each block: dig a depression (if we needed to), tamp the dirt down (we bought a hand tamper for this), add a small bit of gravel then set the block and move it up and down as necessary to match the level of the string line. I’d like to say we did this all in a day, just like in the videos we watched, but it took several days to get it right. We were only working partial days because it was getting hot in the afternoons but it was a slow process.

Electrical
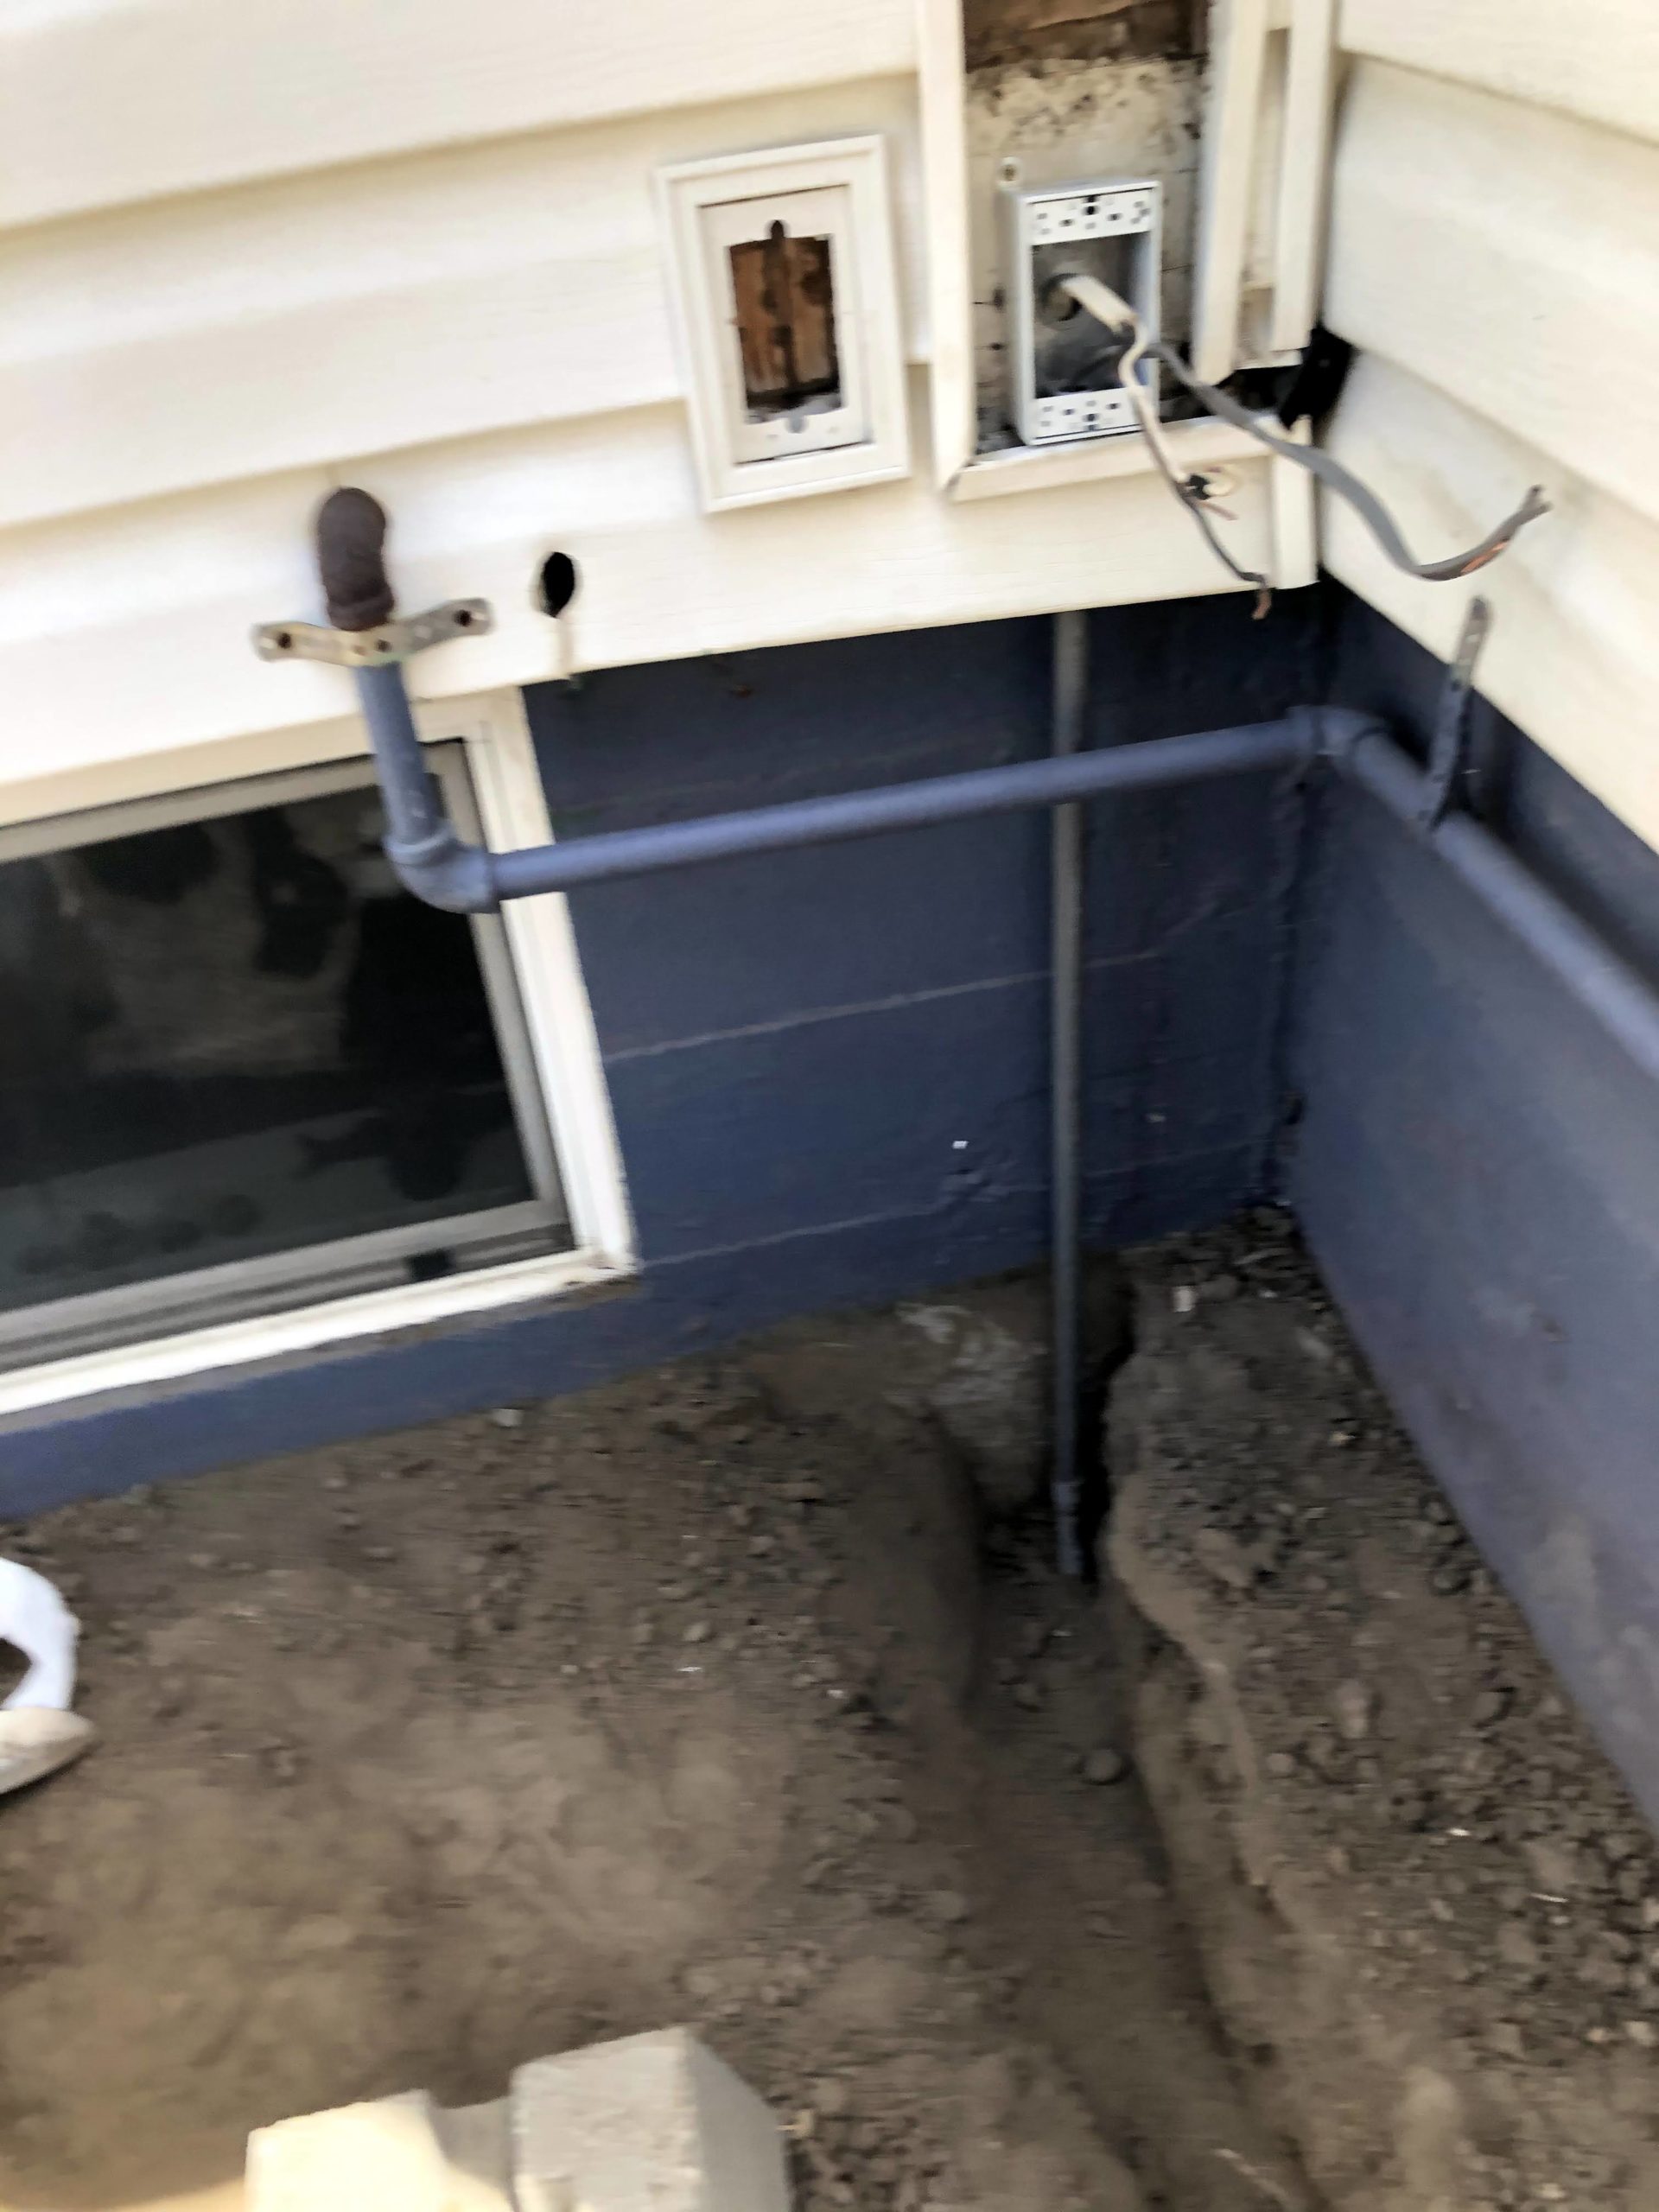
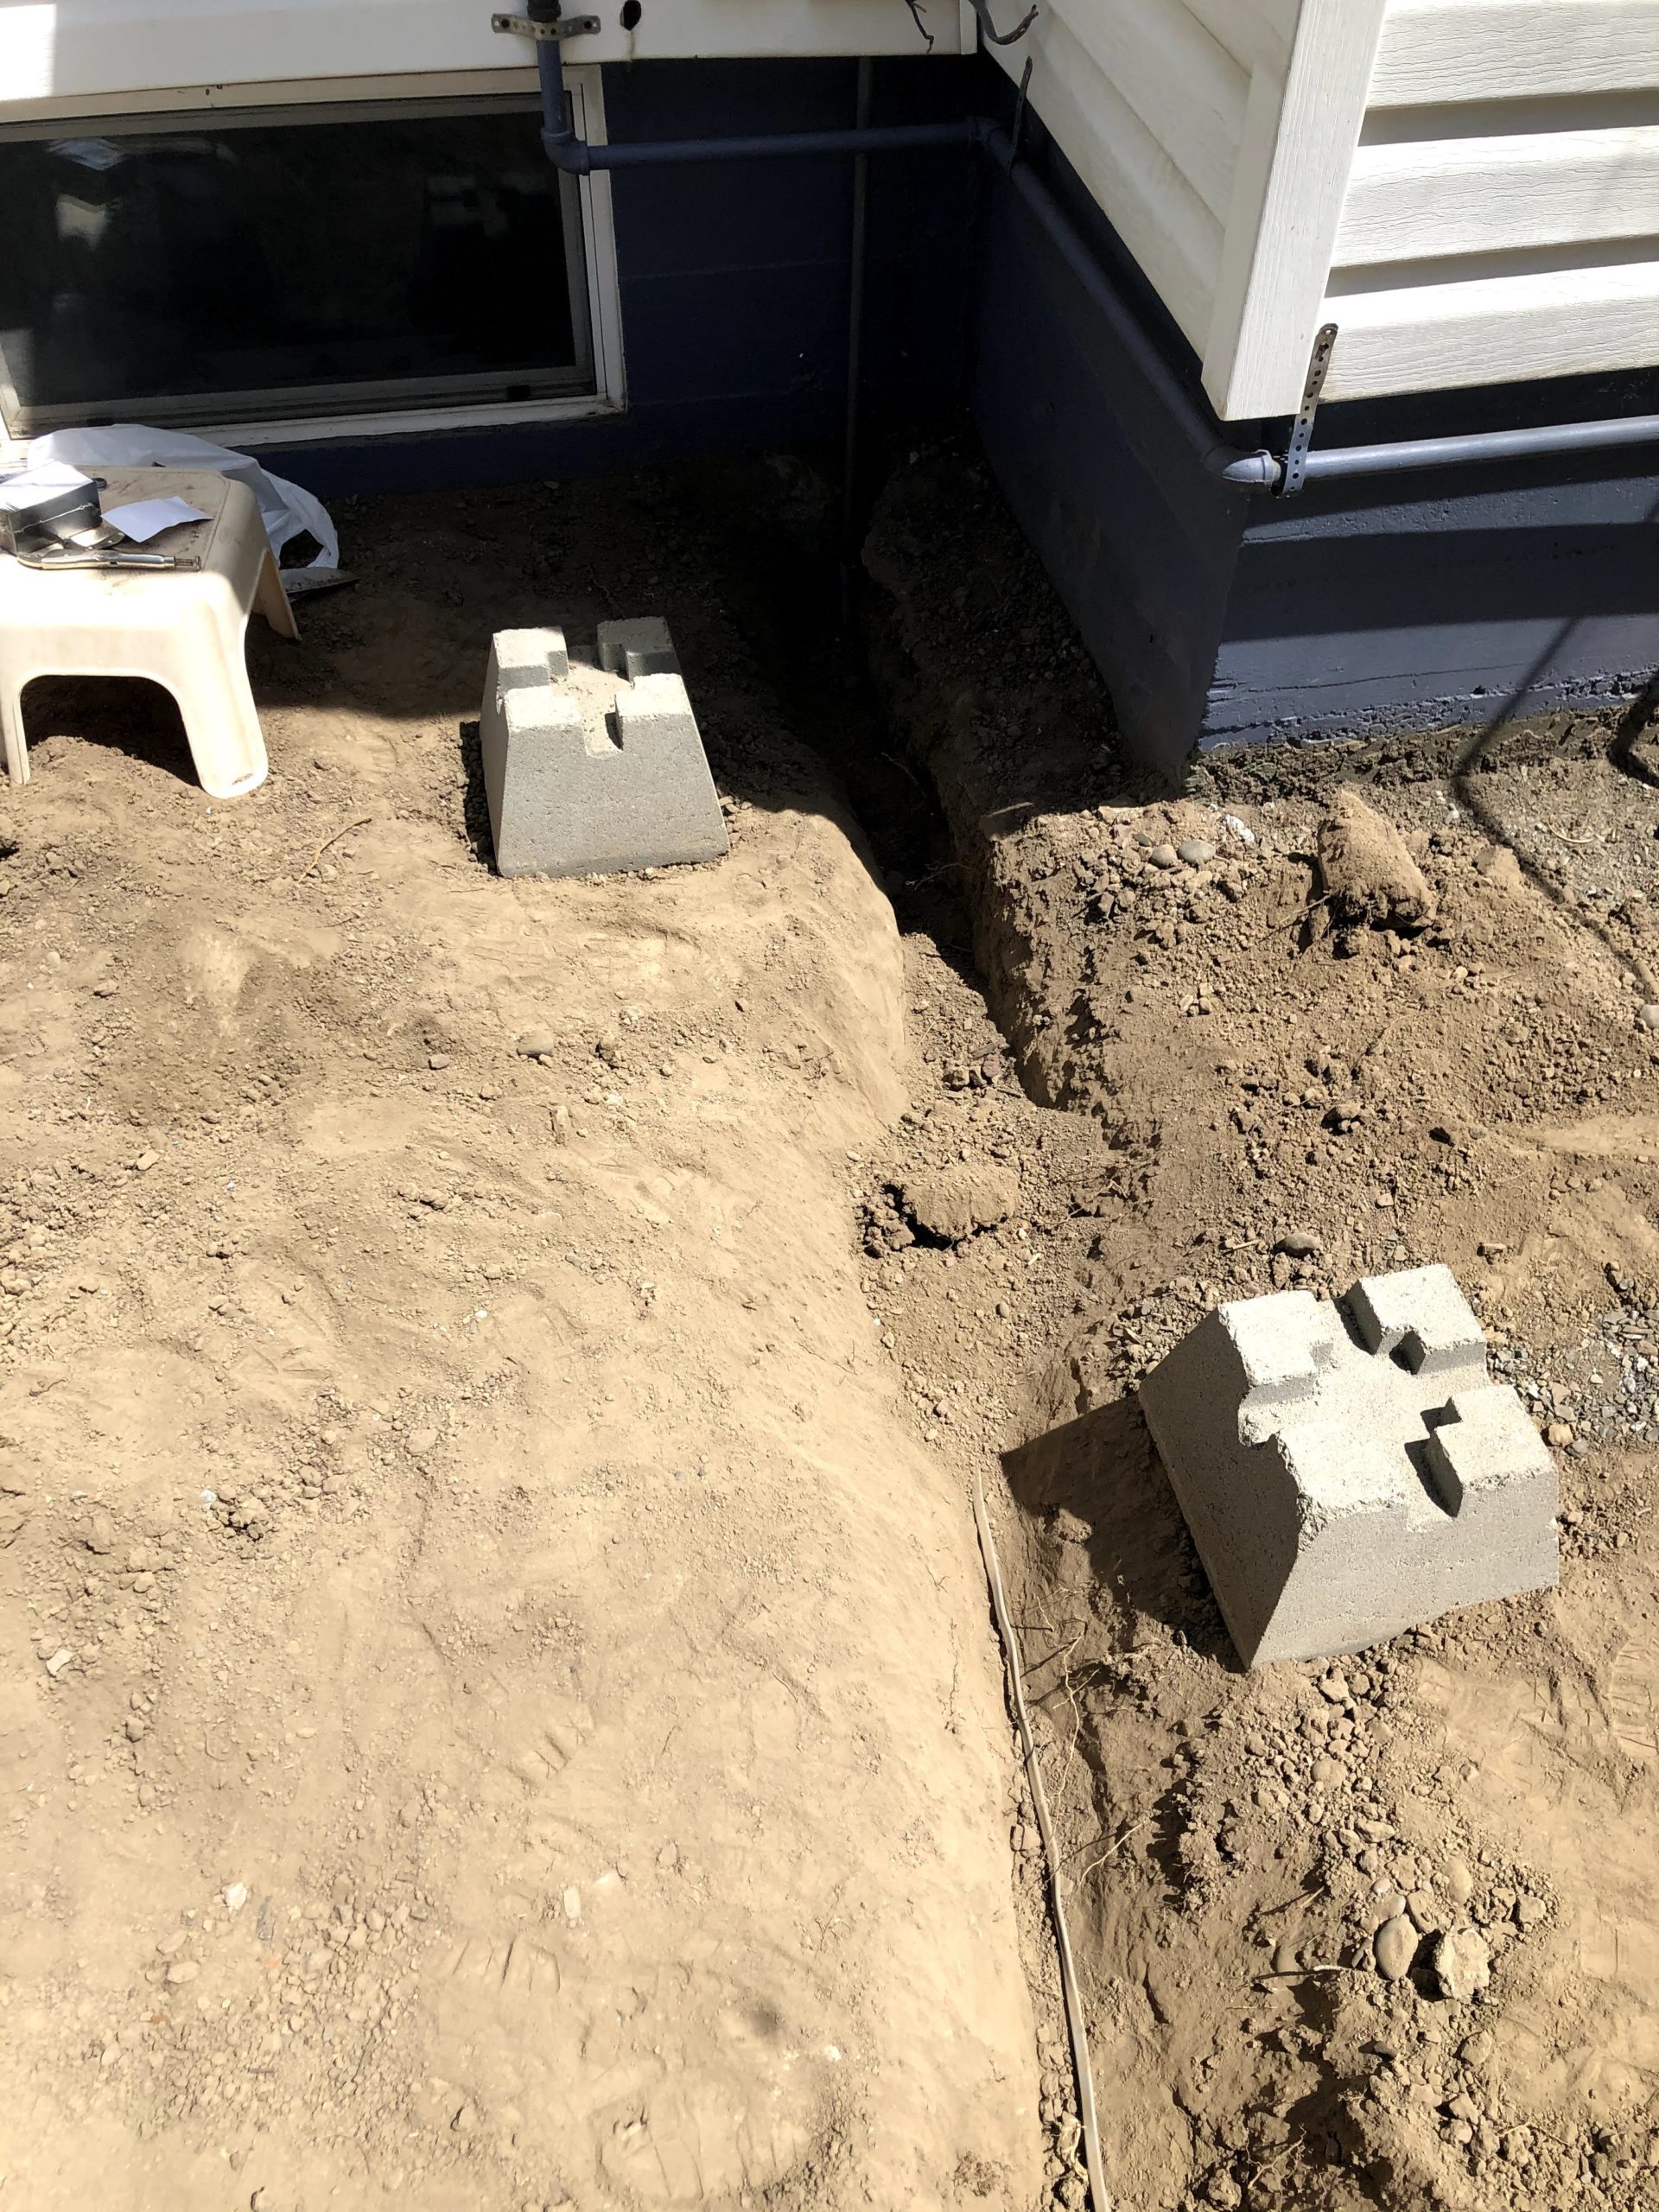
We had decided that we wanted to have power inside the shelter for plugging in devices and lighting. Before we started putting in framing we ran a 1/2″ PVC conduit from our old A/C connection on the side of the house with a 90 degree sweep to about 12″ deep. Inside that we ran 12/2 direct-burial Romex wire so we don’t have to run conduit the whole way. Since we aren’t ready to set the posts we stopped short of where it will run up the side of the middle post in the back.
Framing
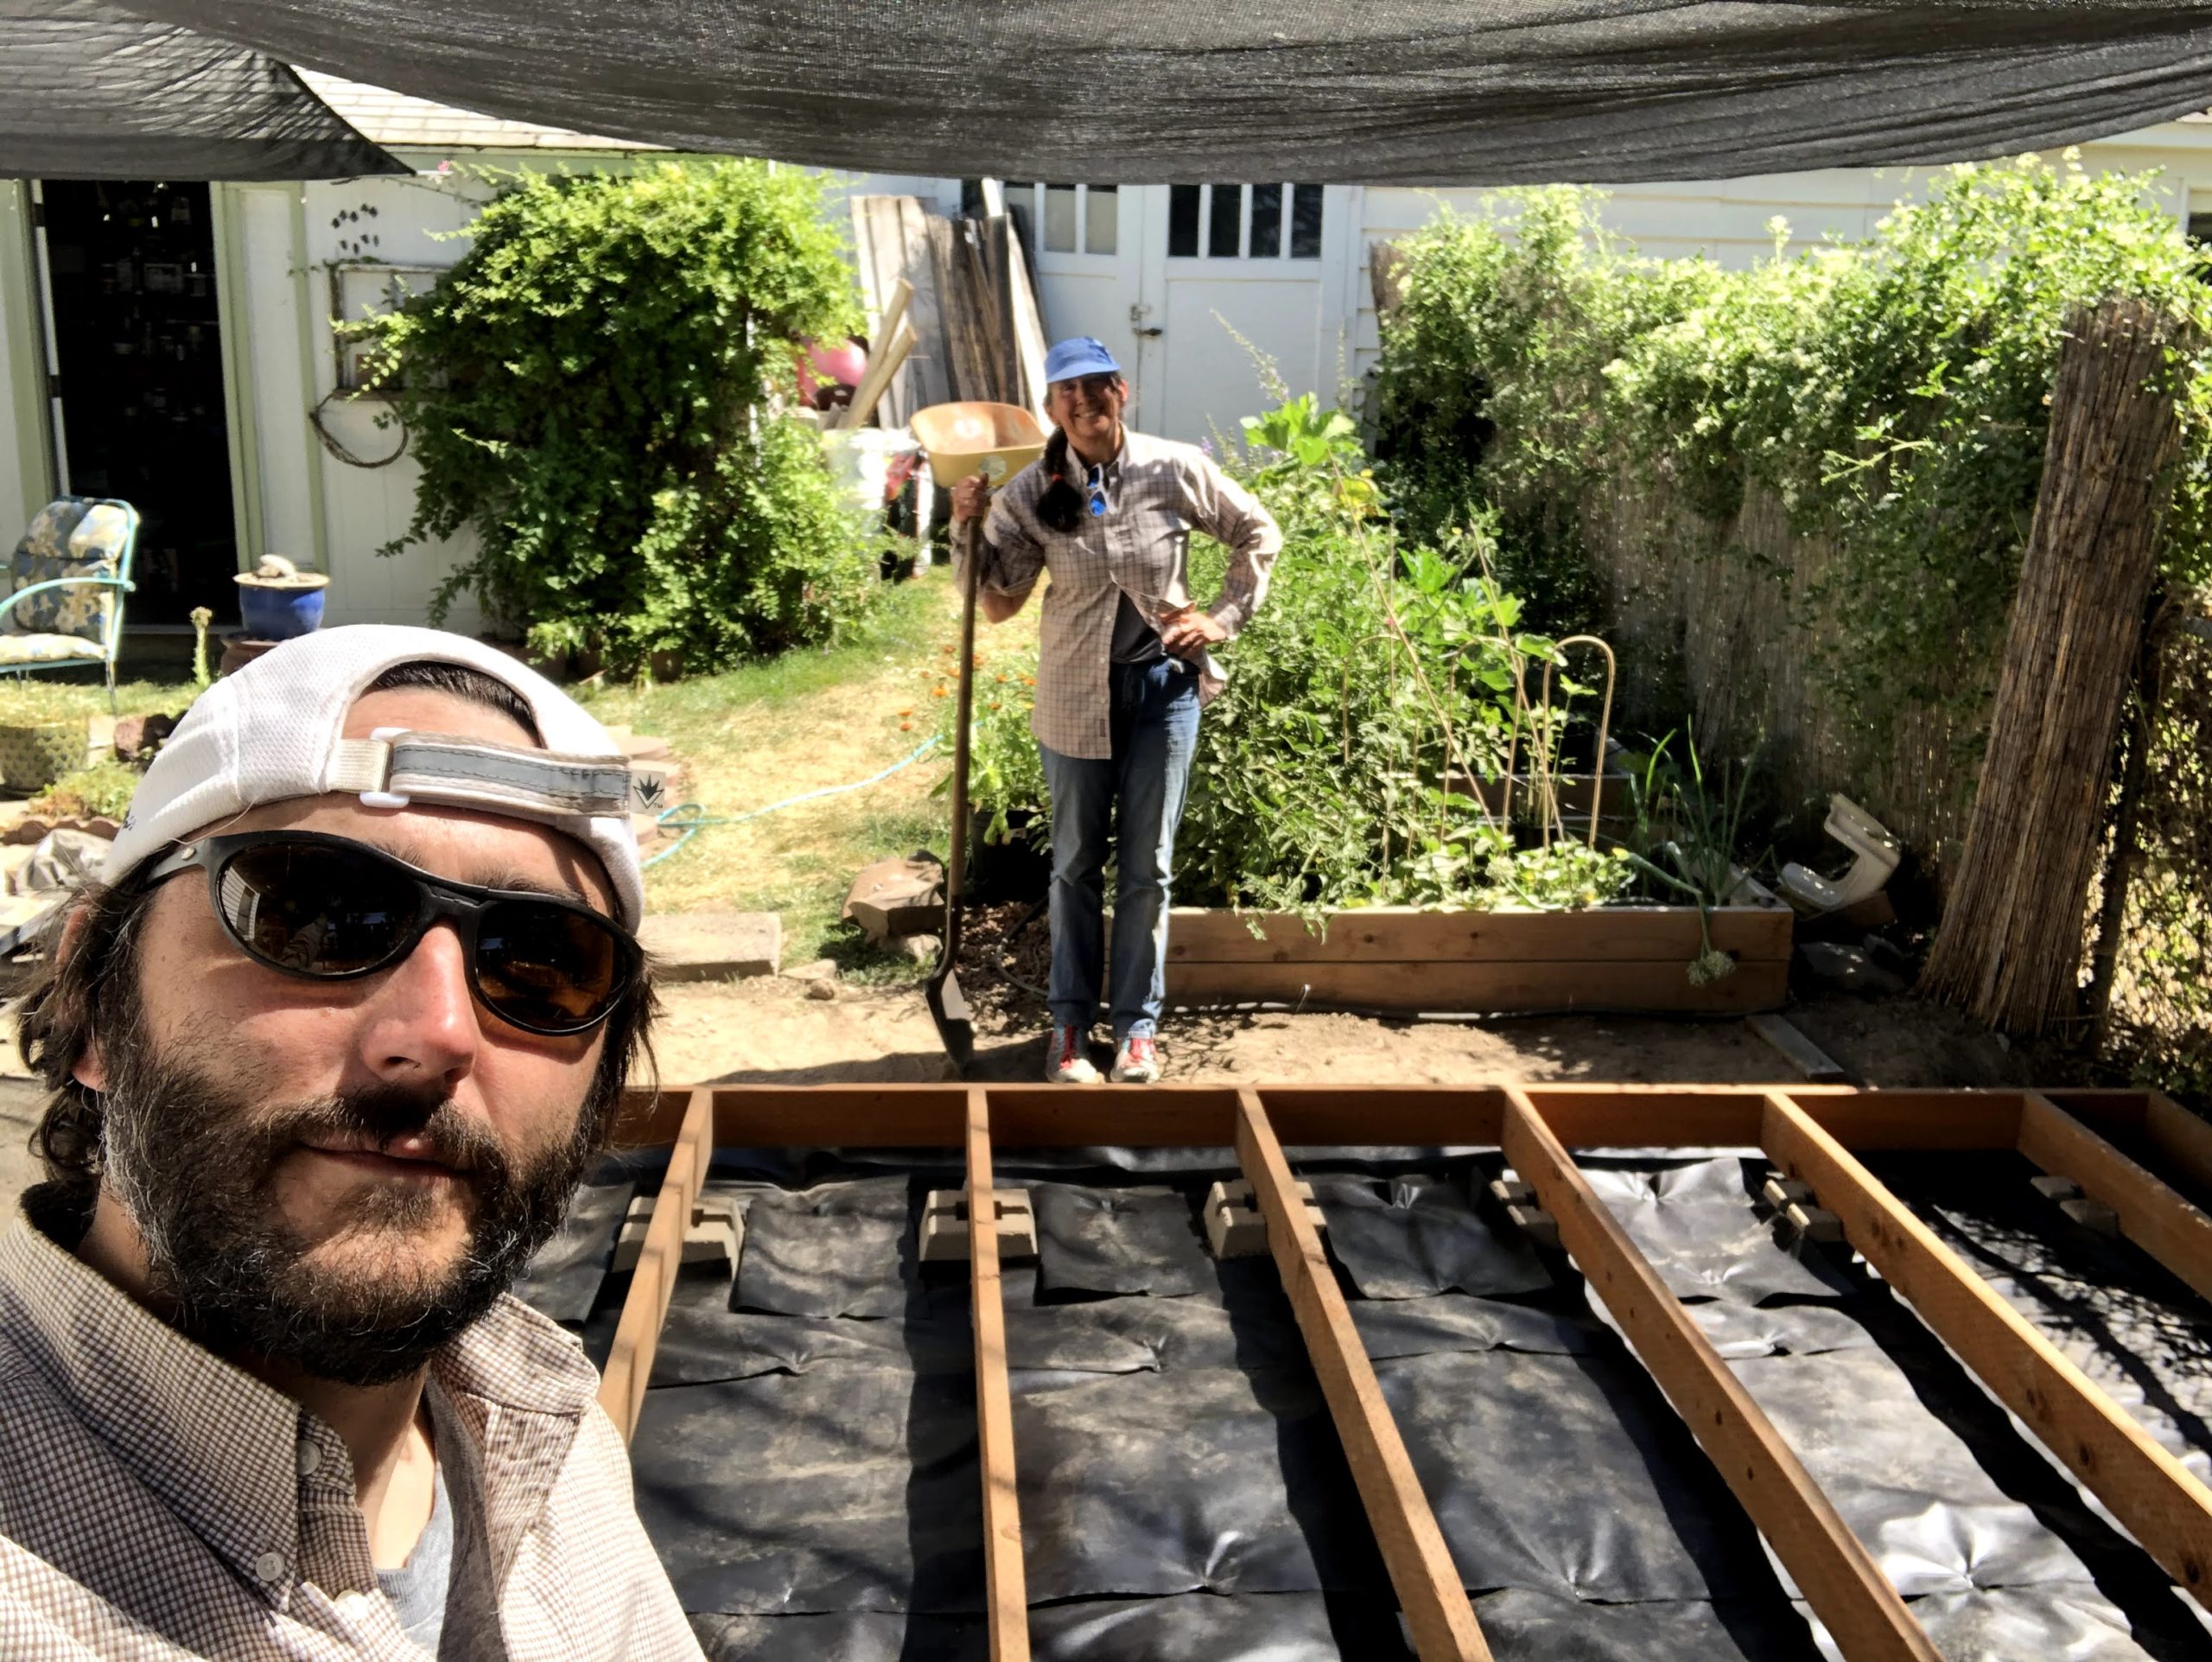
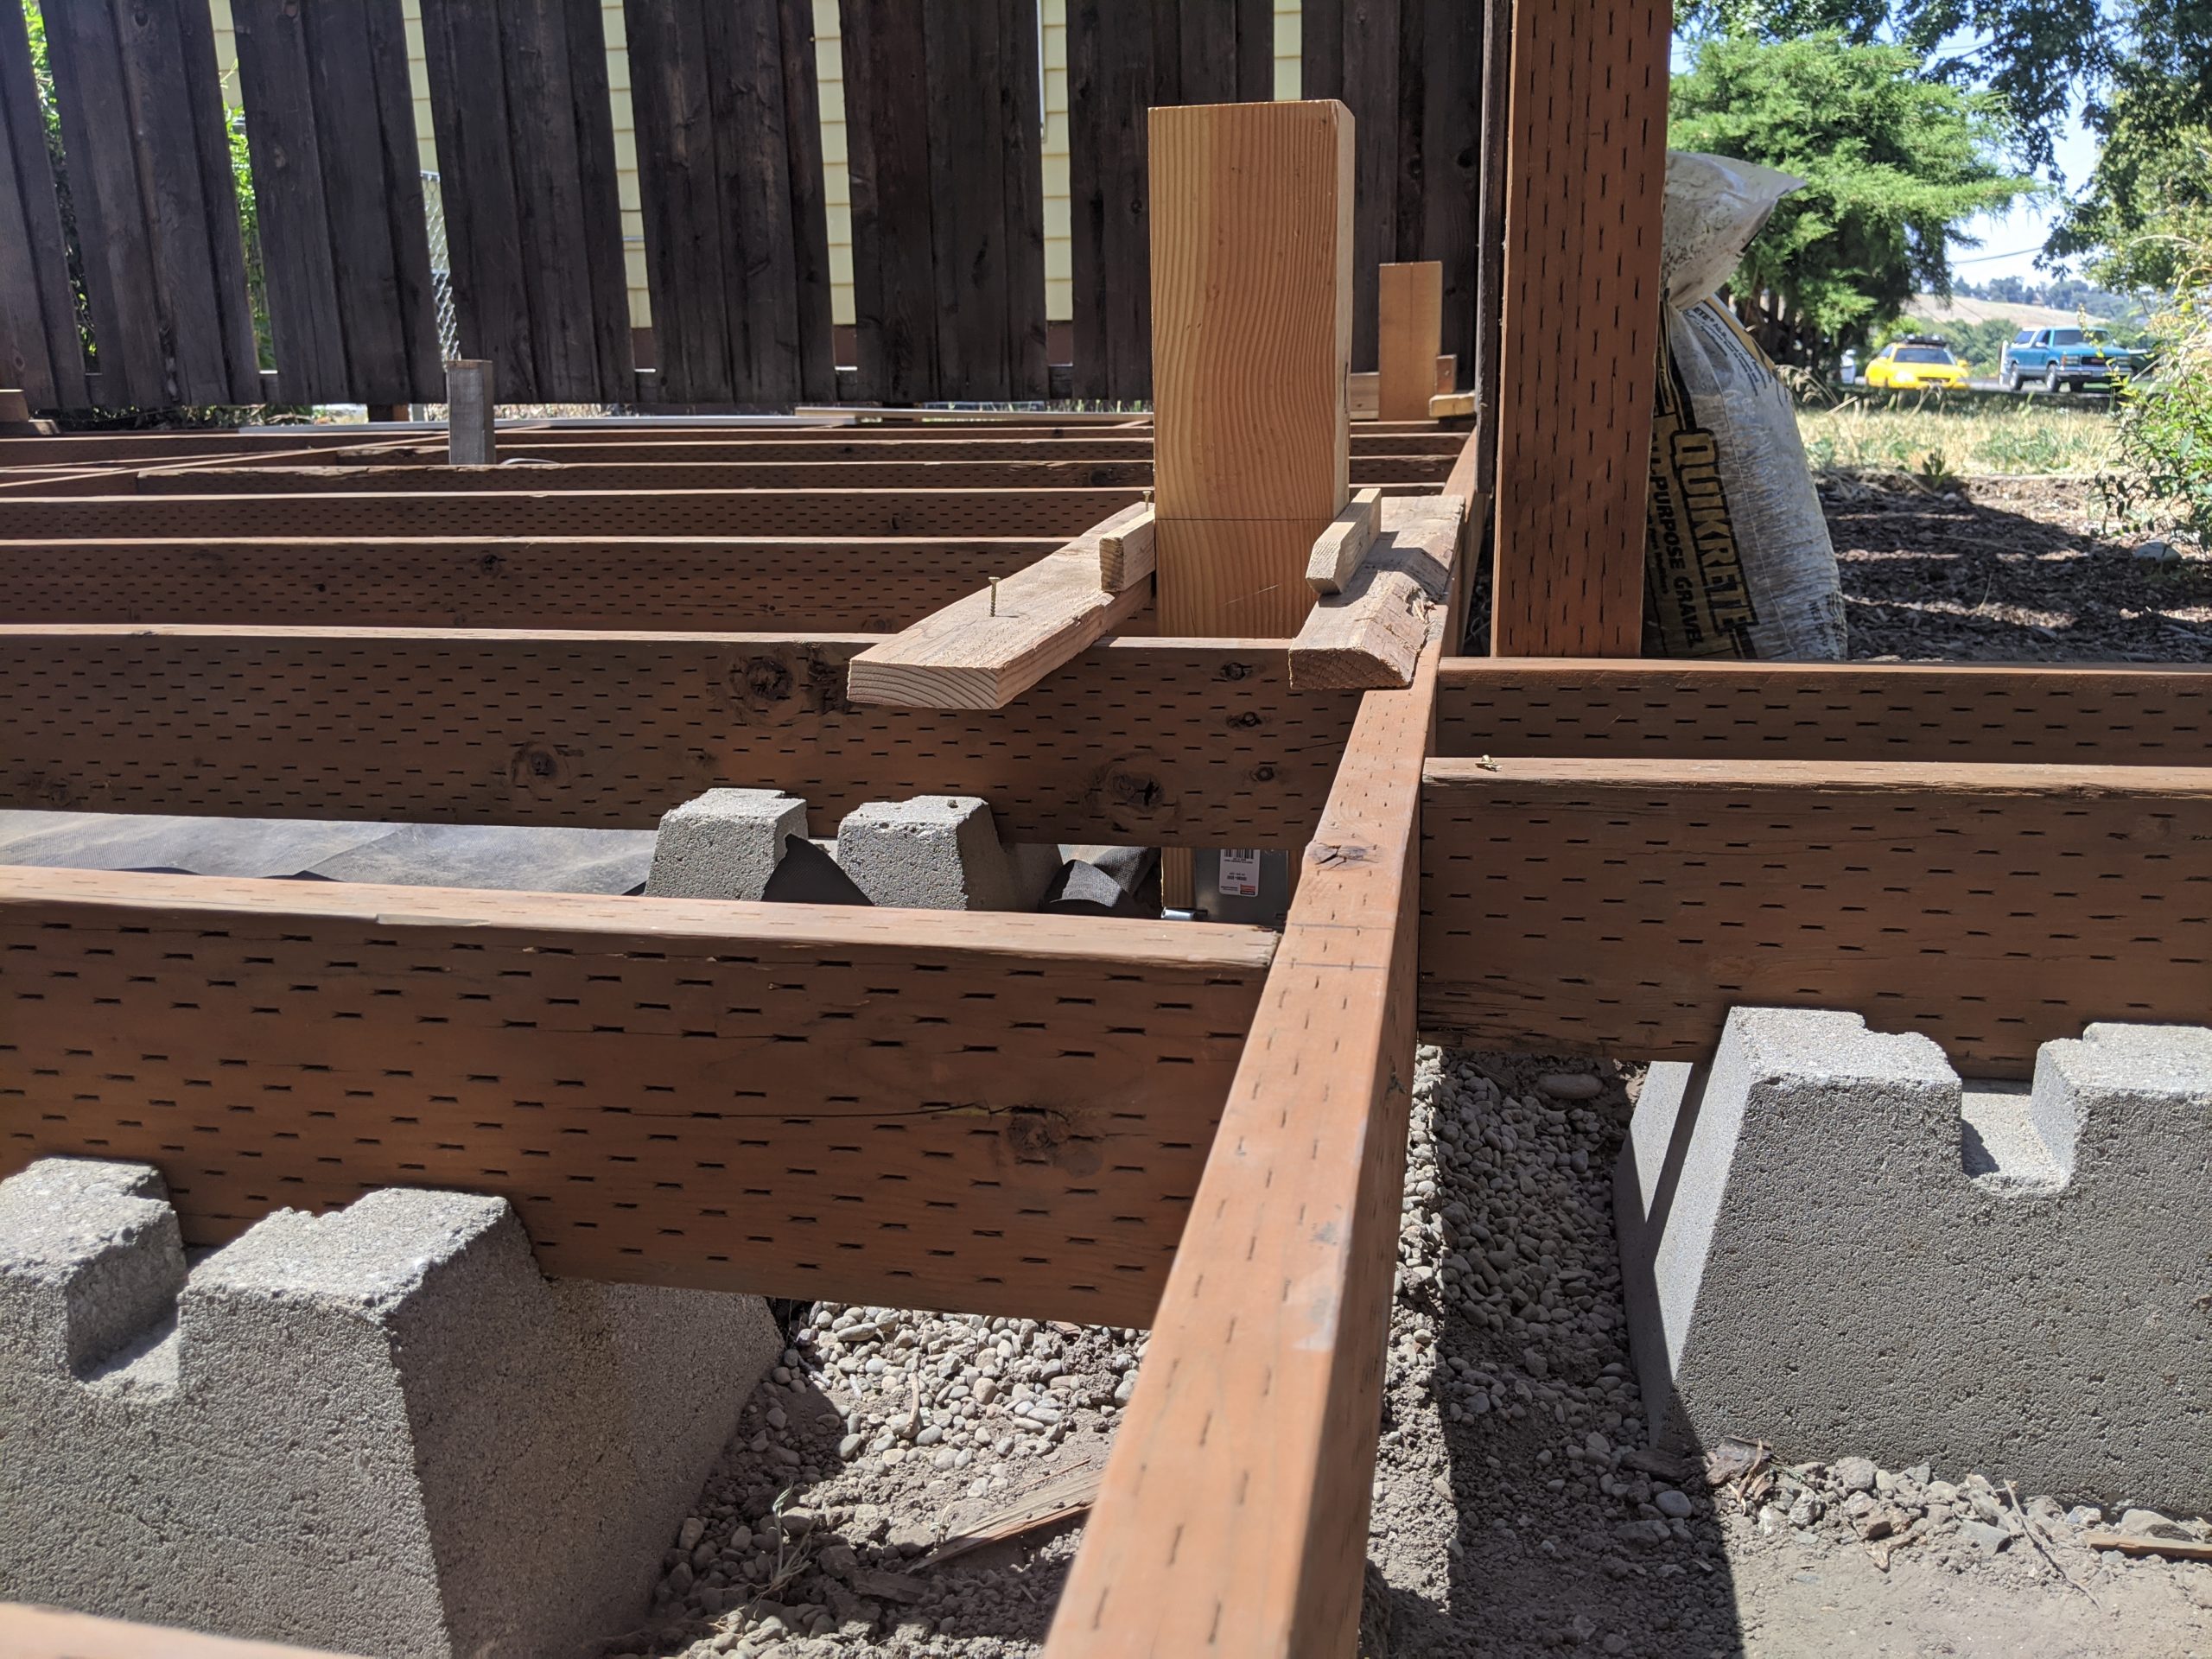
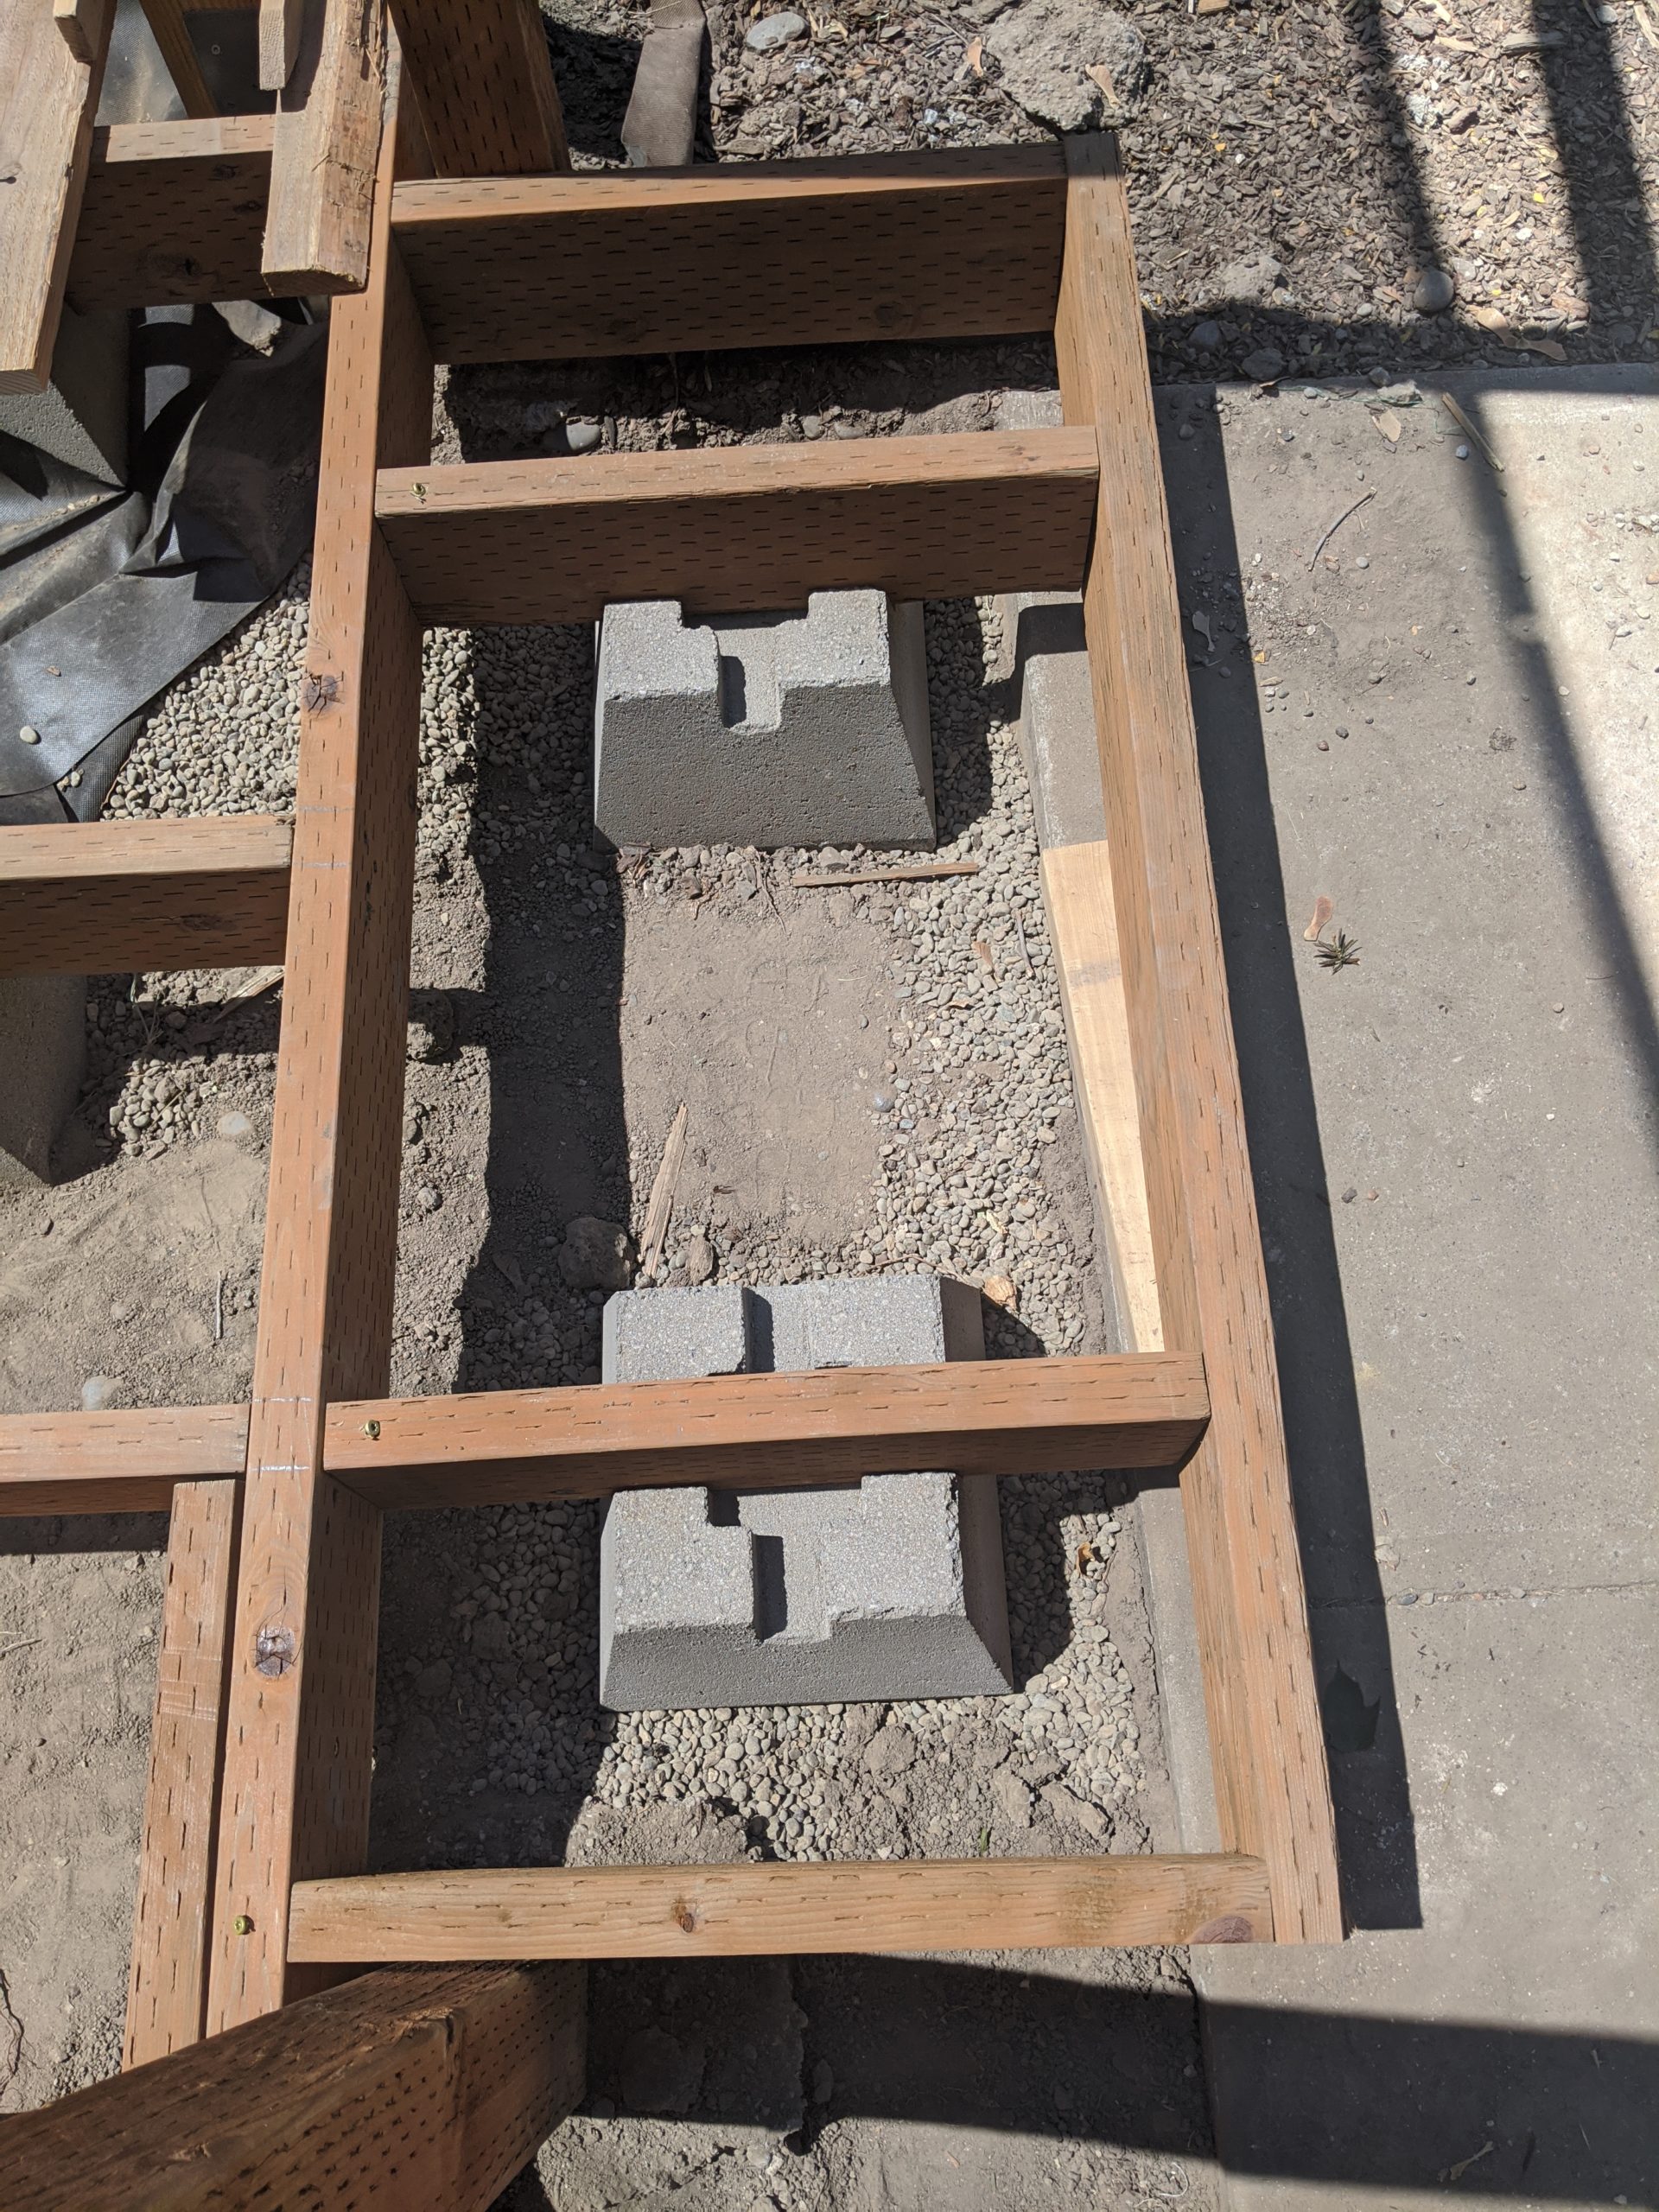
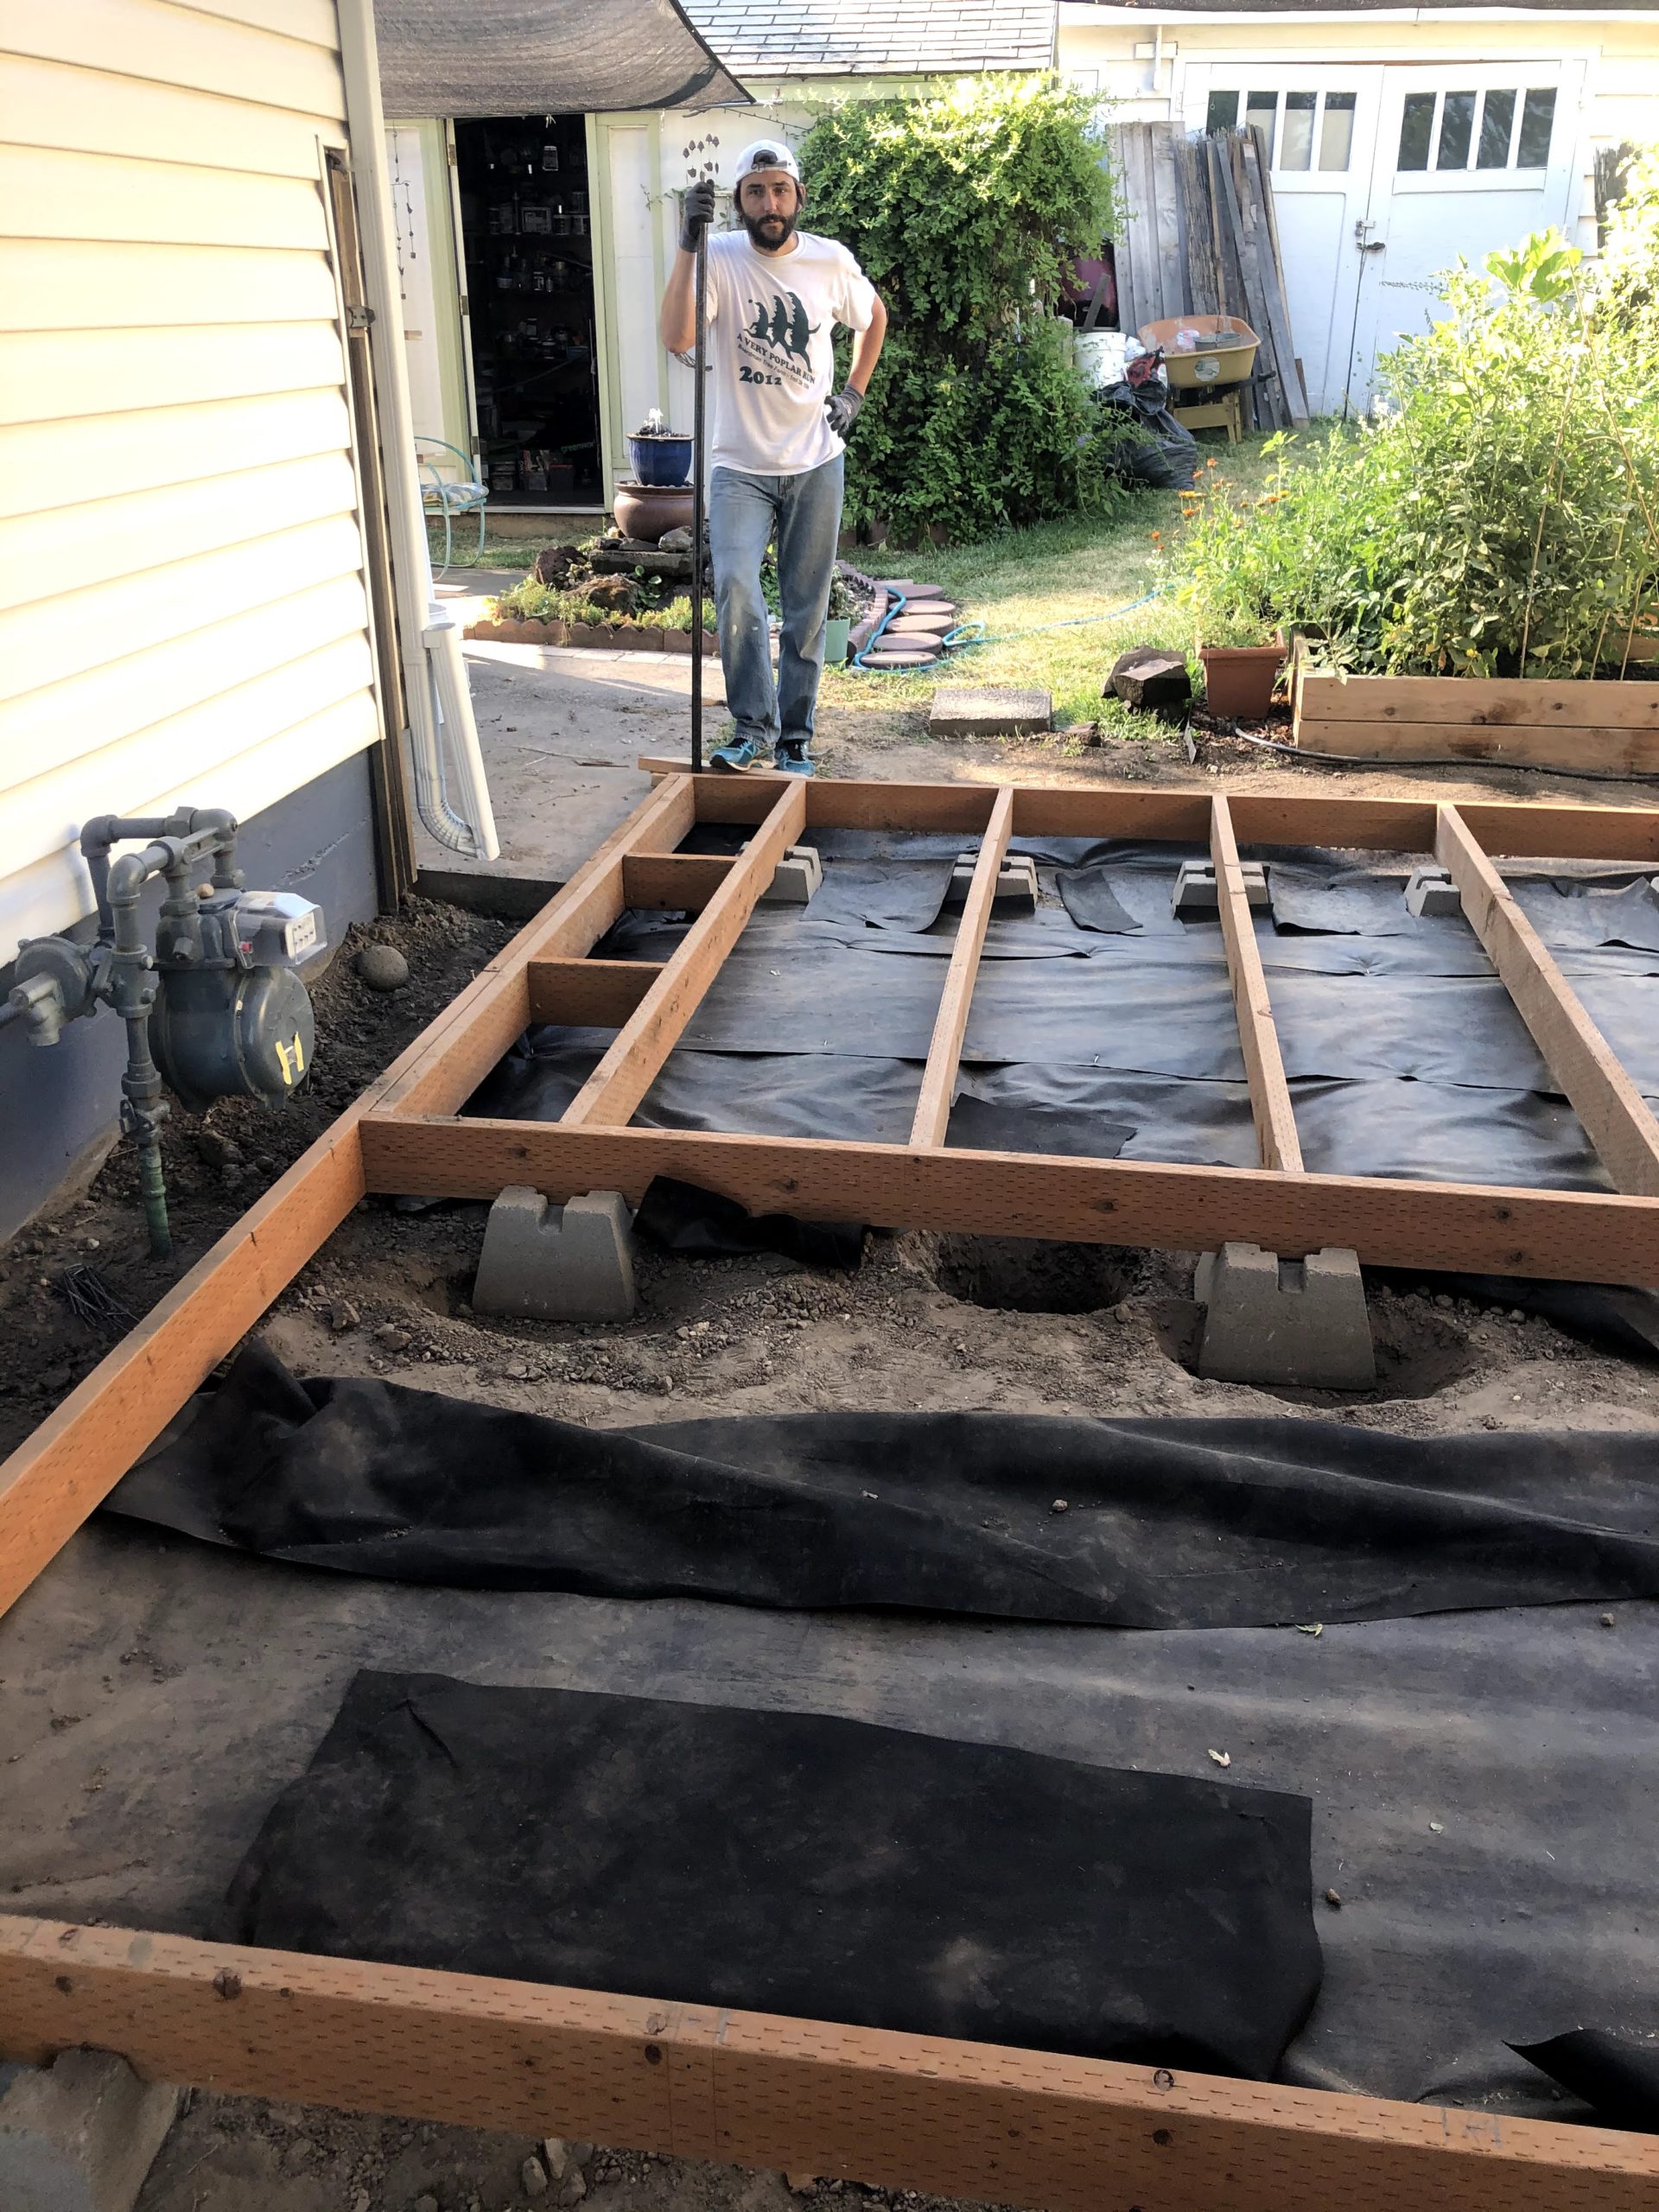
Once the blocks were set and seemed to be level we started cutting and adding the framing. In the videos this seems to take some people only a day but this was a multi-day project for us. Our deck is quite a bit bigger than the example builds we watch and we had a few runs that were longer than our longest framing boards (16′). We had a plan about how to lay out the framing but changed some of those as we were putting them in based on some small changes we had made to the design. We are planning to use 2×6 cedar decking so made the joists 24″ on center. The joist span is between 5 and 7 feet or so with 4 rows of deck blocks, which should be just fine with 2×6 joists.
After getting most of it cut and together we held off on installing joist hangers. so we could spend some time squaring and leveling. At this point everything looked great but was not level. It took most of a day to work out where we had to raise and lower the deck blocks to make it right. After we had it level we starting screwing more framing together but held off on the joist hangers and corner brackets.
It turns out that was a good idea! On the next day we did some calculations to figure out where to set the pergola posts and found the deck was not square. In fact it was off by almost 3″. That would make it very difficult and annoying when it came time to lay the decking. We were both feeling a bit frustrated and decided to take a couple of days off to think about how to proceed.
Fixing the Frame
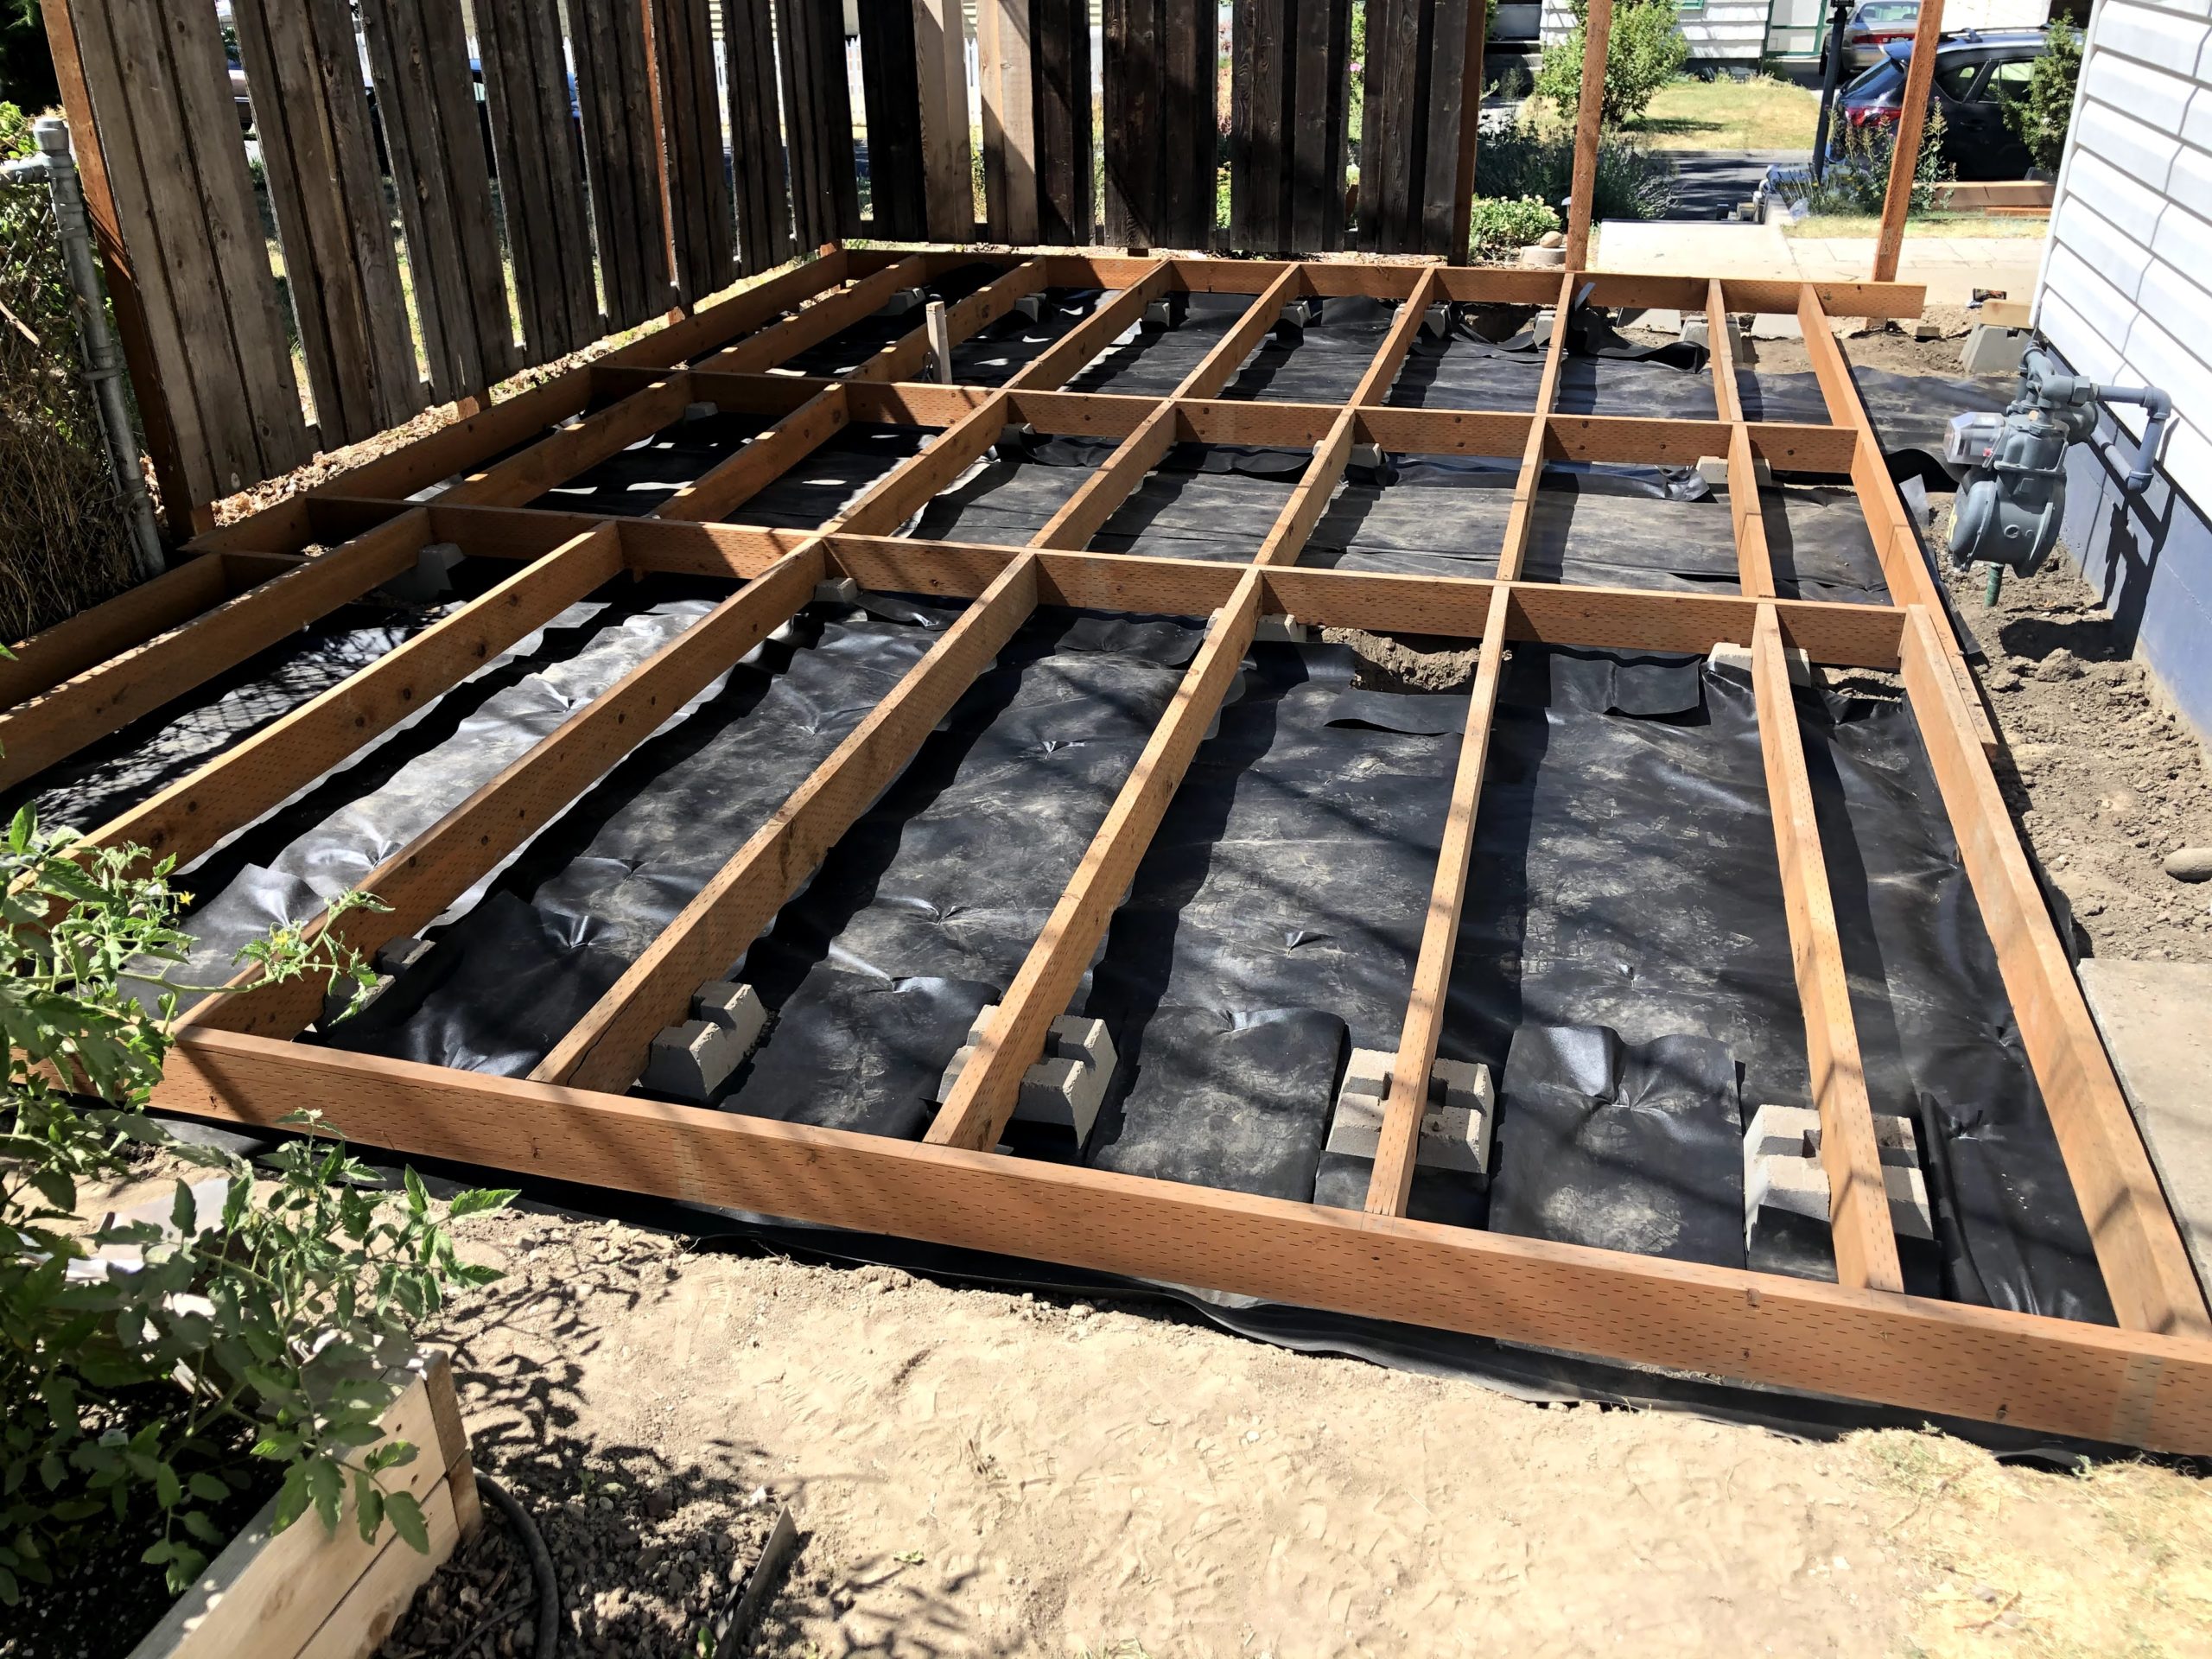
The length of each pair of sides of the framing matched so it was a parallelogram rather than a rectangle. All we had to do was wedge one corner of it over to make it square. We had already put down some weed block over the dirt at this point so had to move some of that back to get to several of the deck blocks. We dug on one side of 6 of the beam blocks in the middle and unscrewed a few places where the framing was attache to the fence. We used a big pry bar to lever the whole thing over a few times until we had it (mostly) square.
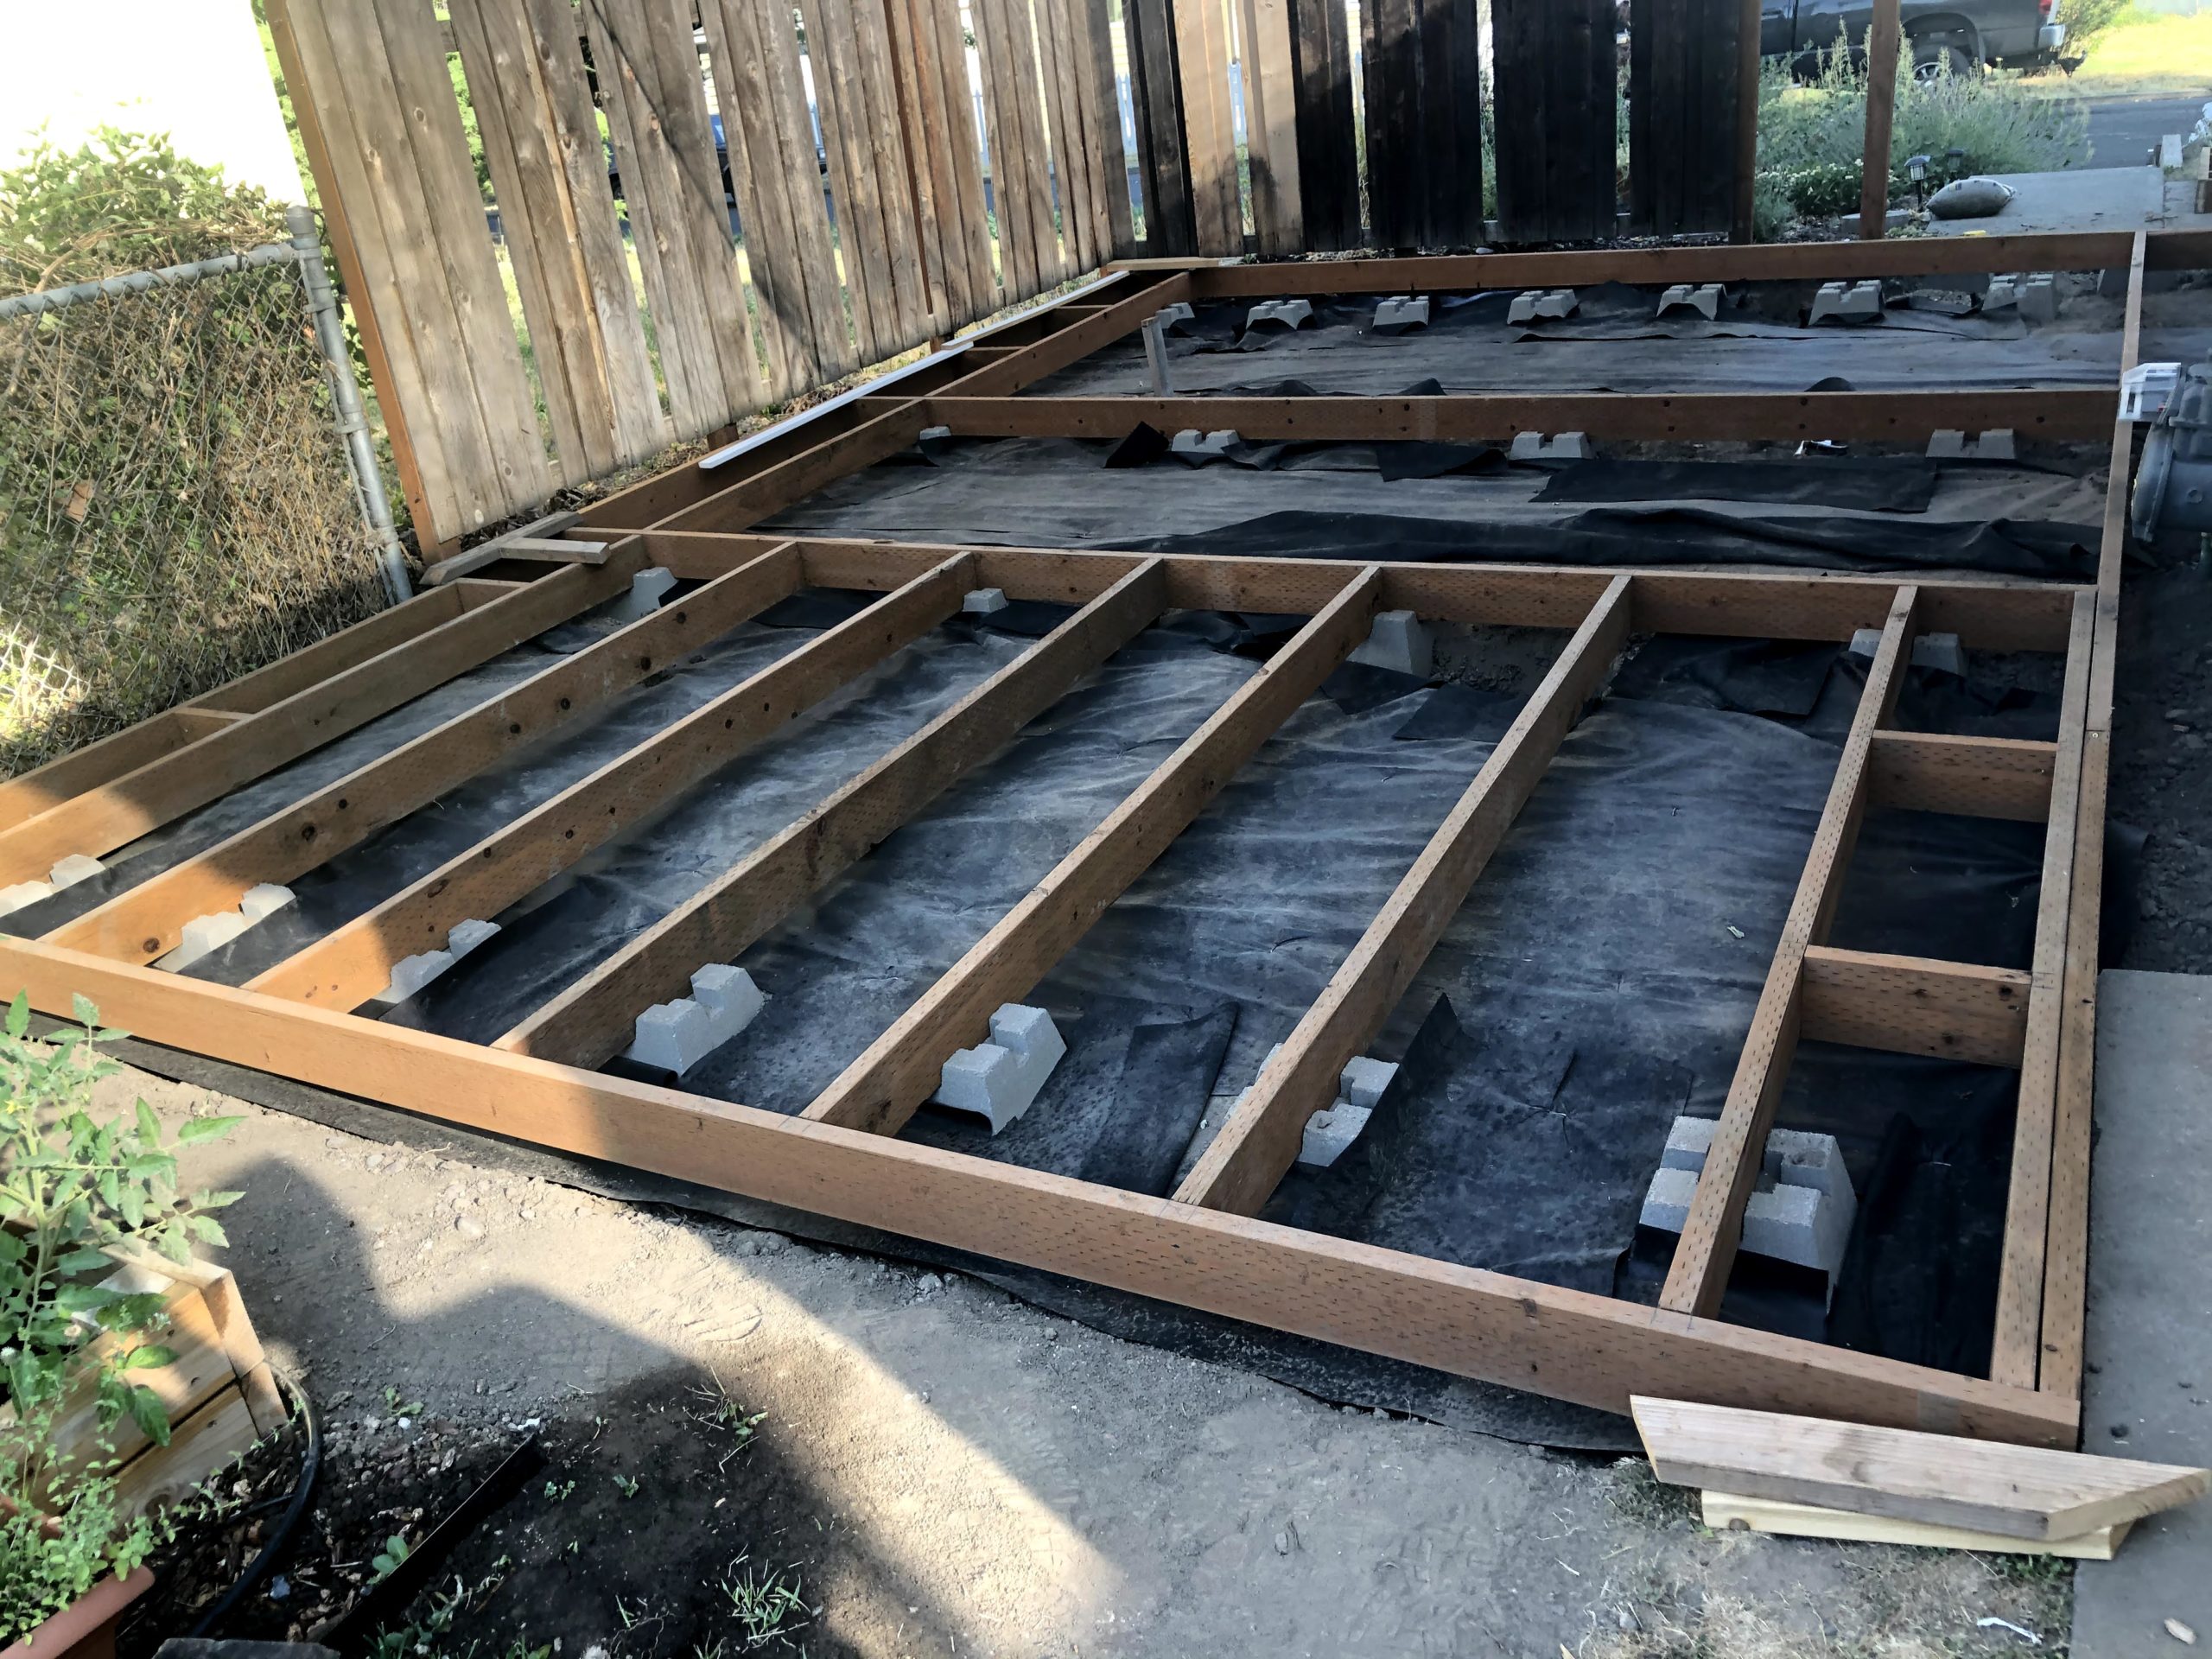
We were finally able to get the whole thing square and are now ready to set the 6×6 post brackets for the pergola posts.